12 Easy Kid Valentine Crafts

Simple Valentine Crafts for Kids

Welcome once again to the weekly Kids Co-op!  I love browsing through all your creative links each week, so thanks for linking up.  Last week I featured 6 Kid Friendly Science Experiments that we can’t wait to try.  With February right around the corner, I am featuring 12 Easy Kid Valentine Crafts that were linked up from last weeks Kids Co-op.

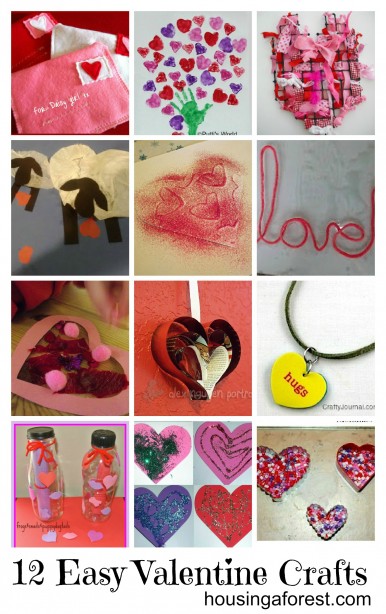
12 Easy Kid Valentine Crafts

  1. Felt Envelope Pattern from Just for Daisy  
  2. Heart Tree Painting from Putti’s World
  3. Creative Weaving from An Idea On Tuesday
  4. Love Ewe Sheep from Art Mama Says
  5. Cardboard Tube Glitter Hearts from Buggy and Buddy
  6. Valentines Yarn Writing from How the Sun Rose
  7. Valentines Window Decorations from The Fairy and the Frog
  8. Paper Heart Valentines from AN Portraits
  9. Conversation Heart Necklace from Crafty Journal
  10. Valentines Message in a Bottle from Frogs & Snalis & Puppy Dog Tails
  11. Valentines Glittered Hearts from 2 Big 2 Little
  12. Melted Valentines Bead Art from Momma’s Fun World

If you were featured this week, feel free to grab a Housing A Forest button.

Come back every Thursday to see if your creative idea were featured and link up any new ideas! (I will be using one image and a link back to your blog.) 

If you don’t want to miss out on any of the fun we are having at Housing A Forest, make sure to follow us on Pinterest, Facebook, Google + and Twitter.


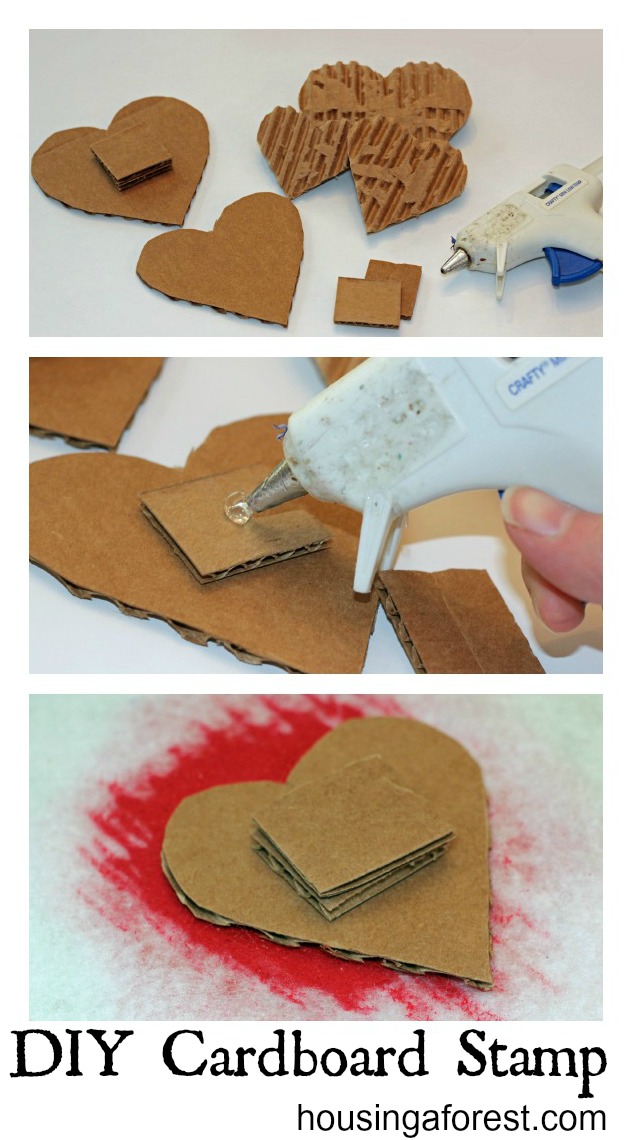
DIY Cardboard Stamp

In the last post I showed you how we make our simple reusable stamp pads.  They are so easy to make, and I love that they can be used with either tempera or acrylic paints.  From that post, I had a few questions about how we made our cardboard stamp.  Since they are so easy to make, it is not much of a tutorial.  However, next time you are looking for art materials don’t over look the possibilities of the simple cardboard box! 

To make your own DIY Cardboard stamp, you will need:

  1. A Corrugated Cardboard box
  2. Glue gun
  3. Scissors or Exacto Knife

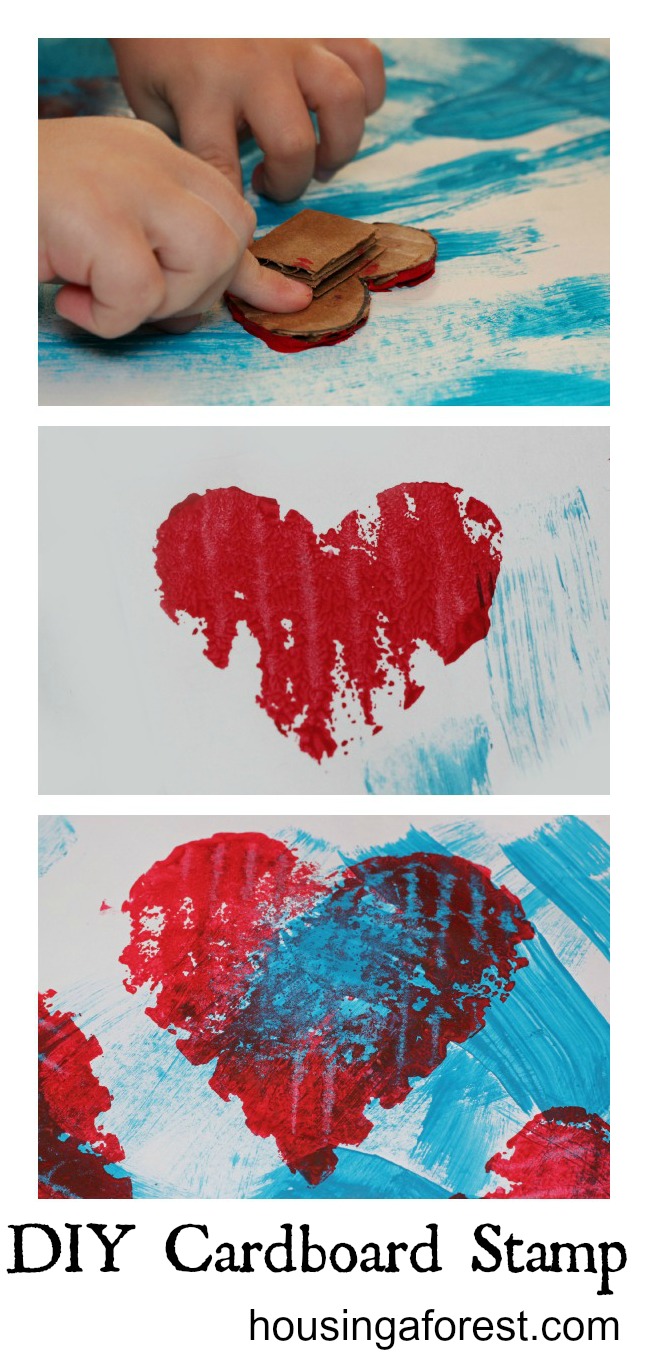
DIY Cardboard Stamp ~ simple stamps that your kids can make. I love the texture the cardboard creates!Once you have your desired shape out of the cardboard, you have a couple options on how you want your stamped image to look.

  • Stamp the cardboard silhouette as is and make a clean simple image.
  • Add a little texture by peeling the layer of paper off revealing the corrugation underneath and then stamp.
  • Add even more texture by peeling only select sections of paper off and leaving some spots where the paper is sill intact.

Everyone has a different look that they are like, and there is no right or wrong way to create yous stamp.  Let the kids have fun peeling paper and see what they come up with, you might be surprised!

Glue small blocks of cardboard to the back side of the stamp to act as a handle for lifting the stamp.

DIY Cardboard Stamp ~ simple stamps that your kids can make. I love the texture the cardboard creates!


Kids will love designing their own stamp and creating a simple masterpiece.  However, you may have to help little fingers cut out their stamp.  Cardboard is a bit tricky to cut.

Check out my Cardboard Creations Pinterest Board for more wonderful inspiring ideas all centered around cardboard

Re-Usable Stamp Pad

My kids love stamping, and can spend hours creating their masterpieces.  A few years ago I made re-usable stamp pads with my kids and it quickly became my go-to stamp pad.  I learned this little trick in art school and I have been using it ever since.  My favorite part is that these stamp pads are very budget friendly.

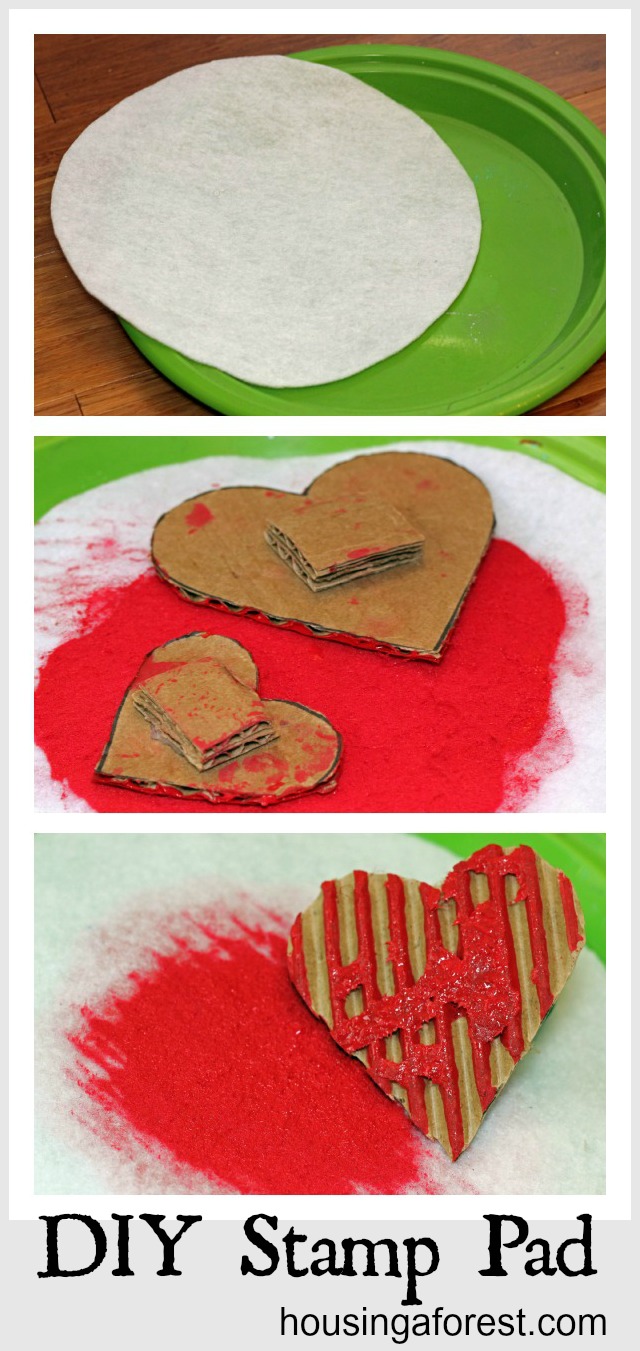
To make your own Re-Usable Stamp Pad, you will need:

  1. Plastic Plate, Lid or Tray ~ It just needs to have a flat bottom
  2. Felt ~ Cut to fit the bottom of the plate
  3. Paint ~ We have used both acrylic and tempera paint with success
  4. Regular Table Salt ~ You will only need a pinch

Place a your paint onto the plate and sprinkle with a tiny amount of salt.  Stir the paint and salt mixture.  The salt will cause the paint to become more fluid, making it easier to stamp with.  If you add too much salt, your paint will become too runny, so add it slowly.  Lay your piece of felt over the paint and you are ready to start stamping.

Since you will be stamping with paint rather than ink, you will find that simple stamp shapes and silhouettes work the best.  I use our stamp pads for homemade stamps, foam stamps, cookie cutters, dice, cardboard, TP tubes etc.  If you are wanting to have a crisp impression from an intricate stamp then you may want to continue using commercial stamp pads.  Don’t get me wrong, I have a drawer full of purchased stamp pads as well.  However, I find that our DIY version is more versatile and easier to use with kids.
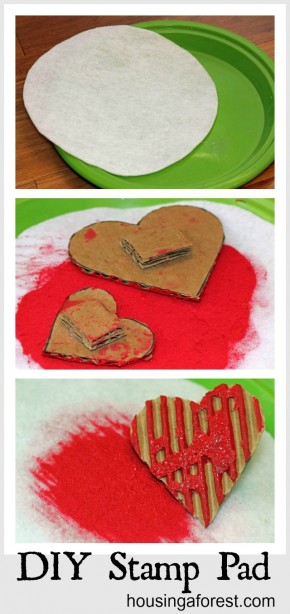
DIY Stamp Pad ~ no more need for expensive stamp pads, make your own. The best part is you can use any color of paint!You may need to tap the stamp onto the felt a few times to encourage the paint to soak through.  If you find that you need more paint, just simply lift the felt add paint and a little salt and you are all set to continue stamping.

I am playing around with covering the paint with plastic wrap to see how long I can keep using the same pad with out washing it.  I’ll let you know what I find out.  Once you are finished stamping, simply wash out the pad like you would your paint brushes.  Set it aside to dry.  I have found rinsing the felt in cool water helps to minimize the amount your felt will shrink.  I have a felt stamp pad that I have been using for a few years and it is still holding up great.

Reasons why I love making our own stamp pads:

  1. You probably already have everything on hand to make them.
  2. Felt is inexpensive.
  3. You can stamp any color you want.  Both acrylic and tempera come in a variety of wonderful colors and it is easy to mix an new color.
  4. Often when kids stamp directly into paint with out the felt layer their imprint is not clear and crisp.  However, by adding the felt your stamp should have just the right amount of paint and leave a beautiful imprint.
  5. Lots of stamp pads say they are washable, but they still often stain fingers.  When you make your own, you are in control of which paint is used.  I have never had a problem with tempera paint not washing off.
  6. You can make your stamp pad any size you need.  You are no longer limited to the tiny commercial pad size.
  7. You no longer need an entire drawer or basket dedicated to stash of stamp pads.

Do you kids love stamping?  I would love to hear what you a creating together!

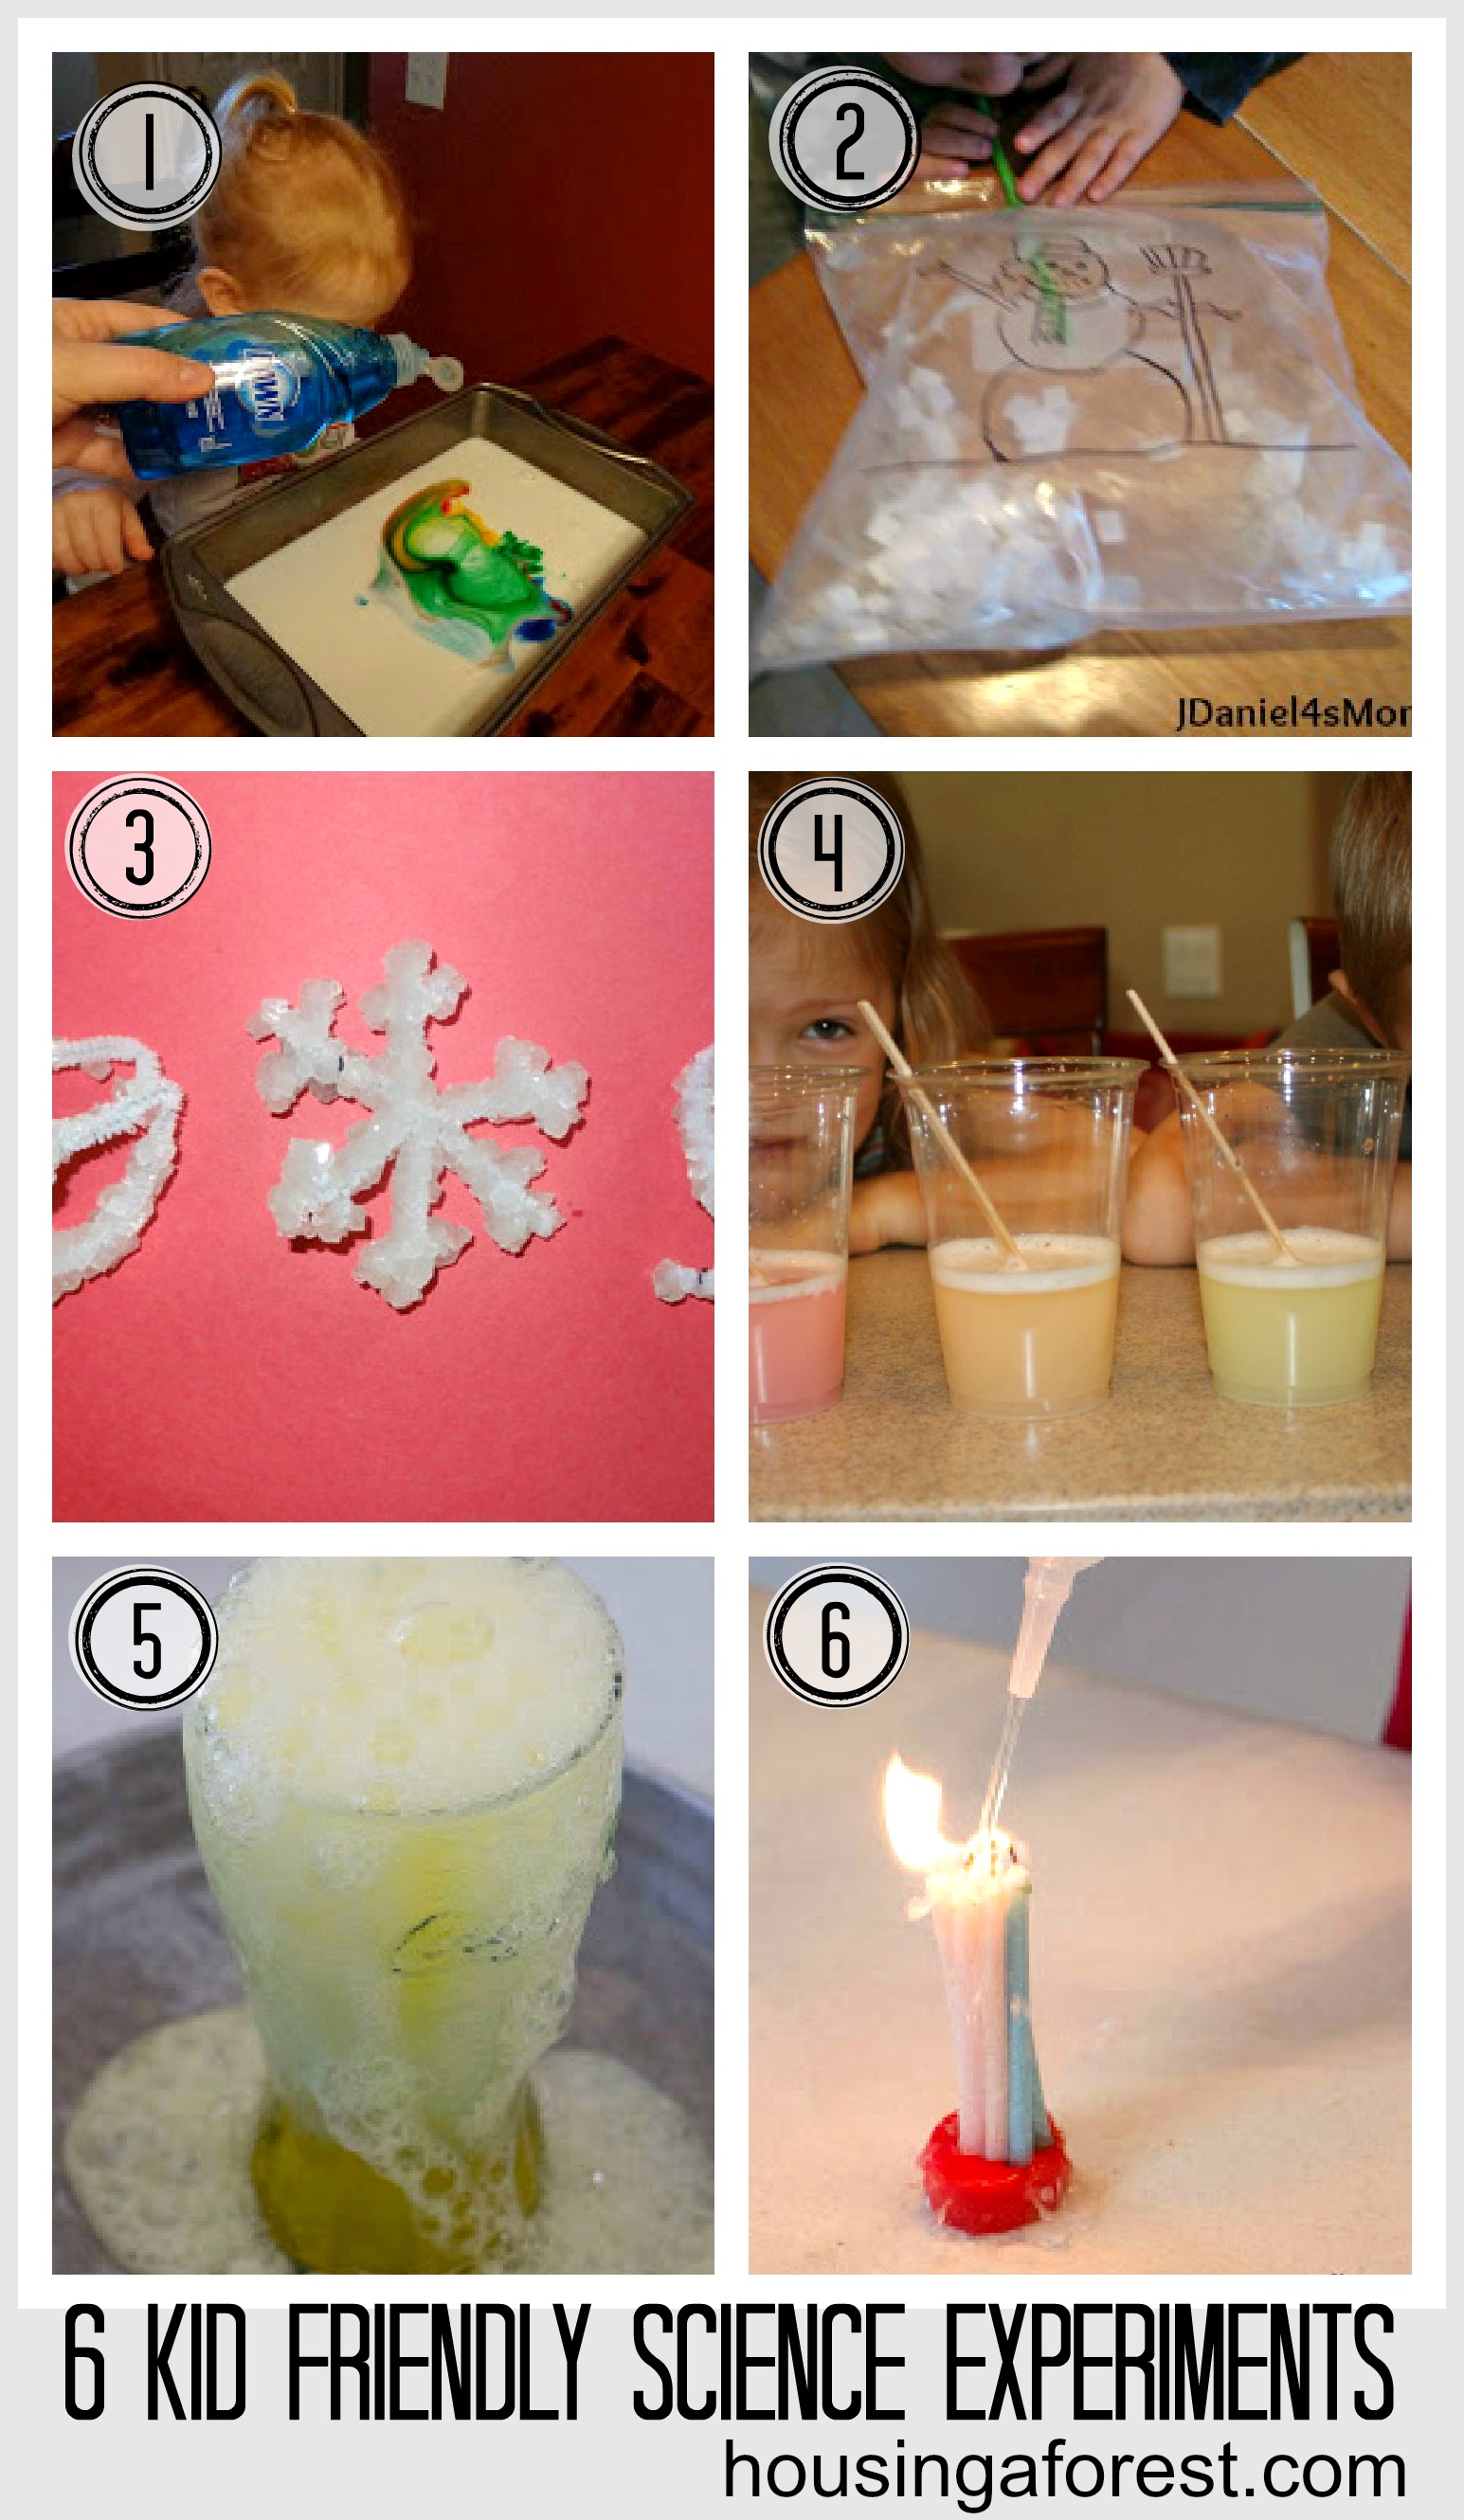
6 Kid Friendly Science Experiments

I have really enjoyed seeing what you guys share each week.  There are so many great blogs out there and this is a wonderful way for me to peek in each week to see what you are creating.  Thanks for linking up!  Last week from the Kids Co-op, I featured creative Snow Play ideas that are perfect for exploring the chilly medium!  Exploring, discovering and experimenting are all wonderful ways kids learn.  That is why this week I’m featuring 6 Kid Friendly Science Experiments that were linked up from last weeks Kids Co-op.

6 Kid Friendly Science Experiments ~ Housing A Forest


  1. Magic Milk Pictures from The View From The Pew
  2. Snowstorm in a Bag from JDaniels4’s
  3. Crystallized Snowflakes from Gift of Curiosity
  4. Marshmallow Science Experiment from Fantastic Fun & Learning
  5. Controlled Fizz from Life with Moore Babies
  6. F is for Fireman from Life with Moore Babies

Our Family loves to experiment.  Follow the link to find some of Housing A Forest’s favorite Science Experiments.

If you were featured this week, feel free to grab a Housing A Forest button.

Come back every Thursday to see if your creative idea were featured and link up any new ideas! (I will be using one image and a link back to your blog.) .

If you don’t want to miss out on any of the fun we are having at Housing A Forest, make sure to follow us on Pinterest, Facebook, Google + and Twitter.


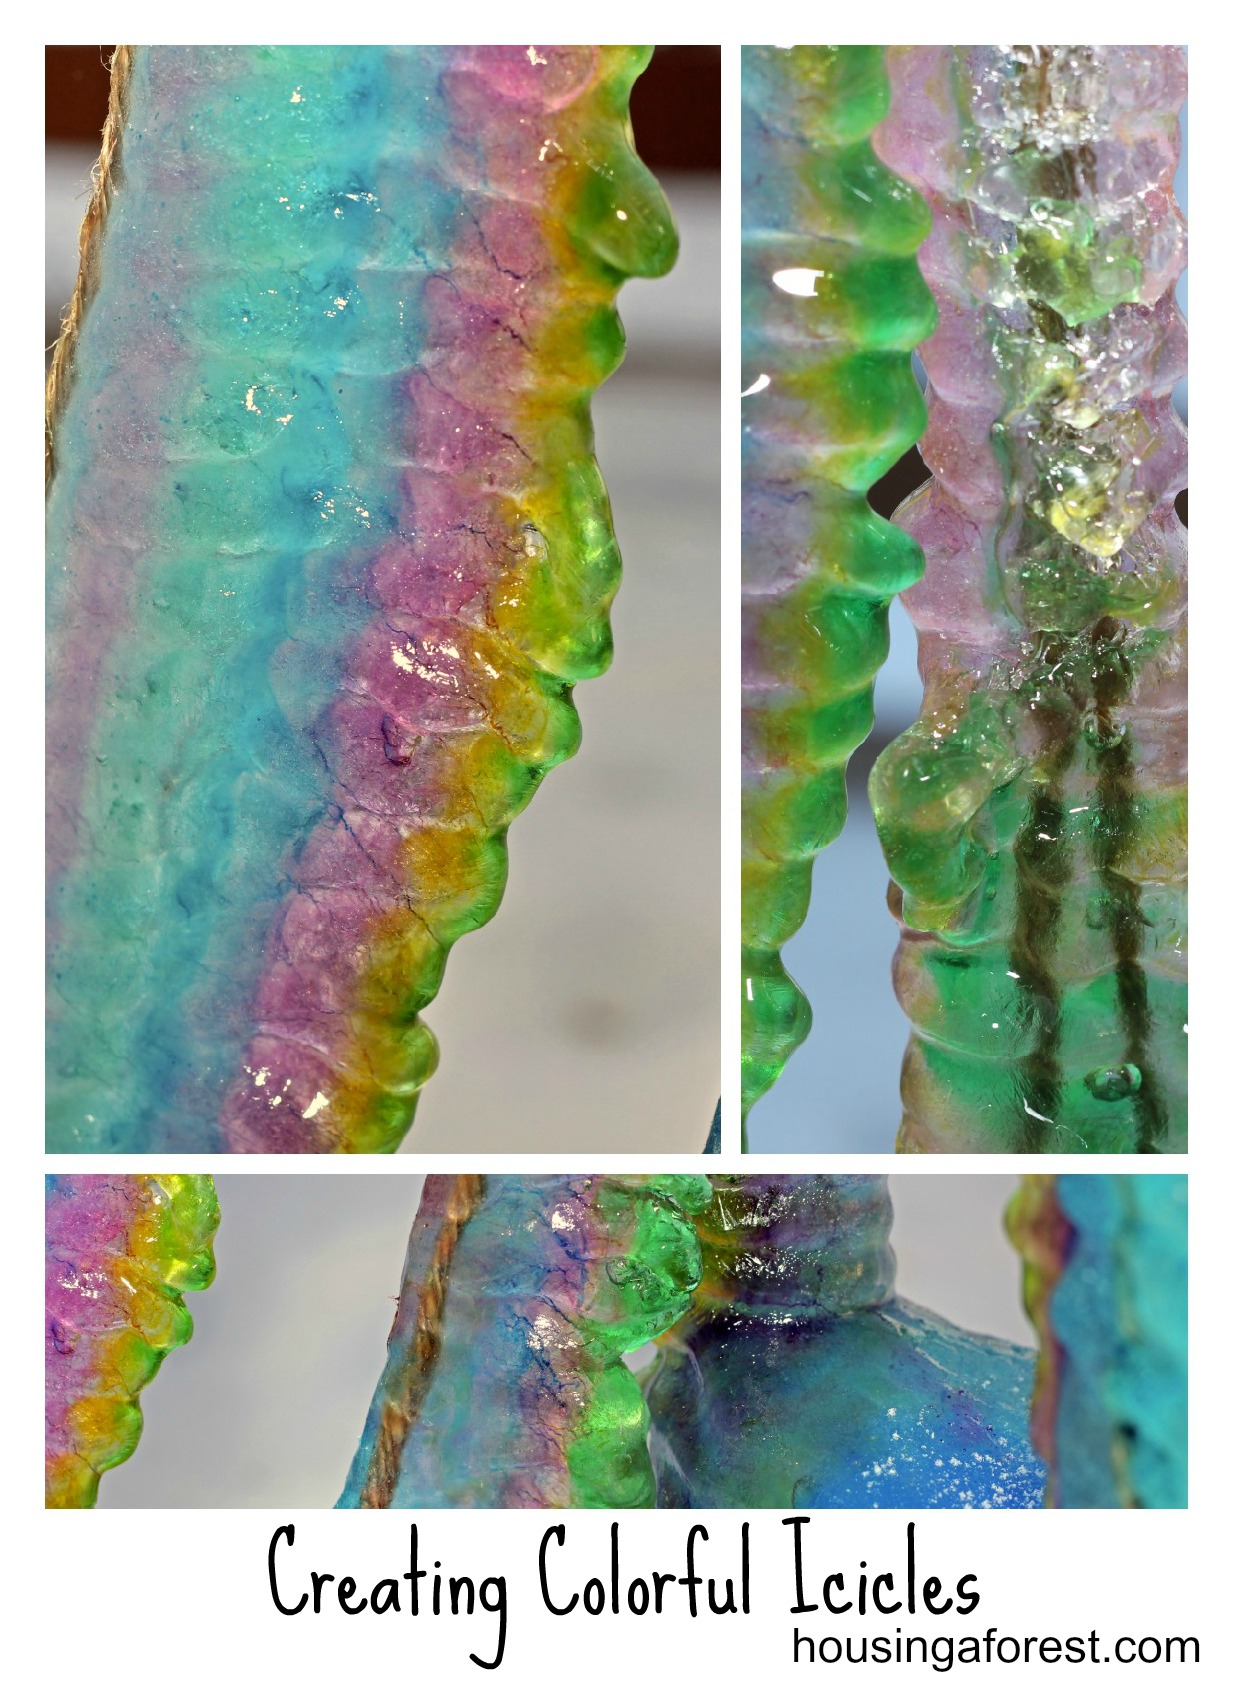
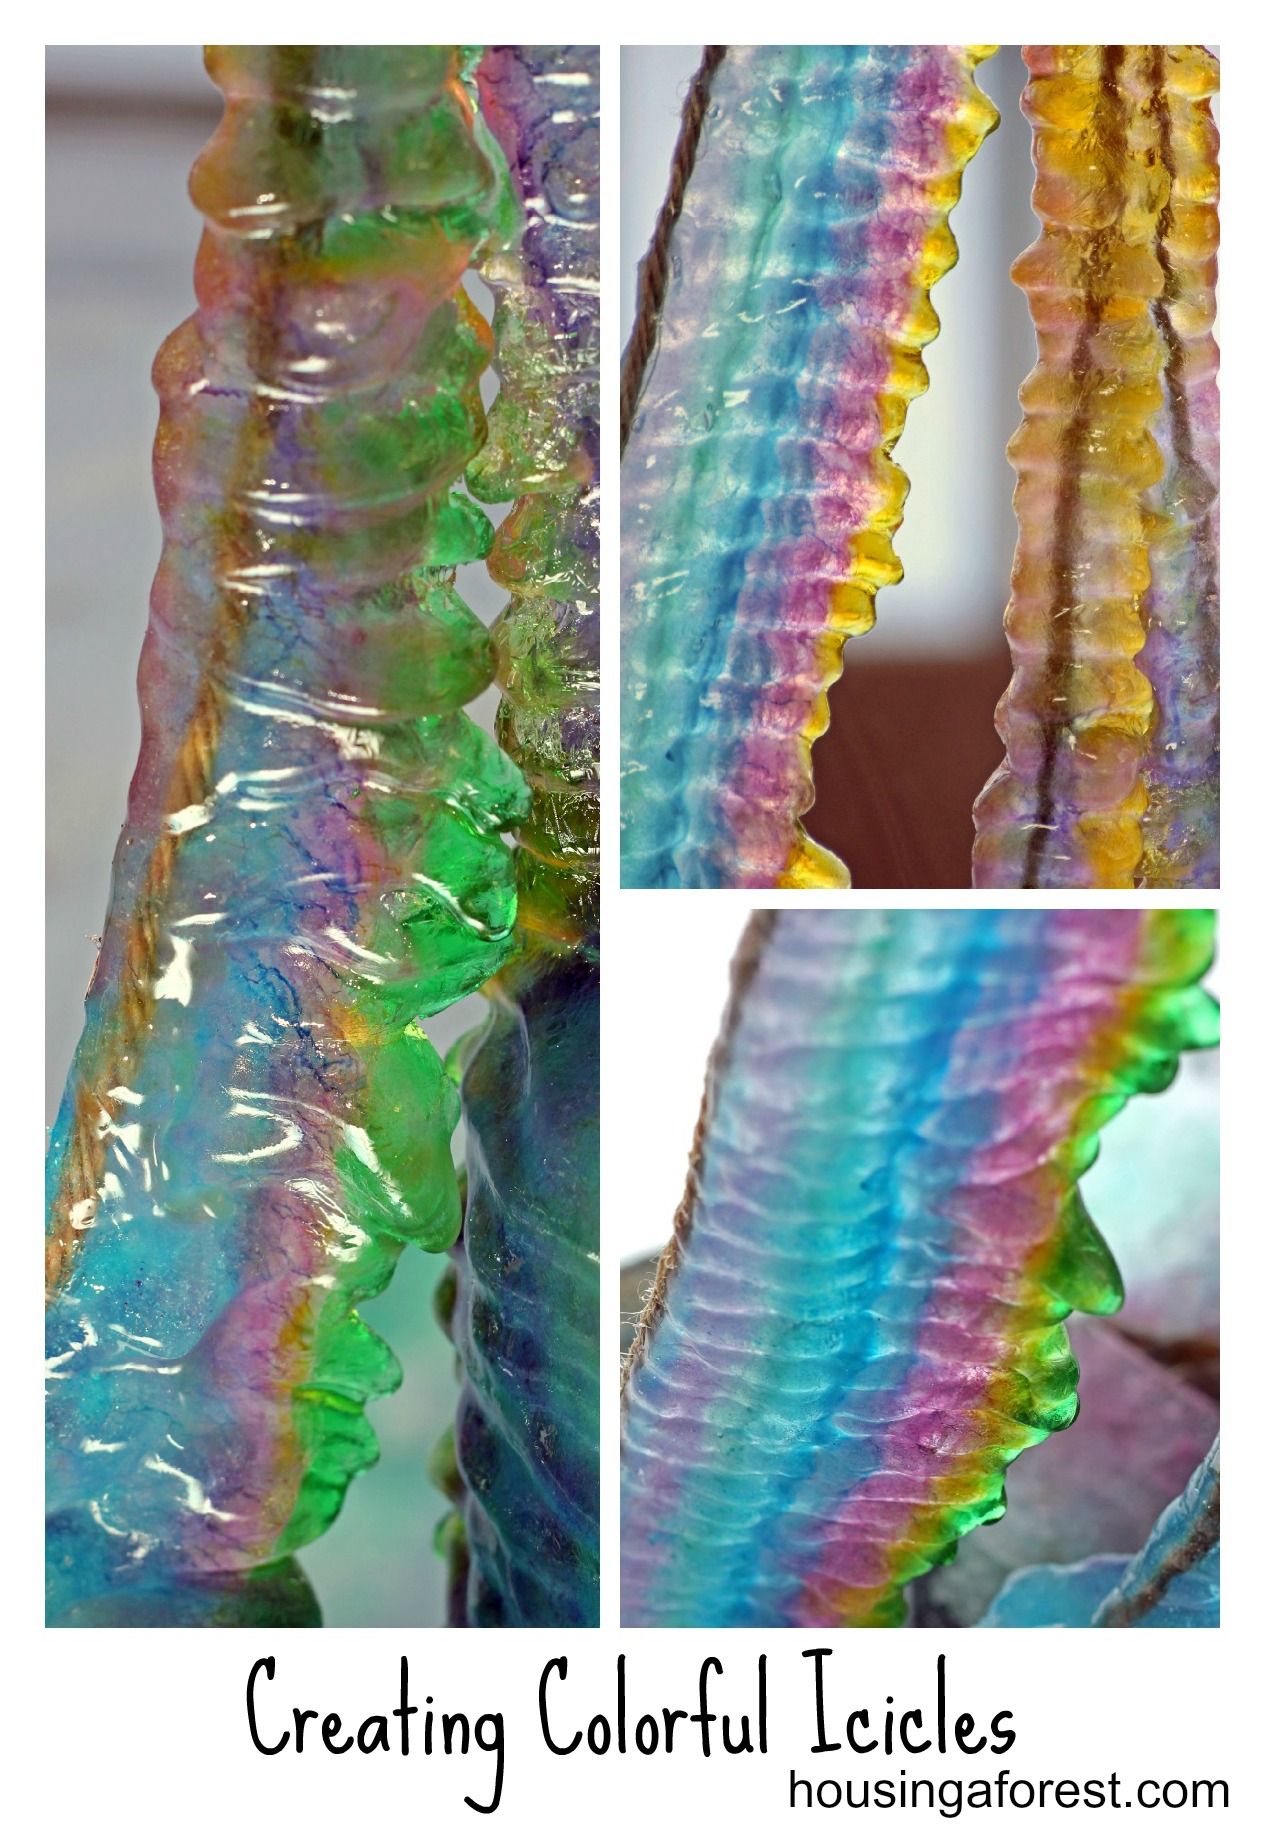
Creating Colorful Icicles

Create Colorful Icicles ~ Winter Science Experiment

We had so much fun creating these amazing colorful icicles over the weekend.  It took a bit of effort/patience to get them to form, but the results were totally worth it!  The weather dipped really cold making it perfect for building icicles.

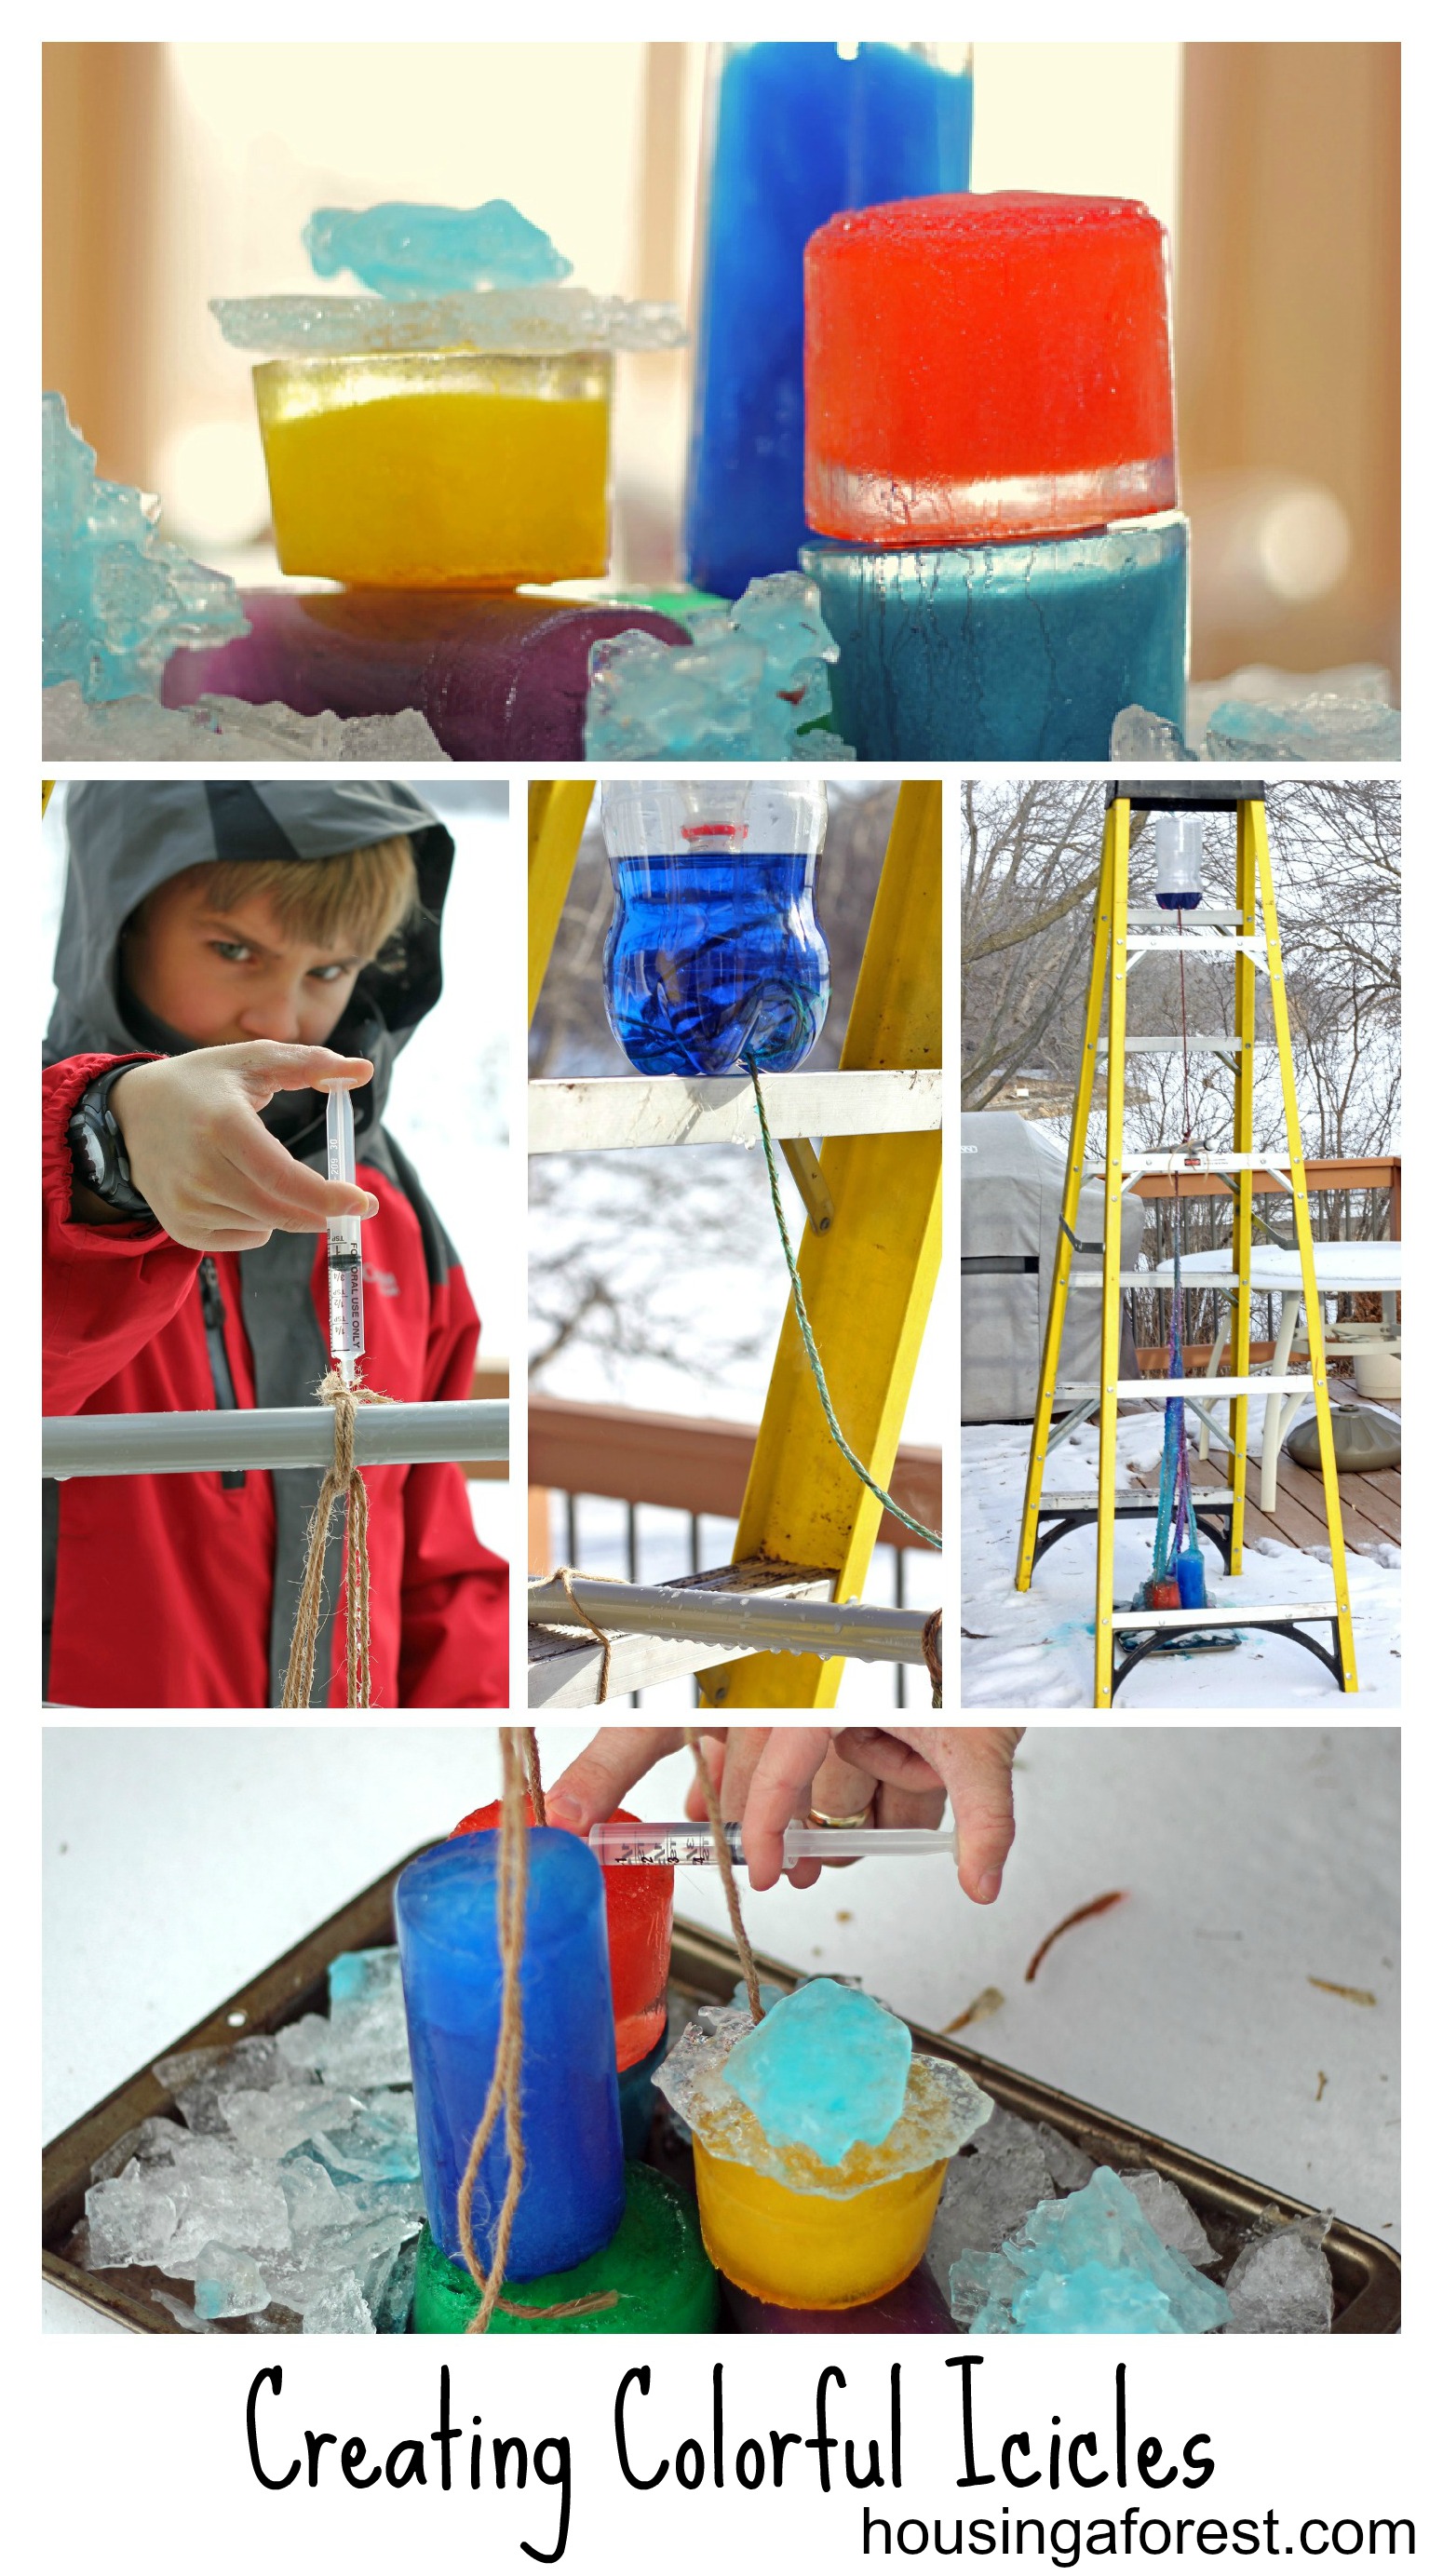
We started by freezing colorful ice blocks the night before, and building a little colorful castle on a cookie sheet.  We used a ladder and a broom handle as our structure, nothing fancy.

Creating Colorful Icicles ~ Housing A Forest

We made a very small hole in the bottom of the pop bottle and threaded string through it.  The bottle was placed on the highest rung of the ladder.  A single string came down from the pop bottle to the broom handle.  It then branched into 5 strings making a tent shape that we stuck to different areas of the ice castle.  You can use a syringe of water to help freeze the string to the ice.  Make sure to wet the sting with water before bringing it outside, this will help guide the water down it.

Creating Colorful Icicles ~ Housing A Forest

We continued to add colored water to the pop bottle about every 10 mins.  Just make sure that the water in the bottle does not freeze.  We also found that if we used to hot of water, it would melt the icicles that had already formed.  You might have to play with the temp to get what works best for you.

Creating Colorful Icicles ~ Housing A Forest

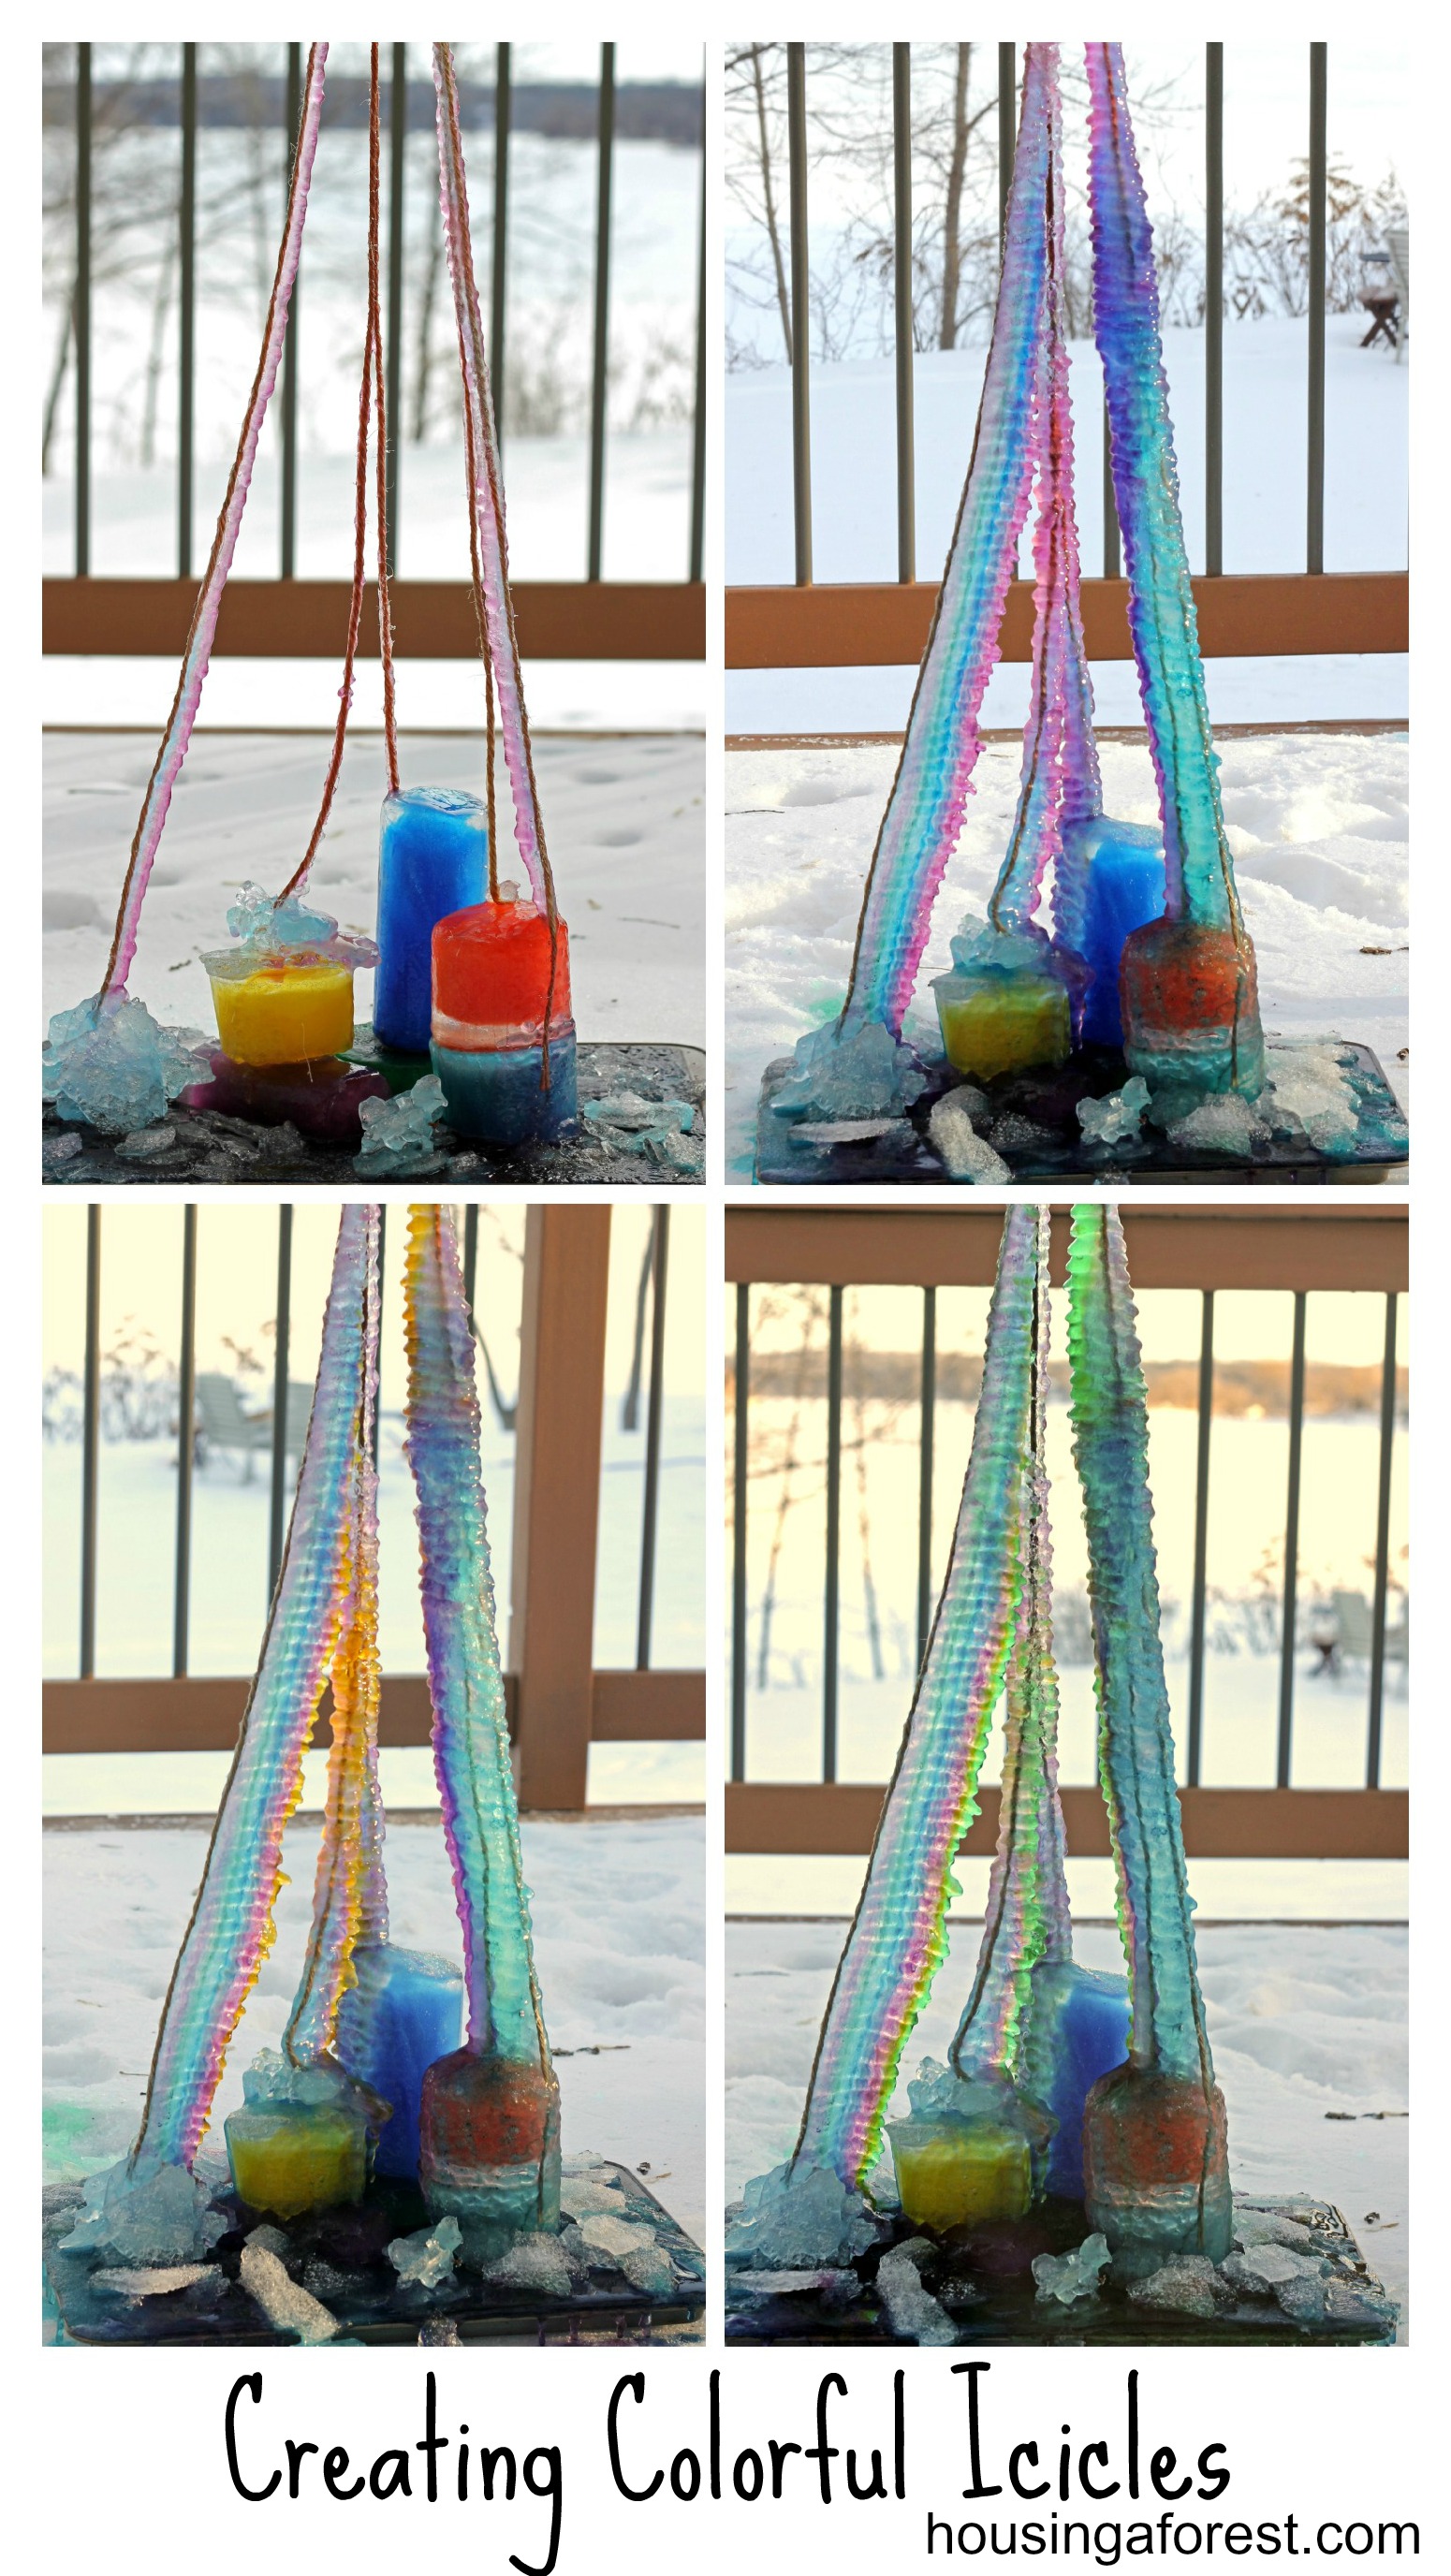
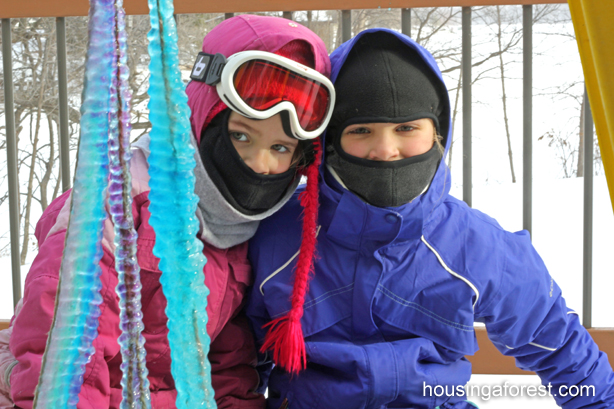
It was fun to change up the colors of the water every so often and see the colorful layers form.  As cold as it was, the kids enjoyed playing outside and peeking in on the icicle progression during trips down the hill.  They thought the process was cool, but a little slow to sit and watch.  However, they loved when a new color was added, because the results were pretty immediate.

Creating Colorful Icicles ~ Housing A ForestI love all the layers and depth of color!  This might be one of my favorite experiments that we have done so far.  We stared building our structure in the morning and a added our last layer of color just before supper.  It took almost a full day to get these results but it was totally worth it.
Creating Colorful Icicles ~ Housing A Forest

A friend made a fun time lapsed video of the process.  You will see the most dramatic results at the end of the video, so make sure you stick it out.  I love when the yellow and green layers are added!

Click on the red links to find more great Kids Winter Ideas and follow my Winter Pinterest Board for more inspiring winter ideas from around the web.

I joined in on the Winter Wonderland Blog Hop today.  You will want to click on the button below to take you to the landing page to scroll through a list of the other creative blogs participating.  Make sure you check it out for more great tips, tricks and ideas on how to make winter exciting for our kiddos!