Homemade Spin Art Machine

How to make your own Spin Art Machine

Have you ever tried creating Spin Art?  We love our store bought spin art machine, however I often get emails wondering if we have an alternative to purchasing a Spin Art Machine.  So we came up with 2 simple ways that you can make a Homemade Spin Art Machine from things around your house.
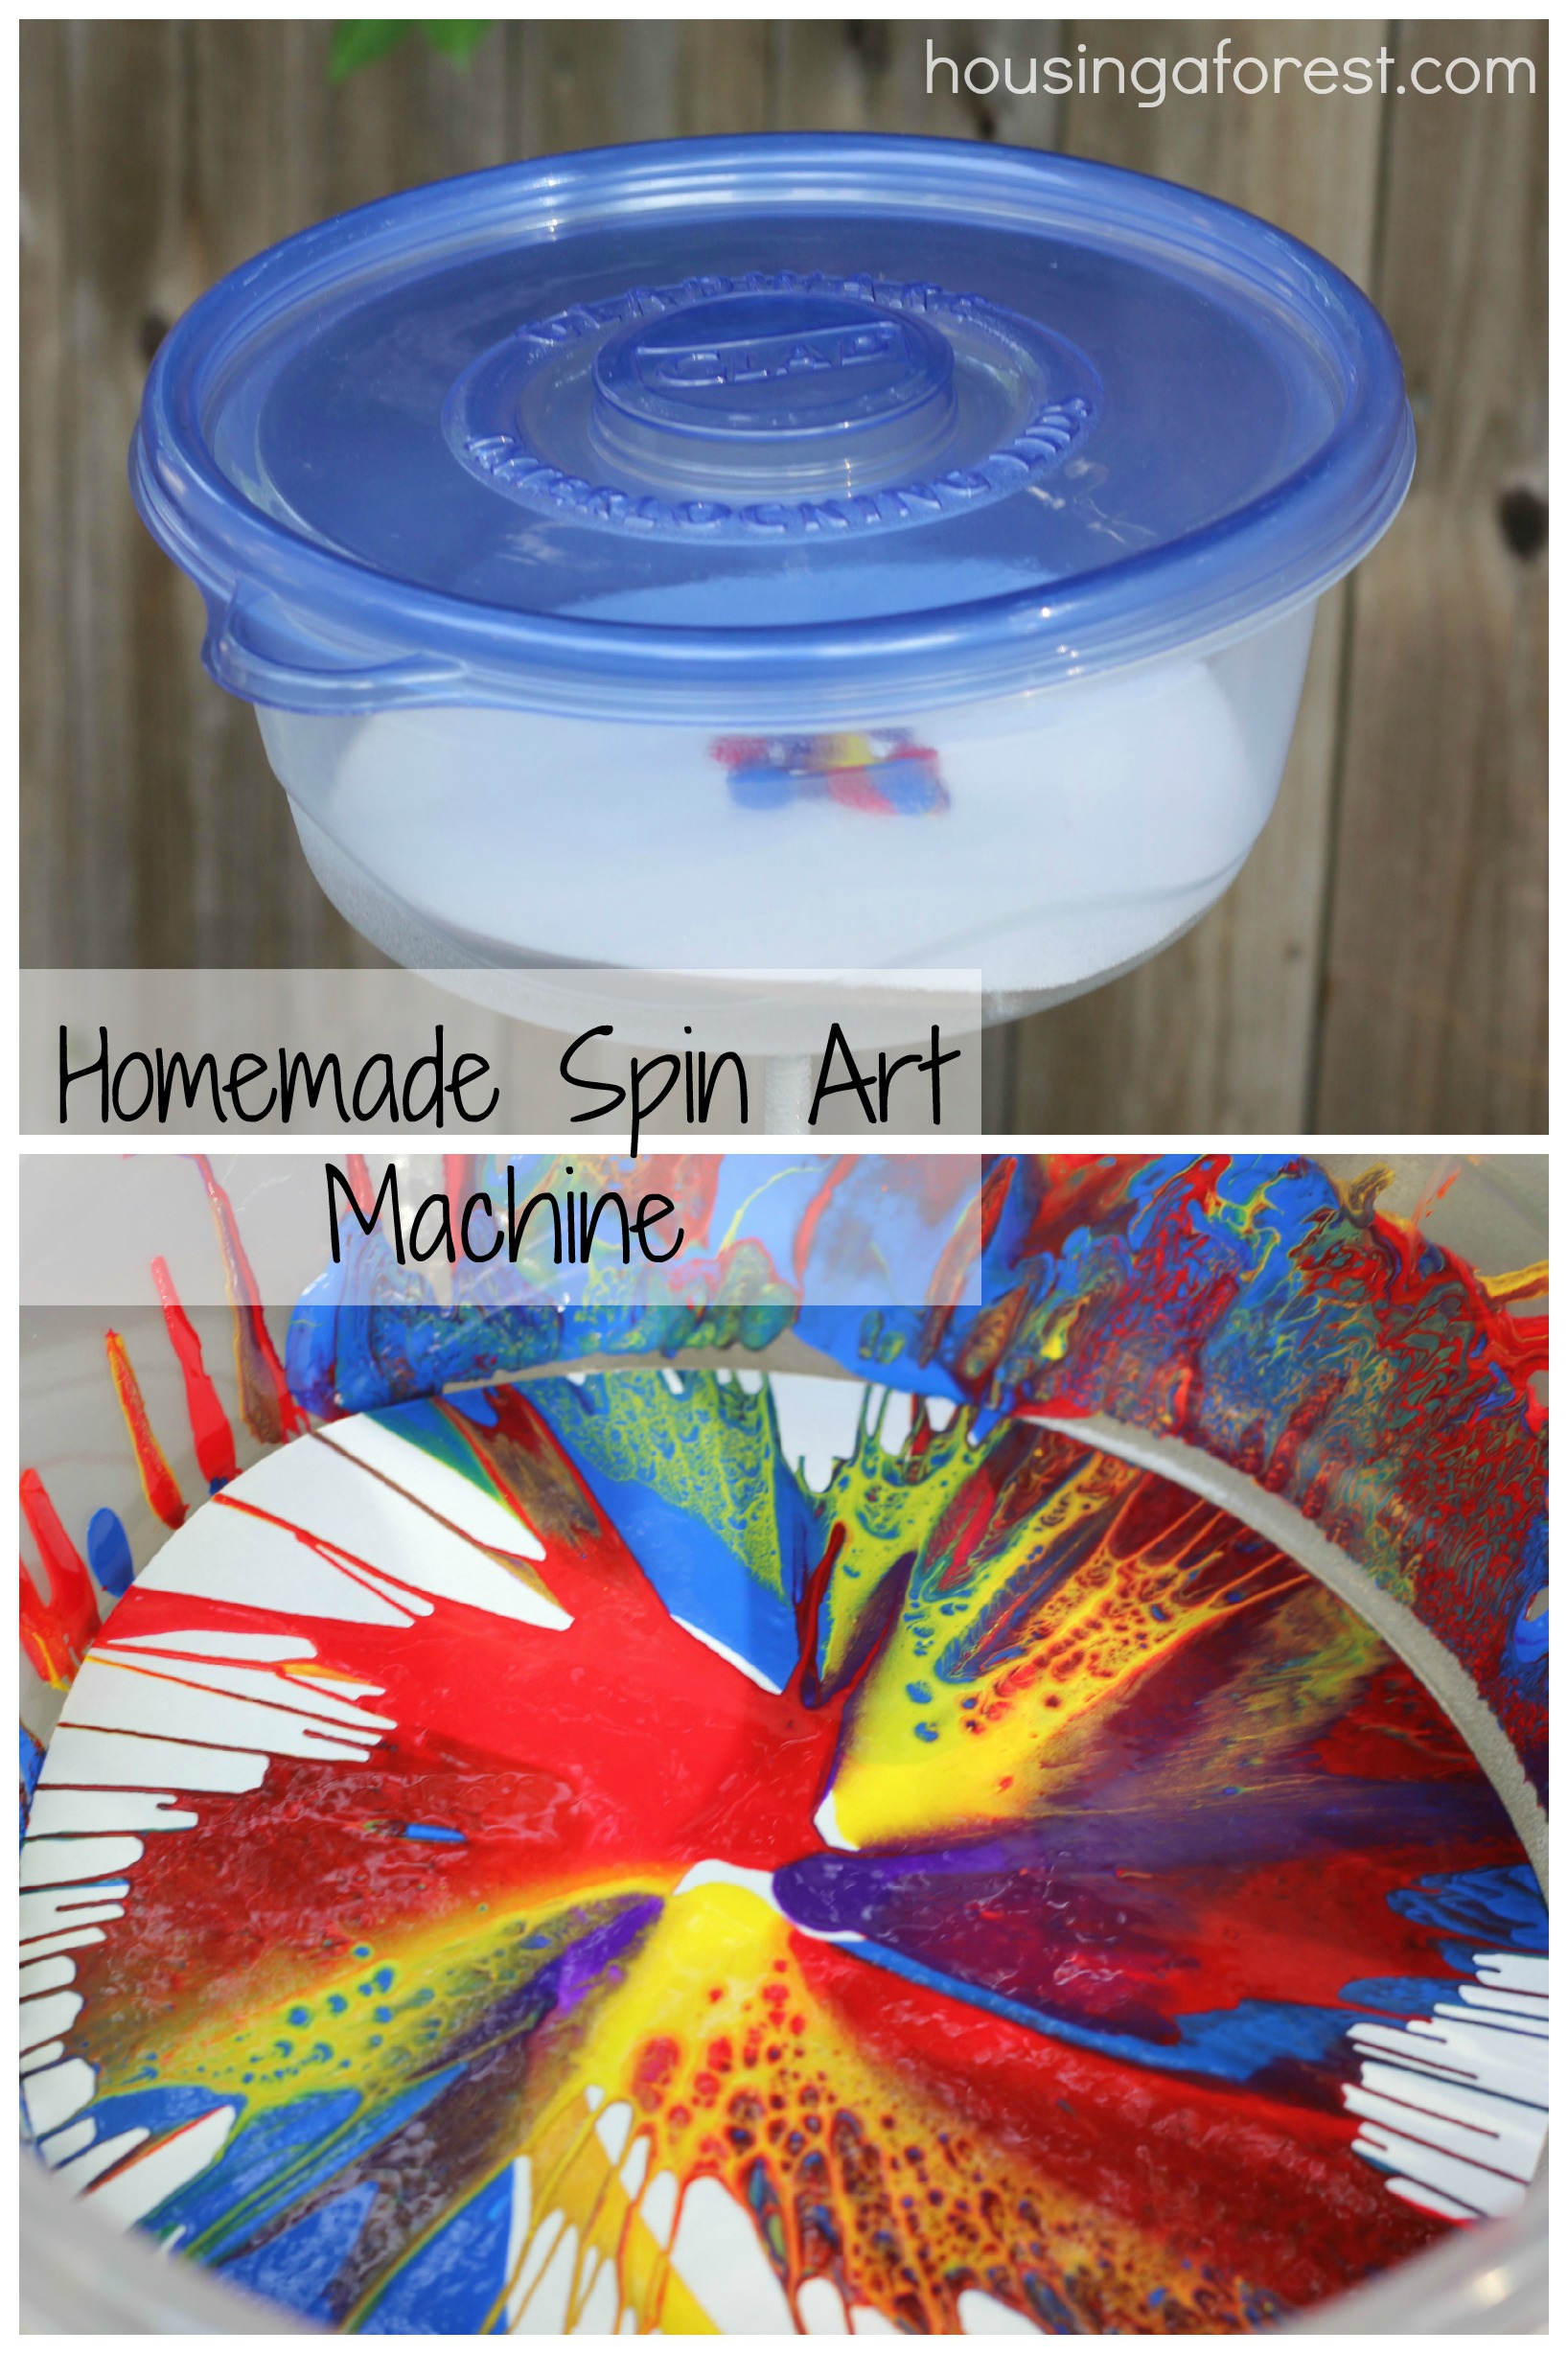
DIY Spin Art Machine

#1 ~ Lazy Susan Spin Art

We picked up a Lazy Susan years ago at a thrift store, and it has been sitting in the basement collecting dust.  So we dusted it off and turned it into a simple Spin Art Machine.
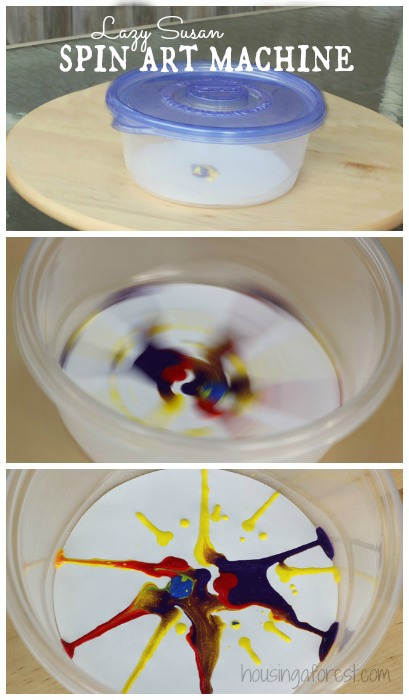
Lazy Susan Spin Art Machine

Materials:

  • Lazy Susan that spin easily
  • Container ~ we used a disposable clear container so the kids could see their artwork.  No need for a lid.
  • Squeeze bottles of watered down paint ~ we used tempera paint
  • Masking Tape
  • Paper ~ cut to fit inside your container

Simply tape the container to the center of the Lazy Susan.  Squeeze some watered down paint into the center of the container and spin the Lazy Susan.

Tips:

  • You need to be able to spin the Lazy Susan fast in order to get the paint to splatter to the edges.  My kids are 7,8 and 10 and it worked well for them, but younger kids would need help spinning it.
  • We also found that it worked best with 2 people.  One person did the spinning and another person added the paint while it was spinning.  So easy and the kids loved the results.
  • When we were all done, we simply removed the container and the tape and sent it back to the basement to collect some more dust:)  I love that we didn’t have to permanently alter the Lazy Susan to make our art.

#2 ~ Electric Drill Spin Art

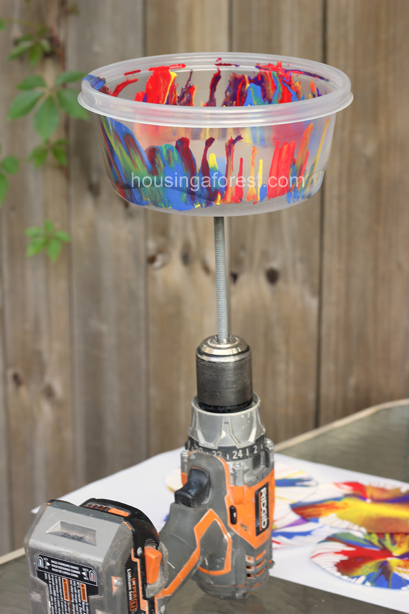
Now this one was AMAZING!  When we were testing out the Lazy Susan idea, my son asked if he could try using an electric drill.  Love it, although I was not sure exactly what he was thinking.  Off to the garage Kaleb and Chuck went and came back with this amazing contraption.  This is my sons version of a spin art machine, with a little tweaking from my hubby:)  My 10 year old boy is in love with power tools, so this was right up his alley!
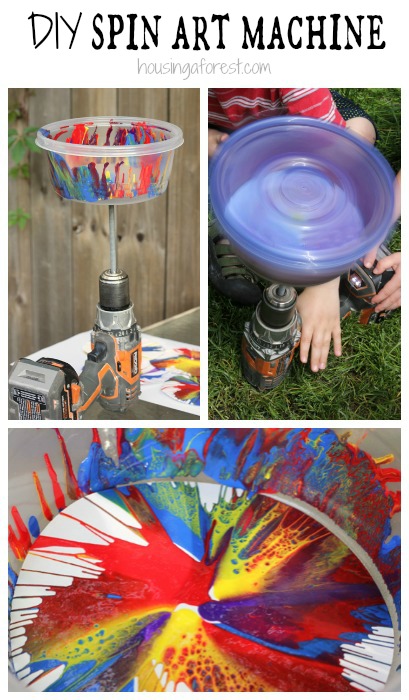
DIY Spin Art Machine

Please remember to be careful when using power tools with kids!  My kids are old enough to know how to use a drill, but they are dangerous and need to be handled with care! PARENTAL supervision is required for this activity!  After some reminders of safety precautions we set to work.
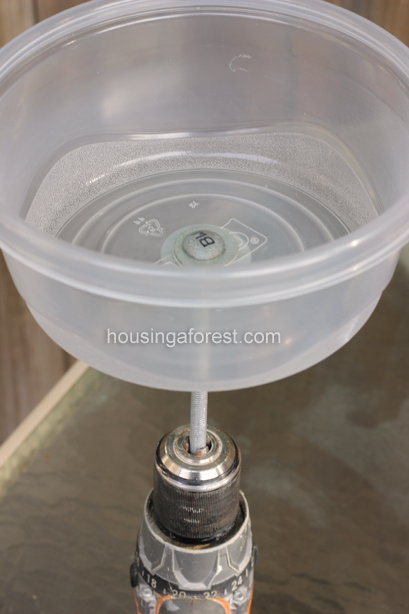
Homemade Spin Art Machine

Materials needed:

  • Electric Drill
  • Clear container with a lid
  • Cardboard circle cut to fit the container ~ just to stabilize the paper
  • Paper ~ cut to fit the container
  • Masking Tape ~ to hold the paper to the cardboard when spinning
  • Long threaded bolt, 2 washers and a nut

When my hubby and Kaleb came back from the garage, this is what they brought me.  Amazing!  Kaleb was so proud of his invention.

To set up your own Drill Spin Art Machine, simply drill a hole in the bottom of your container large enough to fit the bolt through.  Slide one of the washers onto the bolt and then fit the bolt through the container so that the treated end comes out the bottom of the container.  Add another washer and then tighten with a nut.  Once you have all that together simply fit the end of the bolt into the drill and tighten like you would a regular drill bit.

DIY Spin Art Machine

I used our homemade spin art machine with a group of younger kids as well and it worked great.   Just remember to remind them of the safety rules when working with tools.
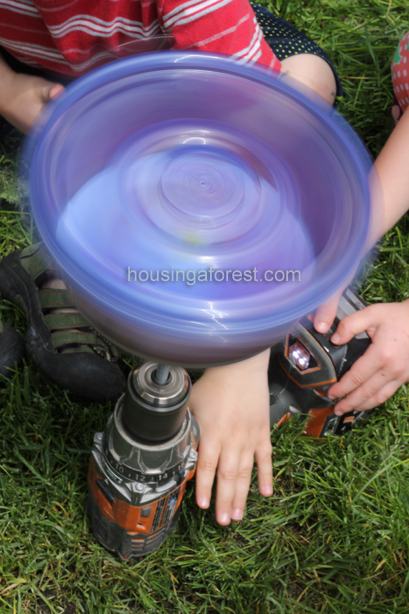
DIY Spin Art Machine

Tips:

  • Inside the container I used a piece of cardboard cut to the size of the paper just to stabilize the bottom.  You probably can skip this step, it might just depend on the type of bolt that you use.
  • Put on the lid after we added the paint.  It tends to splatter a bit, but that is part of the fun.
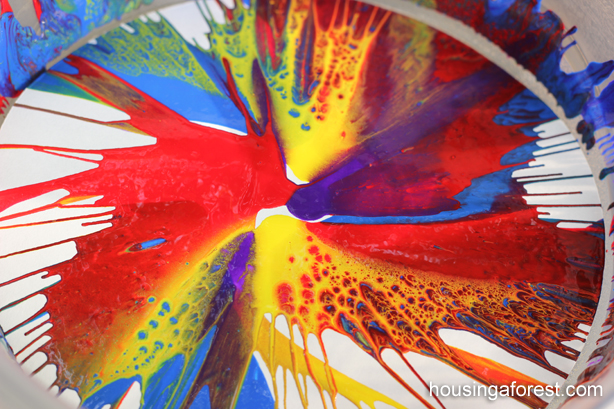
Homemade Spin Art Machine

I love how pretty the colors look when they spin together.  It looks just like the spin art that we have created with our store bought machine.

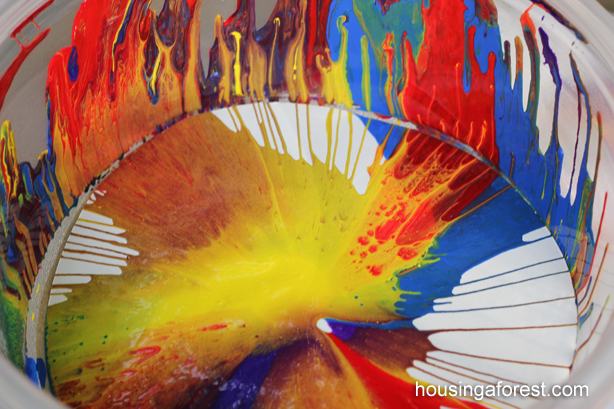
I love how the colors spill up the sides of the container.  Homemade Spin Art Machine Each piece of art turns out different.   This was a blast and something that we will be doing again soon!
 ……………………………………………………………

Welcome Back to Paint and Play!  The Fun new series that I am doing with Crystal from Growing A Jeweled Rose.  The focus for this series is all about the process, having fun and getting kids excited to create art!  This week we challenged each other to put our own “spin” on creating Spin Art.  Growing A Jeweled Rose got moving with her girls to make their art, and we headed to the tool shed to create a simple machine.

Make sure to stop by  Growing A Jeweled Rose and check out all the amazing fun they had creating spin art through movement.
A Spin on Spin Art

Don’t miss out on any of our Paint and Play series:

Super Creative Balloon Painting

Balloon Painting 5 Ways

 ……………………………………………………………

Homemade Spin Art Machine

If you love process art like us, then check out my Painting Without Brushes Pinterest board.  It is packed full of fun ideas.  I would love to hear how you have used balloons to create or play with your kids.
Wet Chalk Drawings

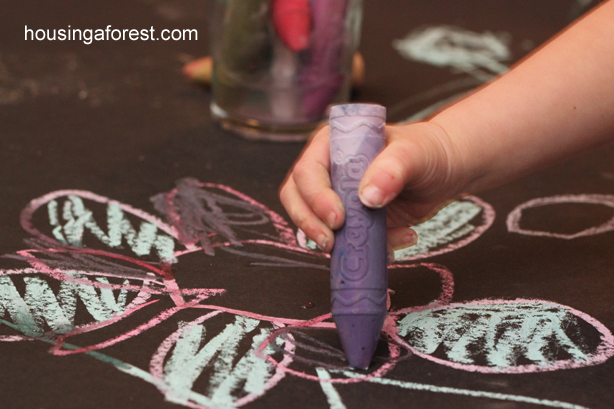
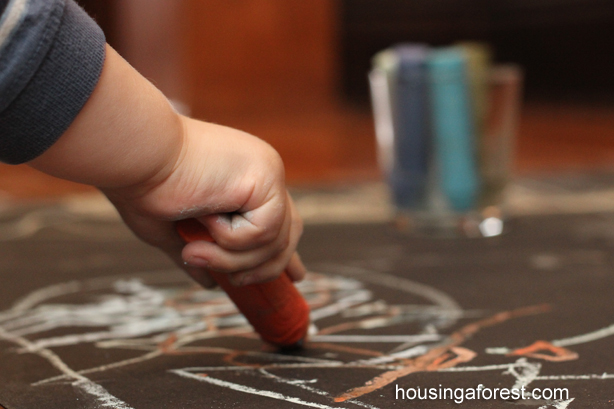
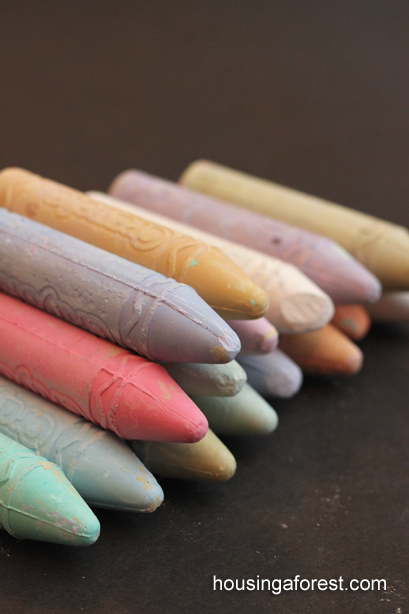
Chalk is a fun and inexpensive medium to draw with.  My kids love decorating our sidewalks with beautiful drawings and colorful games.  They can spend hours outside creating, and love when it rains and cleans their “canvas” so that they can start all over creating new ideas and drawings.  Since we always have an abundance of chalk, we decided to create simple Wet Chalk Drawings.  Nothing to fancy, but so easy to do.

Wet Chalk Drawings

Since the set up of this activity is minimal, it is perfect for those days when you just need something extra to do!  No prep work, and I always have chalk and paper on hand:)

Materials:

  • Chalk ~ we like to use are chunky sidewalk chalk
  • Black paper
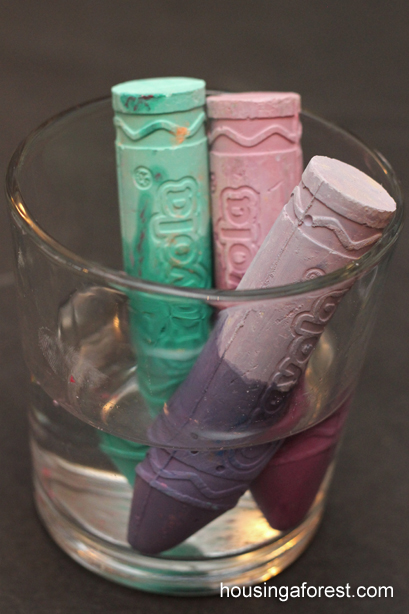
  • Glass 1/2 full of water

Wet Chalk Drawings

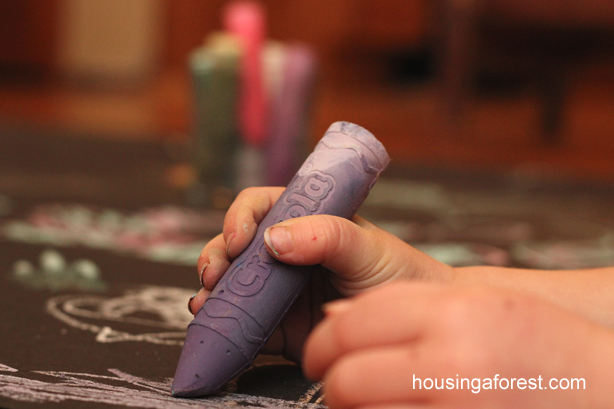
Simple place the chalk into the glass of water for a few moments and you are ready to begin creating.

Wet Chalk Drawings

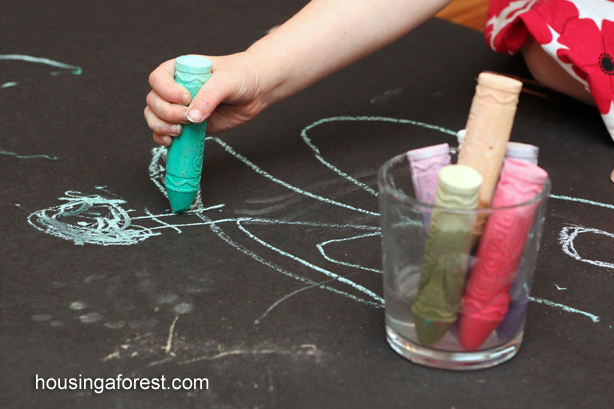
I love the GIANT roll of black paper that a friend blessed us with.  You can do this with any size of paper.   Small sheets of construction paper work great.  However, there is something magical about creating on a huge piece of paper.

Wet Chalk Drawings

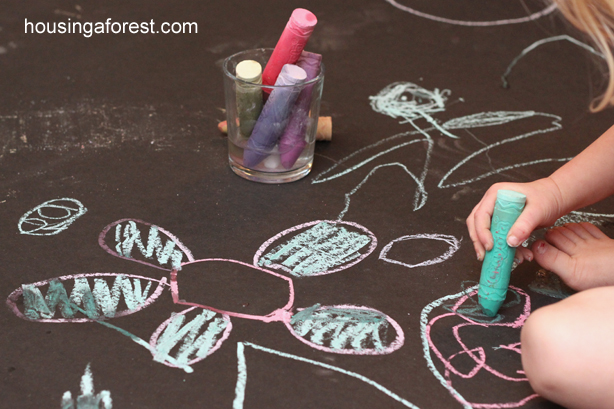
You can also have the kids experiment with both wet chalk and dry chalk to see which they like coloring and drawing with.

Wet Chalk Drawings

They will probably find that by adding water, the texture of the chalk changes.  It becomes more smooth and easier to glide across the paper.  The texture becomes almost paint like.  I love how vibrant the colors become, especially on the black paper.

Wet Chalk Drawings

If you want to make the colors even brighter, experiment with dissolving a little sugar into the water.

Be careful (especially if you are using the skinny chalk) since when the chalk is wet, it is more fragile and will snap if you add too much pressure.

Wet Chalk Drawings

When you are done creating just leave the chalk out to dry.  It will go back to normal once it is dry.

If you are worried about the drawing smudging you can give it a quick spray with hair spray to set it.  Hairspray works great on dry chalk drawing too:)

Wet Chalk Drawings

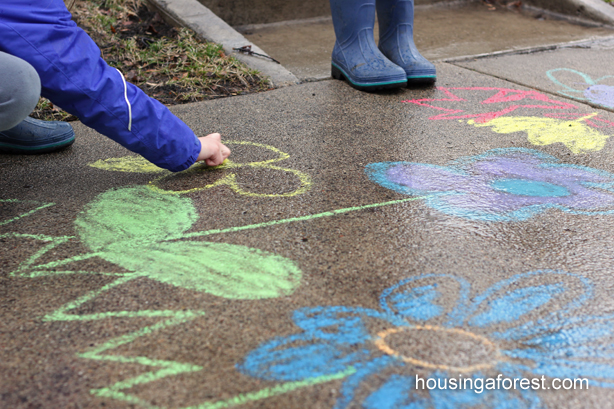
You can also try this fun technique outside on the side walk.  Bring a glass of water with you, or play with chalk in the rain.  You might be surprised at how your drawings turn out:)

Playing with Chalk in the Rain

My kids also love using chalk to temporarily color their hair.  Here is a simple tutorial on how to Chalk Hair.  It is a simple technique that is inexpensive and washes out easily!

What is your favorite way to play with chalk?

Alphabet Gems

I am so excited to have Sam from Thrive 360 Living guest posting on Housing A Forest today!  I met Sam not that long ago, and immediately feel in love with her blog.  I love finding new blogs, and this is one that you will want to go check out.  It is packed full of engaging activities for kids.  I especially love all the literacy activities that Sam does with her little guy.  They are beautiful!
…………………………………………………………………………

Hi everyone! My name is Sam, and I blog at Thrive 360 Living. I’m excited to be here to share my latest craft and learning game. As a stay-at-home mom to my 2-year-old boy Jake, I’m always trying to come up with projects that are a creative outlet for me and a learning experience for him.

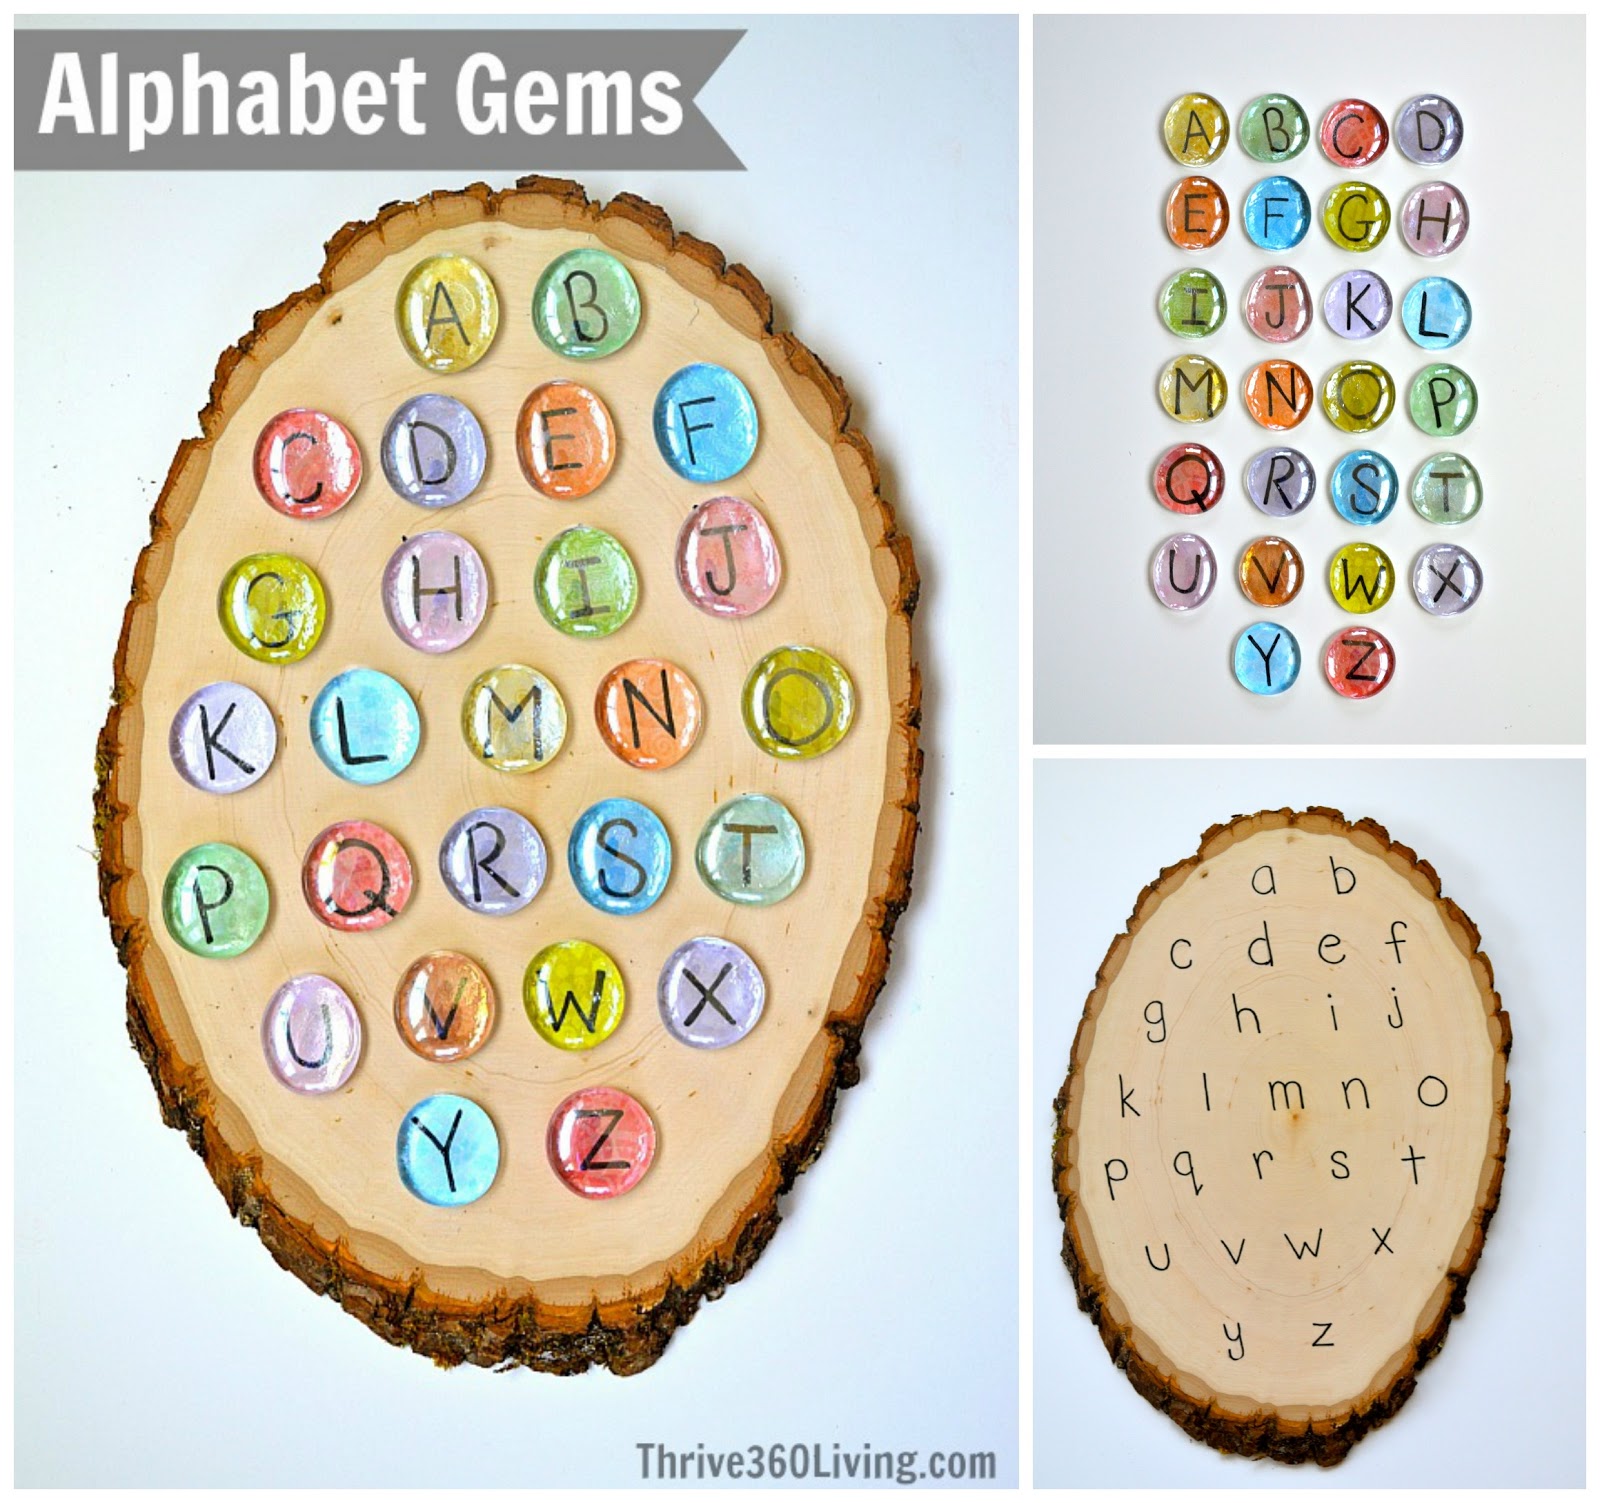
I thought alphabet gems would be good playing pieces for an activity that matches uppercase and lowercase letters. This project is very easy to make, even for a crafting novice.
Alphabet Gems ~ DIY game to encourage matching upper and lower case letters
Here are the materials needed:
*26 large clear glass stones, rounded on one side and flat on the other – I bought mine at Michael’s
*Mod Podge
*Foam brush
*Scrapbook paper
*Black marker
*Playing board – I got my wood slice from Michael’s, but any board, cardboard or even paper would do.
Alphabet Gems ~ DIY game to encourage matching upper and lower case letters
Three easy steps for making the alphabet gems:
1. Cut the scrapbook paper to fit the back of each gem.
2. Draw uppercase letters on each piece of paper.
3. Using your foam brush, apply Mod Podge to the letter-side of the paper and then attach the paper to the flat side of the gem. Add another layer of Mod Podge over the back of the paper to make sure it is sealed.
For the game board, use a marker to write out the lowercase letters.
Alphabet Gems ~ DIY game to encourage matching upper and lower case letters
After nap time is when my creations are typically put to the test. It was such a nice day that I decided to set-up our gem letter-matching game outside. I explained to Jake that the object was to match the uppercase letter with the lowercase letter on the playing board. After showing him two examples, he caught on. However, he was frustrated that the letters didn’t look exactly the same. Since we often refer to smaller items as “baby” items, I told him that the letters on the board were baby letters and the bigger letters were mama letters, and the mamas needed to find their babies. He seemed to enjoy that concept. We still have a ways to go, but I can tell this will be an activity we’ll be using often.
Alphabet Gems ~ DIY game to encourage matching upper and lower case letters
Here are other ways to use your alphabet gems:
-Make them into magnets – perfect for hanging artwork.
-Use them for color sorting.
-Teach simple spelling.
-Put them in a bag or box and give them as a gift.
-Hide them for a treasure hunt.
-Put them in a dish and display them because they just look pretty.
It has been such a pleasure to share this activity with you today. If you’d like to follow along with me and see more projects, you can connect on my blog, Facebook page, and Pinterest.
Alphabet Gems ~ DIY game to encourage matching upper and lower case letters
Sam ~ Thrive 360 Learning

Thrive 360 Living | Facebook | Pinterest

…………………………………………………………………………

Thanks so much for posting with us Sam!  I love your little Alphabet Gems!  I might just have to make a special set as a gift for my niece.  For more great ideas like this one, visit Sam at Thrive 360 Living and let her know you saw her post on Housing A Forest.   We all love comments and I know Sam would love to hear from you:)

Here are a few of my favorite post from Thrive 360 Living to get you started:

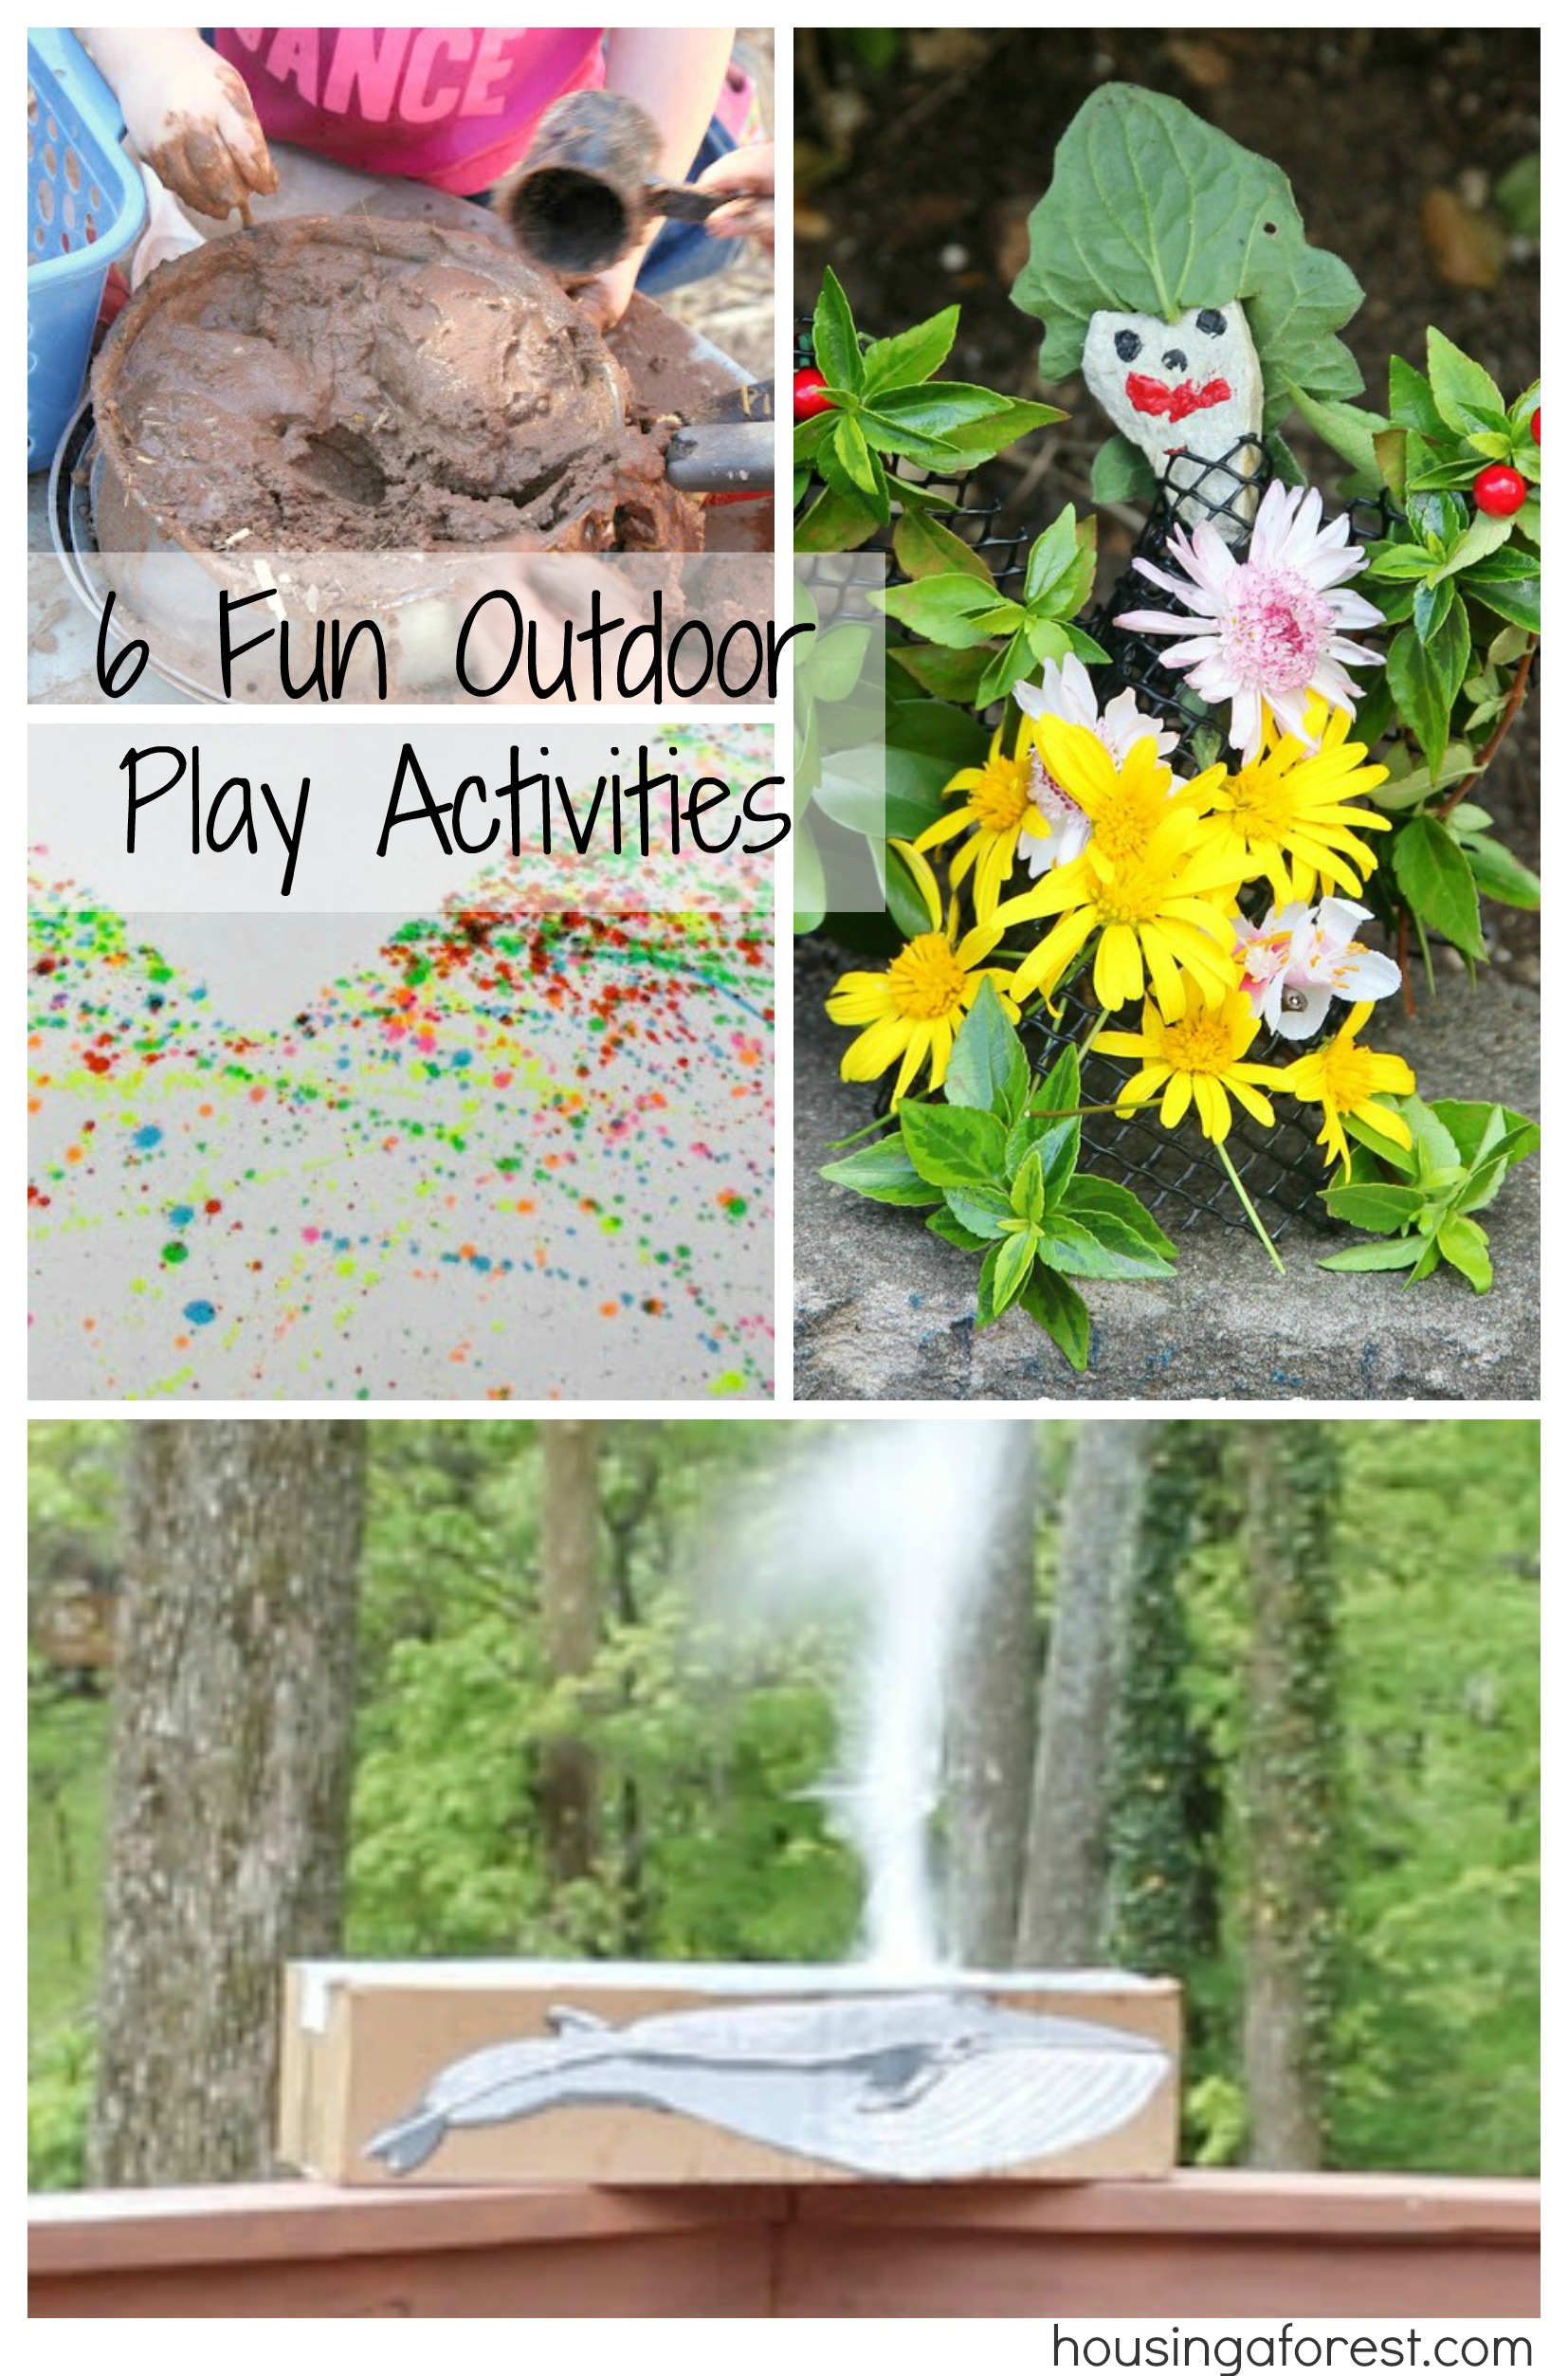
6 Fun Outdoor Play Activities

Welcome back to the Weekly Kids Co-op.  My kids are counting down the days until school is out for the summer.  Last week I featured Engaging Activities for Boys that my kids can’t wait to try while on break.  This week I am featuring 6 Fun Outdoor Play Activities perfect for engaging my kids this summer.  Yea for summer!

6 Fun Outdoor Play Activities

  • Flick and Fling Physical Art ~ We love creating large process art.  This is on our summer bucket list for sure!
  • Mud Day ~ Kids love mud, Squishing, playing and creating.  This simple activity that is perfect for your backyard.
  • 12 Activities for Chalk ~ we love chalk, it is our go to medium for playing outside. Lots of great ideas for playing and learning.
  • Happy Birthday Adam Rex ~ I love how he makes the books come alive for his kids.  Check out his amazing whale creation, complete with an active blowhole.  My kids would love to try this!
  • Recycling Deodorant Bottles for Fun ~ Recycling and art “rolled” into one.  I remember doing this with water on the sidewalk as a kid, even better with paint!
  • Creating with Flowers, Twigs and Leaves ~ We love creating with nature.  I can’t wait to create these simple nature people with my kids.

If you were featured this week, feel free to grab a Housing A Forest button.

Come back every Thursday to see if your creative ideas were featured and link up any new ideas! (I will be using one image and a link back to your blog.)

Weekly Kids Co-op


Painting with Balloons

Process Art ~ Painting with Balloons

You know how much we love process art!  Thats why I’m so excited to announce a NEW weekly Paint and Play Series that I am doing with my friend Crystal from Growing A Jeweled Rose.  The focus for this series is all about the process, having fun and getting kids excited to create art!  Each week we will be choosing a topic and then both of us will post fresh ideas centered around the chosen topic.

To kick off our series, we are both sharing ideas all about Painting with Balloons and creating engaging process art that your kids will love.

Balloon Drip Painting ~ Process Art

Balloons are one of those things that you never grow out of.  They are perfect for indoor games, creating paper mache, launching as balloon rockets  and seeing who can make the best ear piercing squeaky noise.  You know the sound I’m talking about.  The one that most parents cringe when they hear:)

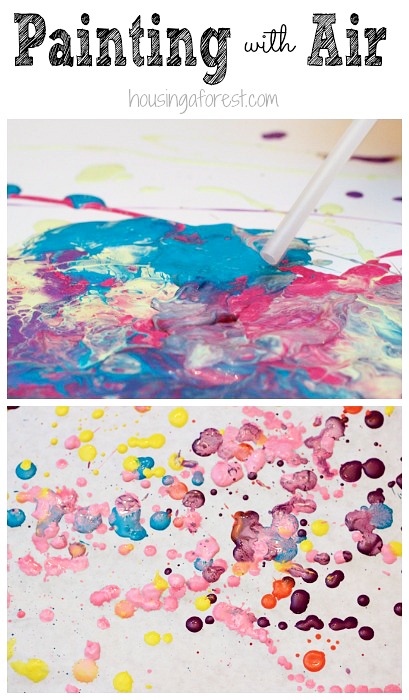
#1 ~ Painting with Air from a Balloon ~ Blow Painting

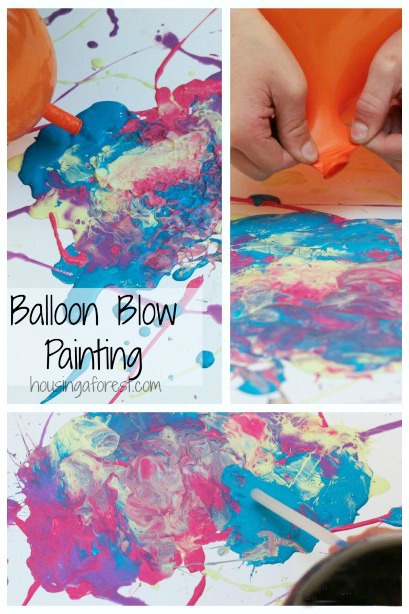
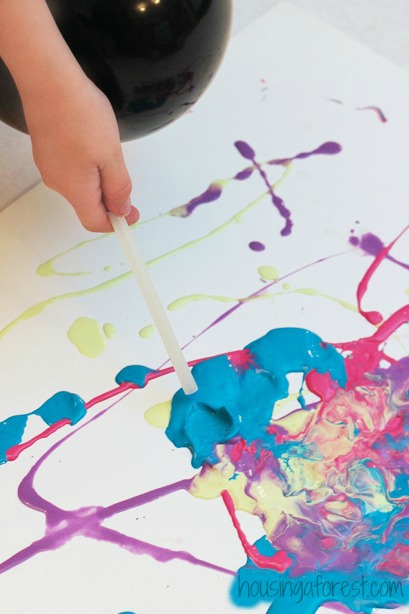
My kids had a blast painting with the air from a balloon.  For our first balloon painting activity we tried our hand at Balloon Blow Painting.

Balloon blow Painting ~ Process Art

Materials needed for Balloon Blow Painting:

  • Cardboard
  • Paint ~ we used acrylics
  • Balloons
  • Straws
  • Tape

Balloon blow Painting ~ Process Art

The kids squirted paint onto a thick piece of cardboard.  We used ours straight from the paint tube and layered it on nice and thick.  Having a thick layer of paint, makes it easier for the air from the balloon to move the paint.

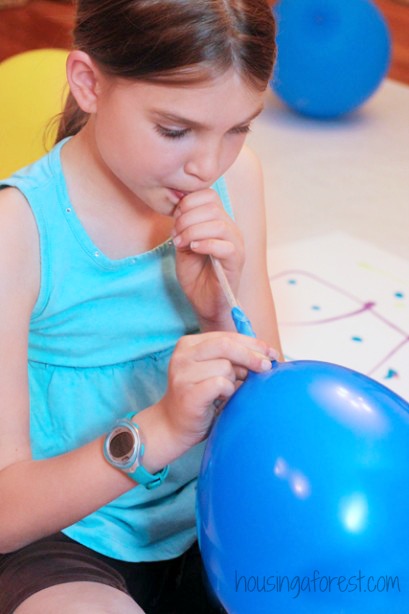
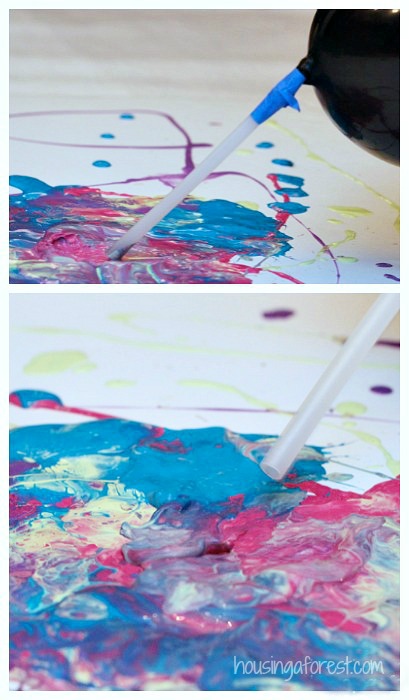
Next the kids placed a straw inside the balloon and secured it with tape.  Once they made sure they had a good seal and no leaks, they blew the balloon up with the straw.

Now all you have to do is aim the straw at the paint and let the air out.  The air will blow the paint around and create amazing swirled patterns.  You can either just let the air escape through the straw or squeeze the balloon and “forced” the air out.  The kids found both techniques to work well.

Balloon blow Painting ~ Process Art

It was so fun to watch the paint swirl and mix on the cardboard.

Balloon blow Painting ~ Process Art

The kids also tried blowing the paint with just the balloon and no straw.  Also a fun technique.  I love all the tiny waves of paint it creates.  We will be trying this again soon.  The kids loved painting with air!

#2 ~ Painting with Balloons ~ Balloon Drip Painting:

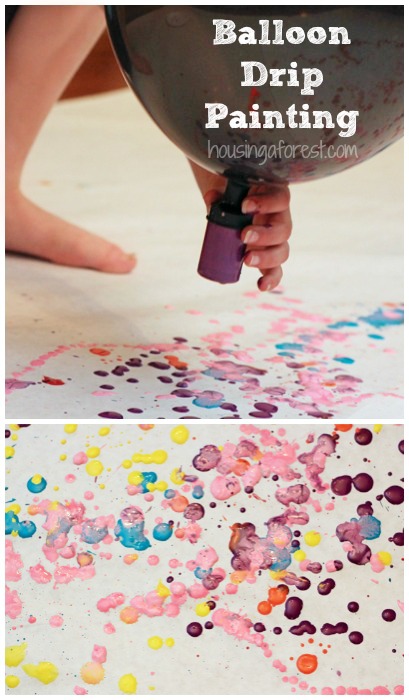
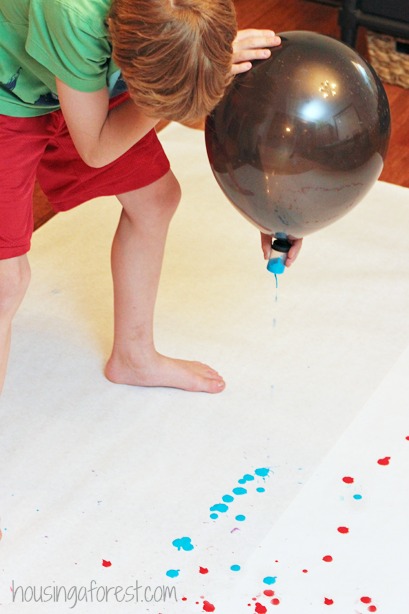
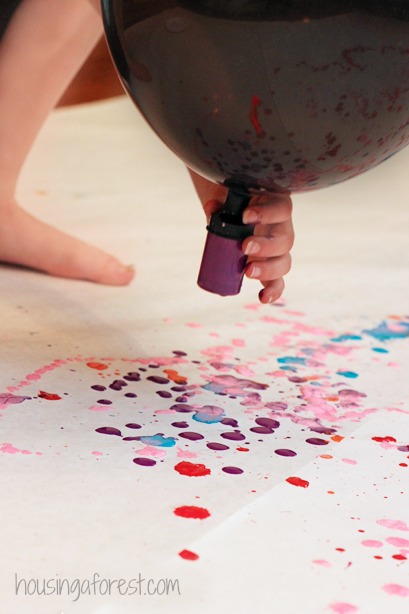
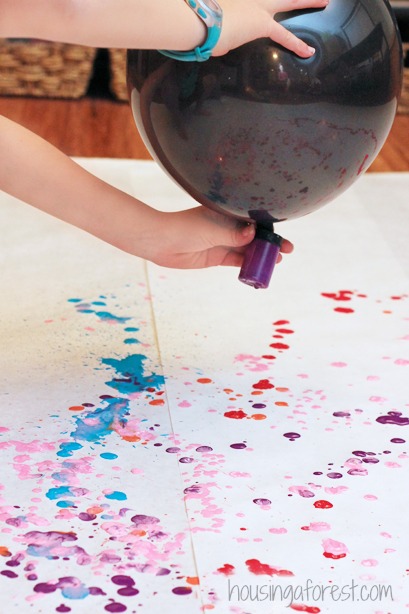
The next activity we tried was Balloon Drip Painting.  This took a bit more setup, but the process was just as fun!

Balloon Drip Painting ~ Process Art

Materials needed for Balloon Drip Painting:

  • Film canister or similar container
  • Nail
  • Balloon
  • Large sheet of paper or cardboard
  • Paint ~ we used Acrylic

Balloon Drip Painting ~ Process Art

We used a film canister to contain our paint and poked a hole in the bottom of it with a nail.   Any container would work, as long as the balloon will stretch over the opening and you can poke a hole in the bottom of it.

Make sure to hold your finger over the hole when you fill it with paint, or you will end up with a huge mess:)  Each paint we used was a little different consistency  but you want your paint thin enough to drip out, but not run straight out the hole.  However, if your paint is too thick or it won’t drip at all.  We found that about 70% paint and 30% water worked the best for us.  We used acrylic paint, but I’m sure that tempera paint would work great too:)

Balloon Drip Painting ~ Process Art

Once you have the canister full of paint, stretch a blown up balloon over the top of the canister.  This may require 2 people.  One person to keep their finger over the hole so the paint does not drip out and one to stretch the balloon over the canister.

When you are ready to start painting, simply remove your finger and let the drips begin.

Balloon Drip Painting ~ Process Art

The kids loved this process!  We did ours indoors because of the weather, but I think this would make a fun backyard art project.  If you have a number of film canisters laying around, one of our favorite art projects so far has to be our Exploding Art.  It is a fun summer art project with a little science thrown in for good measure.

 ……………………………………………………………

Don’t forget to hop on over to  Growing A Jeweled Rose and check out all the amazing fun they had creating with their balloons.

5 fun ways to paint with balloons

 ……………………………………………………………

We had so much fun Painting with Air!

Painting with Air ~ Process Art

If you love process art like us, then check out my Painting Without Brushes Pinterest board.  It is packed full of fun ideas.  I would love to hear how you have used balloons to create or play with your kids.