Ocean Sensory Pool

I am so excited to have Heather from the Crayon Box Chronicles guest posting on Housing A Forest today.  Do you ever just stumble on a blog and want to read every single post?  Click on the link above and you will be lost among creative ideas and beautiful photos ~ two of my favorite things!  I love the Ocean Sensory Pool that Heather is sharing with us today!

……………………………………………………………………………….

PIN_IT

Ahoy! I’m Heather and I explore sensory, art, and messy play at Crayon Box Chronicles! I’m a former window designer and stylist from the Big Apple! I traded my push pins for paint and now I’m a proud mommy to my budding paleontologist — little C! I’m so happy to be here today at Housing A Forest to explore sensory play, origami, and shapes with you! Let’s dive into the Big Blue O together! All aboard! Here’s a sneak peek inside our ocean sensory pool!
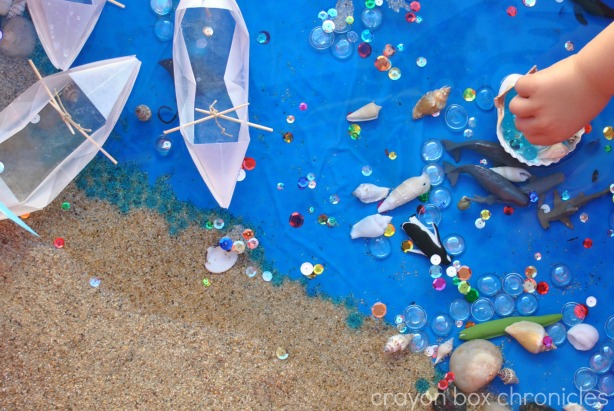
ocean_resized

Let’s get started! Pull out your wax paper, yes I said wax paper, and let’s make our boats! Wether this is your first time making origami boats or you’re an expert, you’ll find this fold to be a breeze! With a little practice the kids can fold it too! This is a hooded Sampan boat! It floats in water too! Why wax paper? Well, it lasts longer in water than paper, it’s so versatile, and we love using basic household goods for projects! To learn the fold just follow this great tutorial!
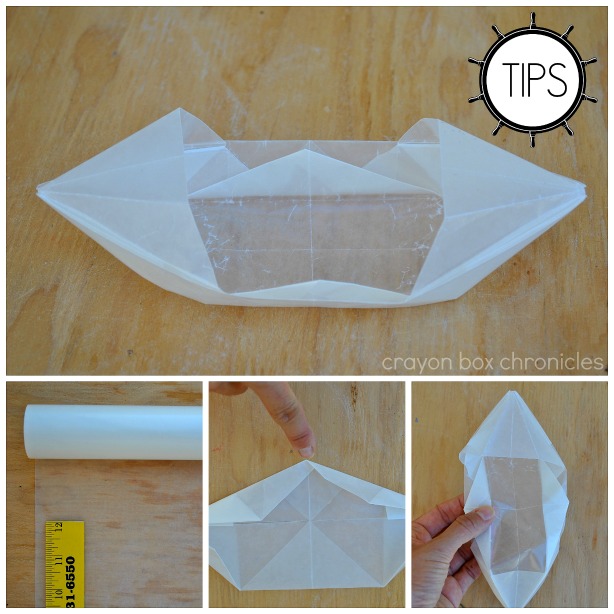
tips_boats

Here are a few tips for the boats:

  • Cut 12 x 12 sheets using a paper cutter or ruler edge.
  • The paper will cross over at this point (pointer finger), that’s ok, just be consistent on both sides.
  • When you flip the boat over and push the bottom through, hold the sides where my thumb is so the fold doesn’t pop out.

Once your boats are complete, it’s time to make the sails and shape flags!
flags_boats

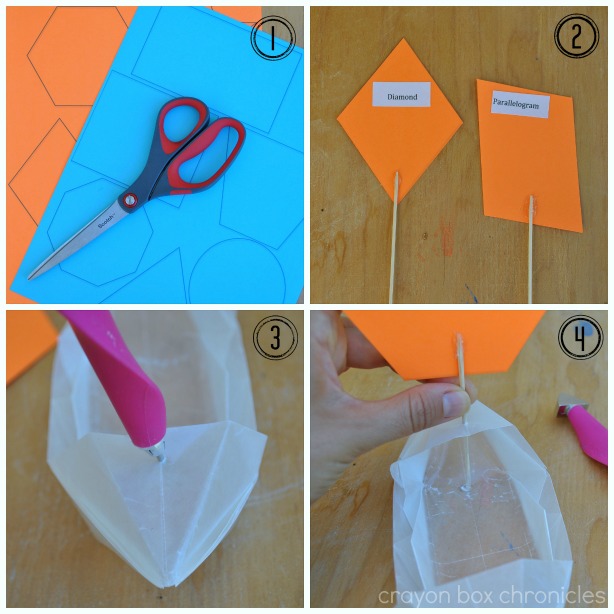
Sail time! Shapes are so fun! I used a hexagon, trapezoid, parallelogram, circle, square, rectangle, right triangle, octagon, diamond, and triangle. I made the shapes in Word and printed them on standard 65 lb. card stock. For an added lesson I added the names on the back of the shapes.

Here’s the process: #1 Cut out the shapes. #2 Glue shapes to toothpicks (tips cut-off). #3 Poke a hole in the boat. #4 Add hot glue at the base of the toothpick. I used the remaining shapes as flags!
knot

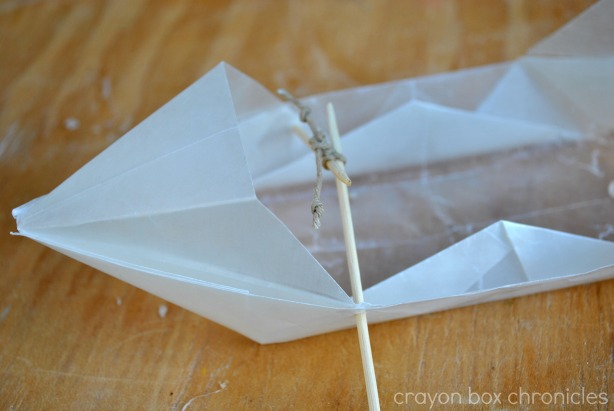
This is totally optional — I added “oars!” Let’s set-up and play!
DSC_0291

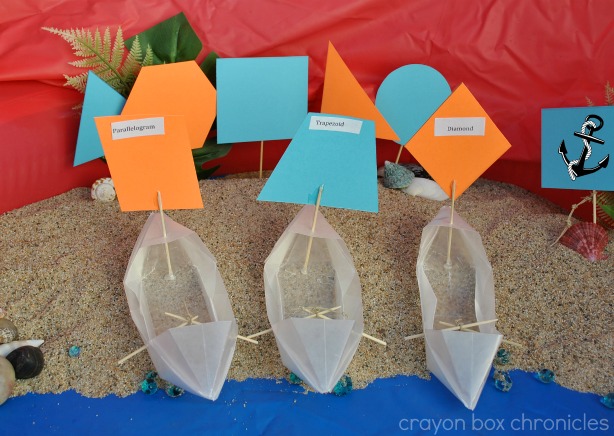
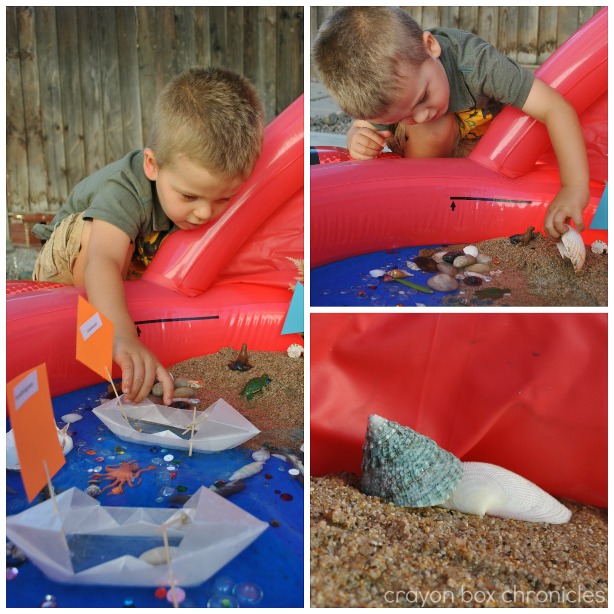
Here’s our finished boats and flags. We added a piece of styrofoam under the flags, a little foliage, and sand. After our shape lesson, C took the flags out of the pool to save them for later. Kids turn — time to explore imaginative and sensory play in our ocean pool!
full_shot

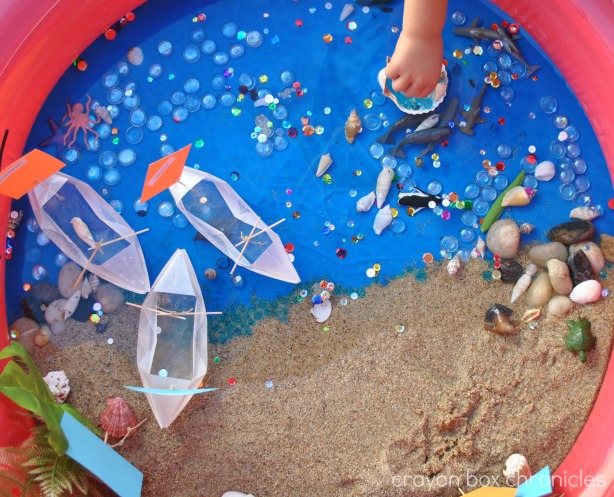
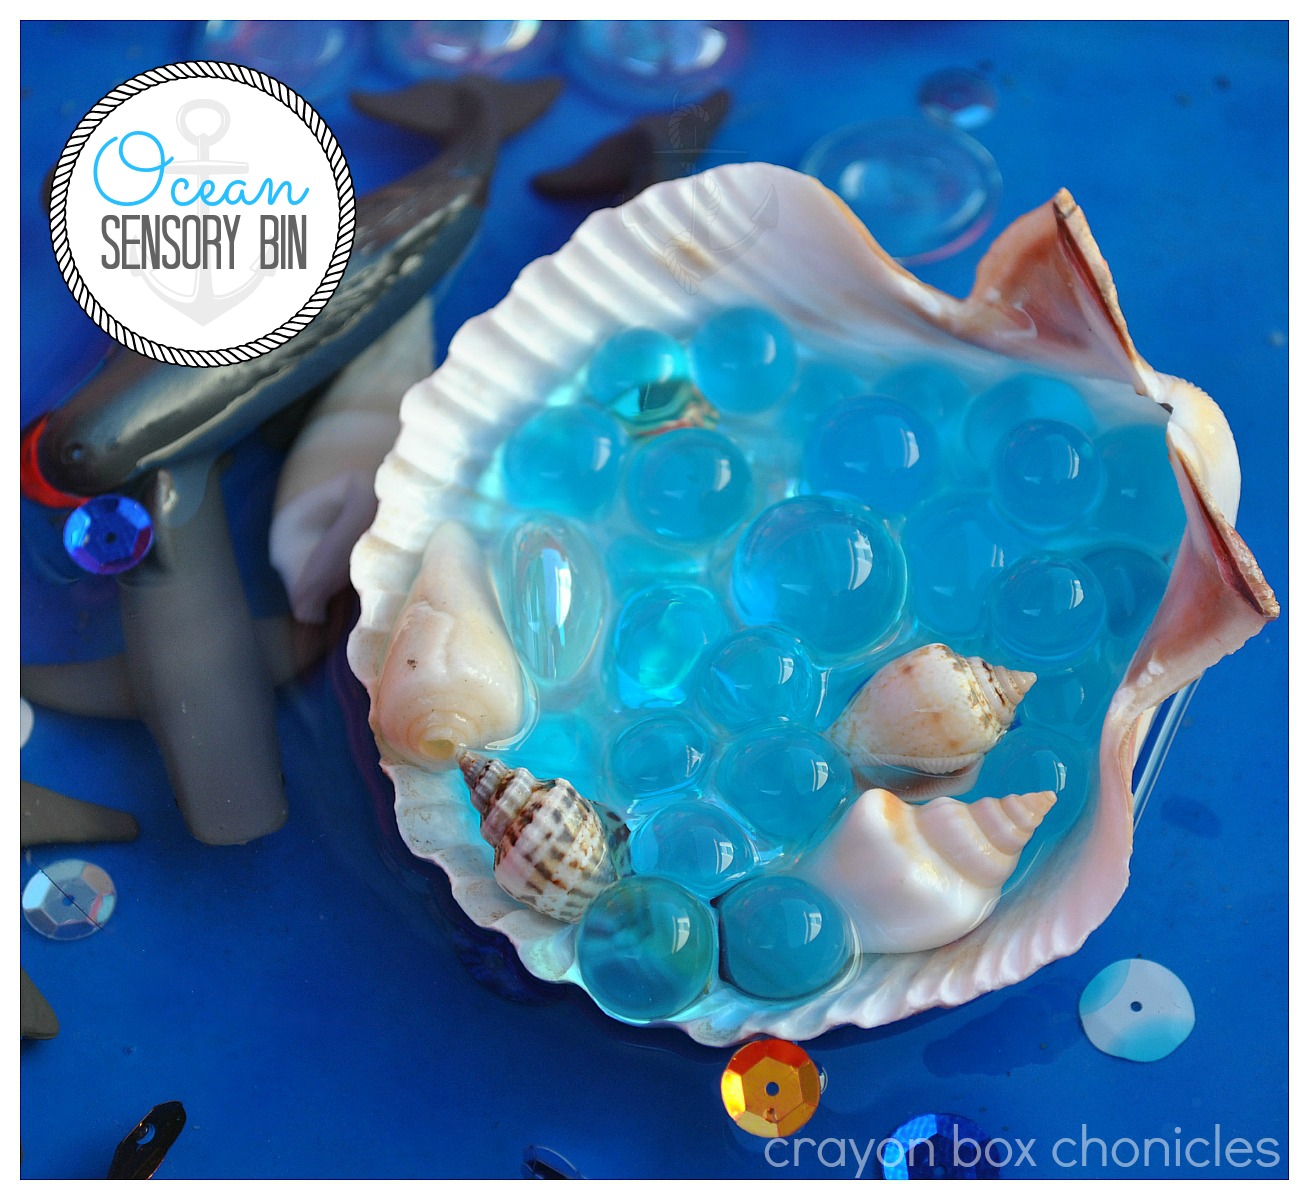
We added water beads, clear gems, rocks, beach shells, miniature ocean creatures, and water to our crab pool! Luckily, we had the crab pool from when he was a baby. Let’s meet our ocean creatures!!
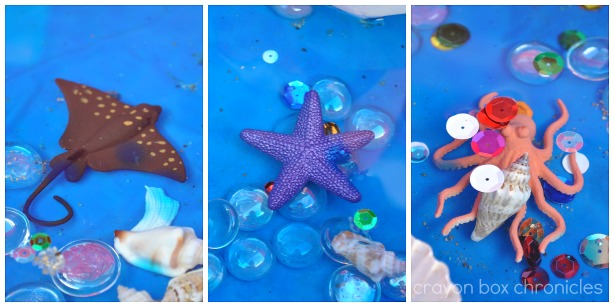
3sea_creatures

Look! It’s our friends string ray, starfish, and 8-legged octopus! They’re so shimmery and colorful!
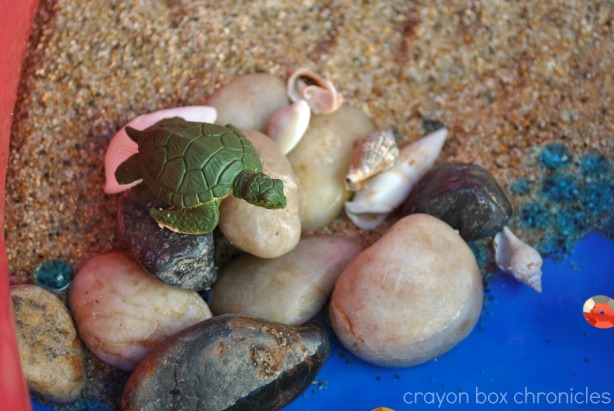
turtle

Sea turtle is slowing migrating back to the ocean! Animal fact! Sea turtles spend their entire lives at sea, except when adult females come ashore to lay eggs several times per season every 2 to 5 years. After about sixty days, baby sea turtles, known as hatchlings, emerge from their sandy nests and make their way to the ocean. Wow, those are brave little hatchlings!
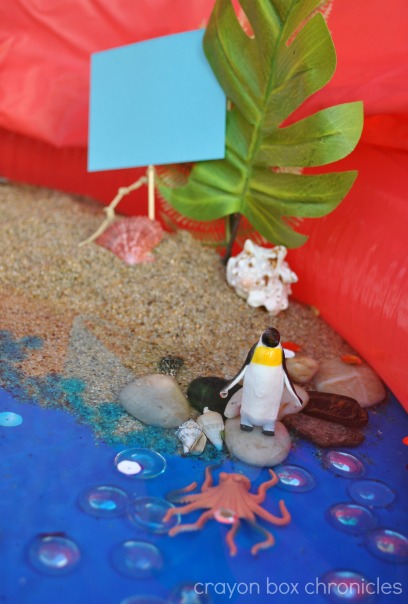
penguin

Penguin, look out below! Octopus is searching for his coral reef den! Animal fact! Did you know octopuses have three hearts. Two of the hearts pump blood through two gills, while the third pumps blood through the body — fascinating!
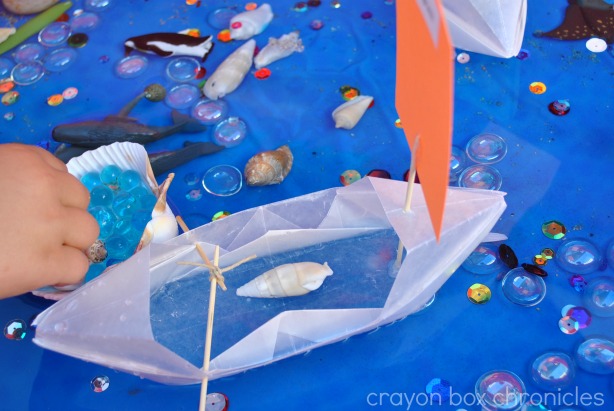
shell_boat

Sea shell is taking a ride on the Sampan boat!
CJ_play1

I just adore the colorful sea shells! Little C couldn’t get enough of those slippery water beads! Today’s ocean pool was a great sensory experience that gave him the chance to play, create, investigate, and explore! I’d say sea turtle was his favorite. It was a windy day too, so the boats really zoomed in the water! He kept saying, “Parallel-gm, parallel-gm moving in the water!”

For more origami and ocean fun, check out C’s Under The Sea Birthday Party! There’s lots of DYI tutorials on his party designs. Thank you for joining us in our journey today as we explored play through imagination! (note) Please always supervise your child during play and never leave them unattended, especially around water.

shell

Crayon Box Chronicles

Follow along and join in the fun at:

Crayon Box Chronicles | Facebook | Pinterest | Twitter | Bloglovin’

……………………………………………………………………………….

I love it Heather, thanks so much for sharing!  I would never have thought to make a boat out of wax paper, what a brilliant idea!  My kids love origami, and they are going to love these!  We all love comments, so why not pop over and visit Crayon Box Chronicles and tell her how much you enjoyed her post on Housing A Forest.

Just a few of my favorite posts from Crayon Box Chronicles  to get you started:
DIY Balloon Powered Wooden Car

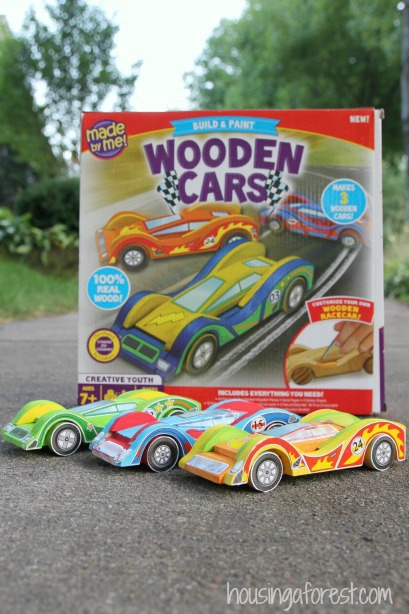
My kids love creating and tinkering. It makes me smile, since I never know what they will be building next. Some of their favorite projects include a fun Elastic-Band Launcher and a noisy Tin Can Howler. When I was contacted by Craft Project Ideas to review their Made By Me Wooden Cars, my kids were super excited! Just to be clear, we were given this product for an honest review and the best part is…they are also offering one of my lucky readers their own Wooden Car Kit. How cool it that! This might be the easiest competition to enter ever, check out the bottom of the post to find out how!

DIY Balloon Powered Wooden Cars ~ simple homemade toy that is so fun!

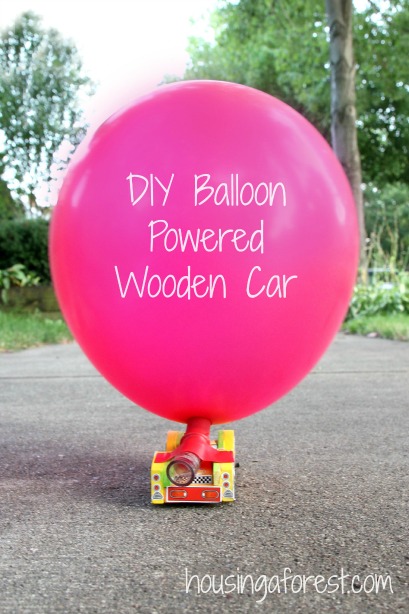
Since I already mentioned that my kids love to build and tinker, it will come as no surprise that they had a blast building and painting their wooden cars. However, they also wanted to add their own twist to the already cool race cars. Balloon Cars have been something that we have been meaning to make for a long time. So we combined our super cool race cars with a little speed from a balloon, creating an awesome DIY race car that your kids will love.

DIY Balloon Powered Wooden Cars ~ simple homemade toy that is so fun!

Before I get into building our cool balloon race cars, let me just say this kit was a breeze to put together. The directions were super simple to follow, and everything that you need is included. As a mom, I loved that each of the cars came in their own bag. No sorting parts or hours spent trying to figure what part goes where. Love that!

DIY Balloon Powered Wooden Cars ~ simple homemade toy that is so fun!

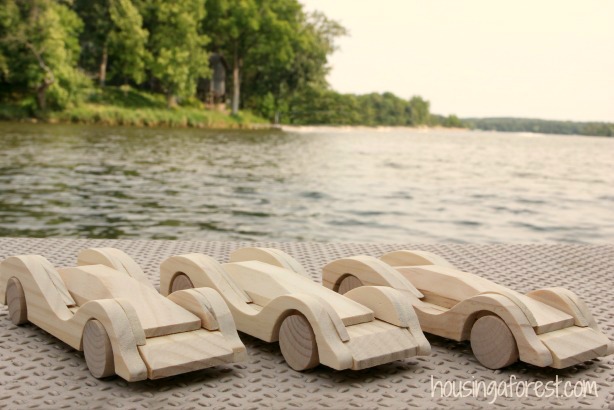
Once they had most of the race cars assembled, they took the cars outside to do a quick sanding. I personally love the look natural, but the kids are all about the bright colors:)

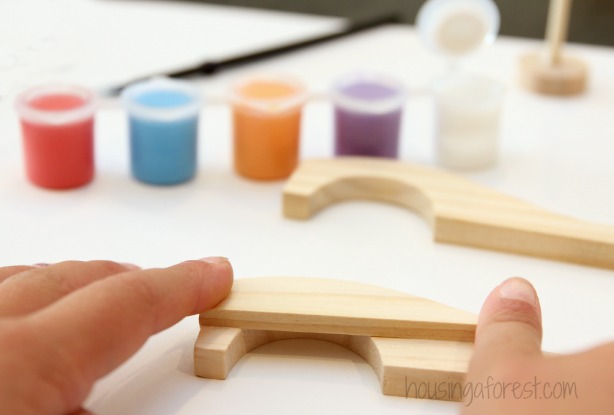
Simple painting tip: For the photo we set the sides in place. However, we actually glued them on after the kids painted them. This made it easy for the kids to paint all the little crevices, especially behind the fenders.
DIY Balloon Powered Wooden Cars ~ simple homemade toy that is so fun!

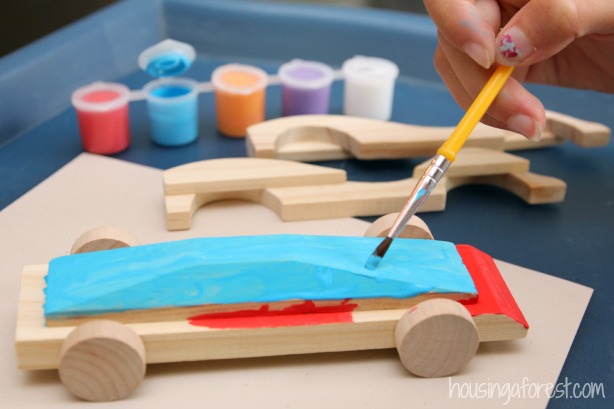
Each car comes with 4 paint colors and 1 container of glue. (We only used a fraction of the paint that was in the little tubs) I love that only one coat of paint was needed to achieve the colors that the kids were looking for, especially once the kids added the detail stickers. These little race cars turned out to be a fun a simple project that is easy enough to complete in an afternoon.

DIY Balloon Powered Wooden Cars ~ simple homemade toy that is so fun!

How to Build a DIY Balloon Powered Wooden Car:

DIY Balloon Powered Wooden Cars ~ simple homemade toy that is so fun!

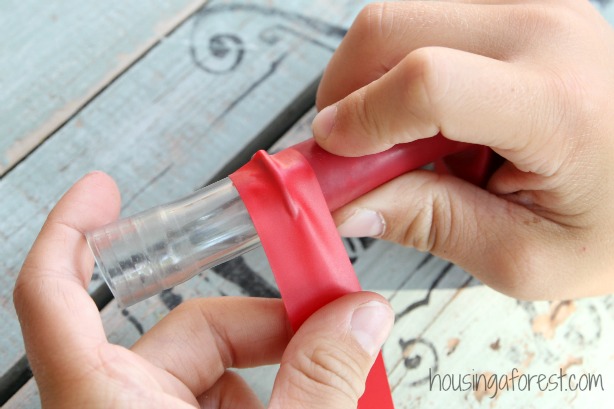
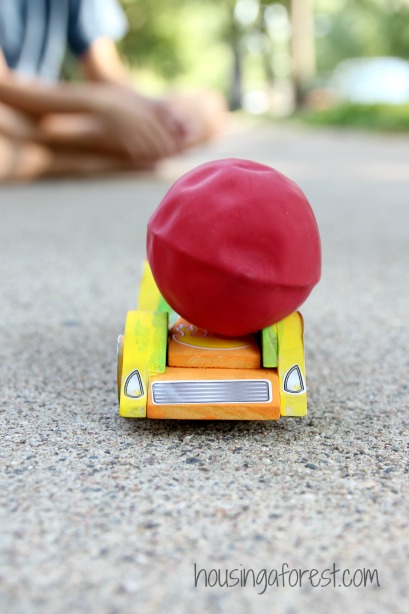
Slide the plastic tube into the balloon so that over half of the tubing is inside the balloon and secure with tape. The extra tube inside the balloon helps to stabilize the balloon, when the air is released. We found without it, the balloon flopped to one side and squeaked like crazy. Honestly my kids loved it, but I think I would have been driven batting in just a few moments. Once we added the extra length of tubing, no more squeaking and a happy mom:)

DIY Balloon Powered Wooden Cars ~ simple homemade toy that is so fun!

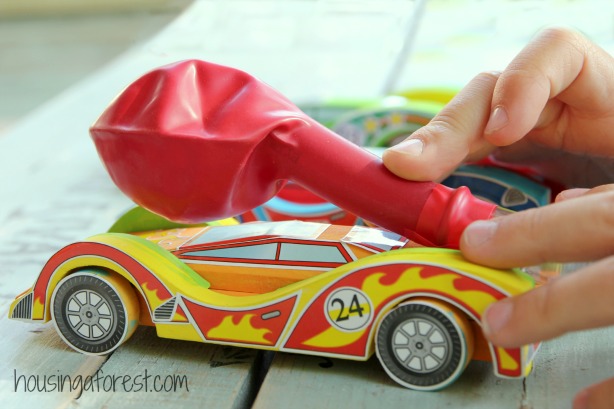
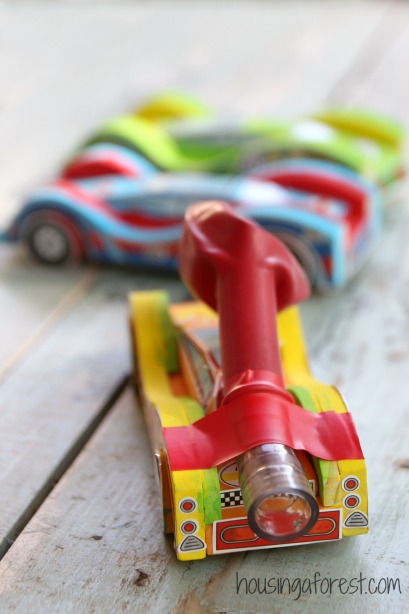
Next tape the balloon and tubing to the back fenders of the race car. The kids wanted the make sure their custom paint job and stickers were not harmed when the tape was removed. Love it!
DIY Balloon Powered Wooden Cars ~ simple homemade toy that is so fun!

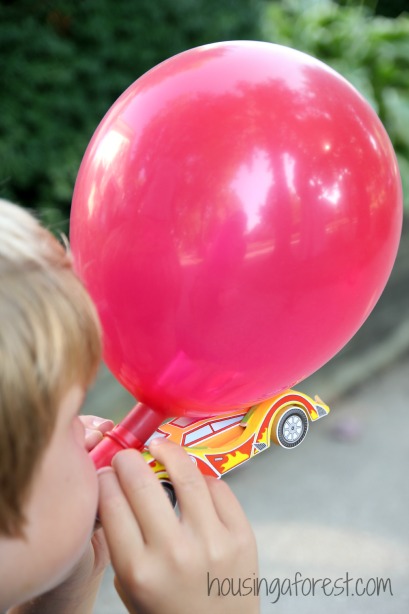
Use the plastic tube to blow up the balloon. It may take a bit of effort, so an adult may have to assist in blowing. The larger tube can make it a bit tricky to blow up. We tried using a drinking straw, but since our cars are wooden, the straw did not force out enough air at one time to make our race cars zoom. We found that the wider opening of the tube worked perfect.
DIY Balloon Powered Wooden Cars ~ simple homemade toy that is so fun!

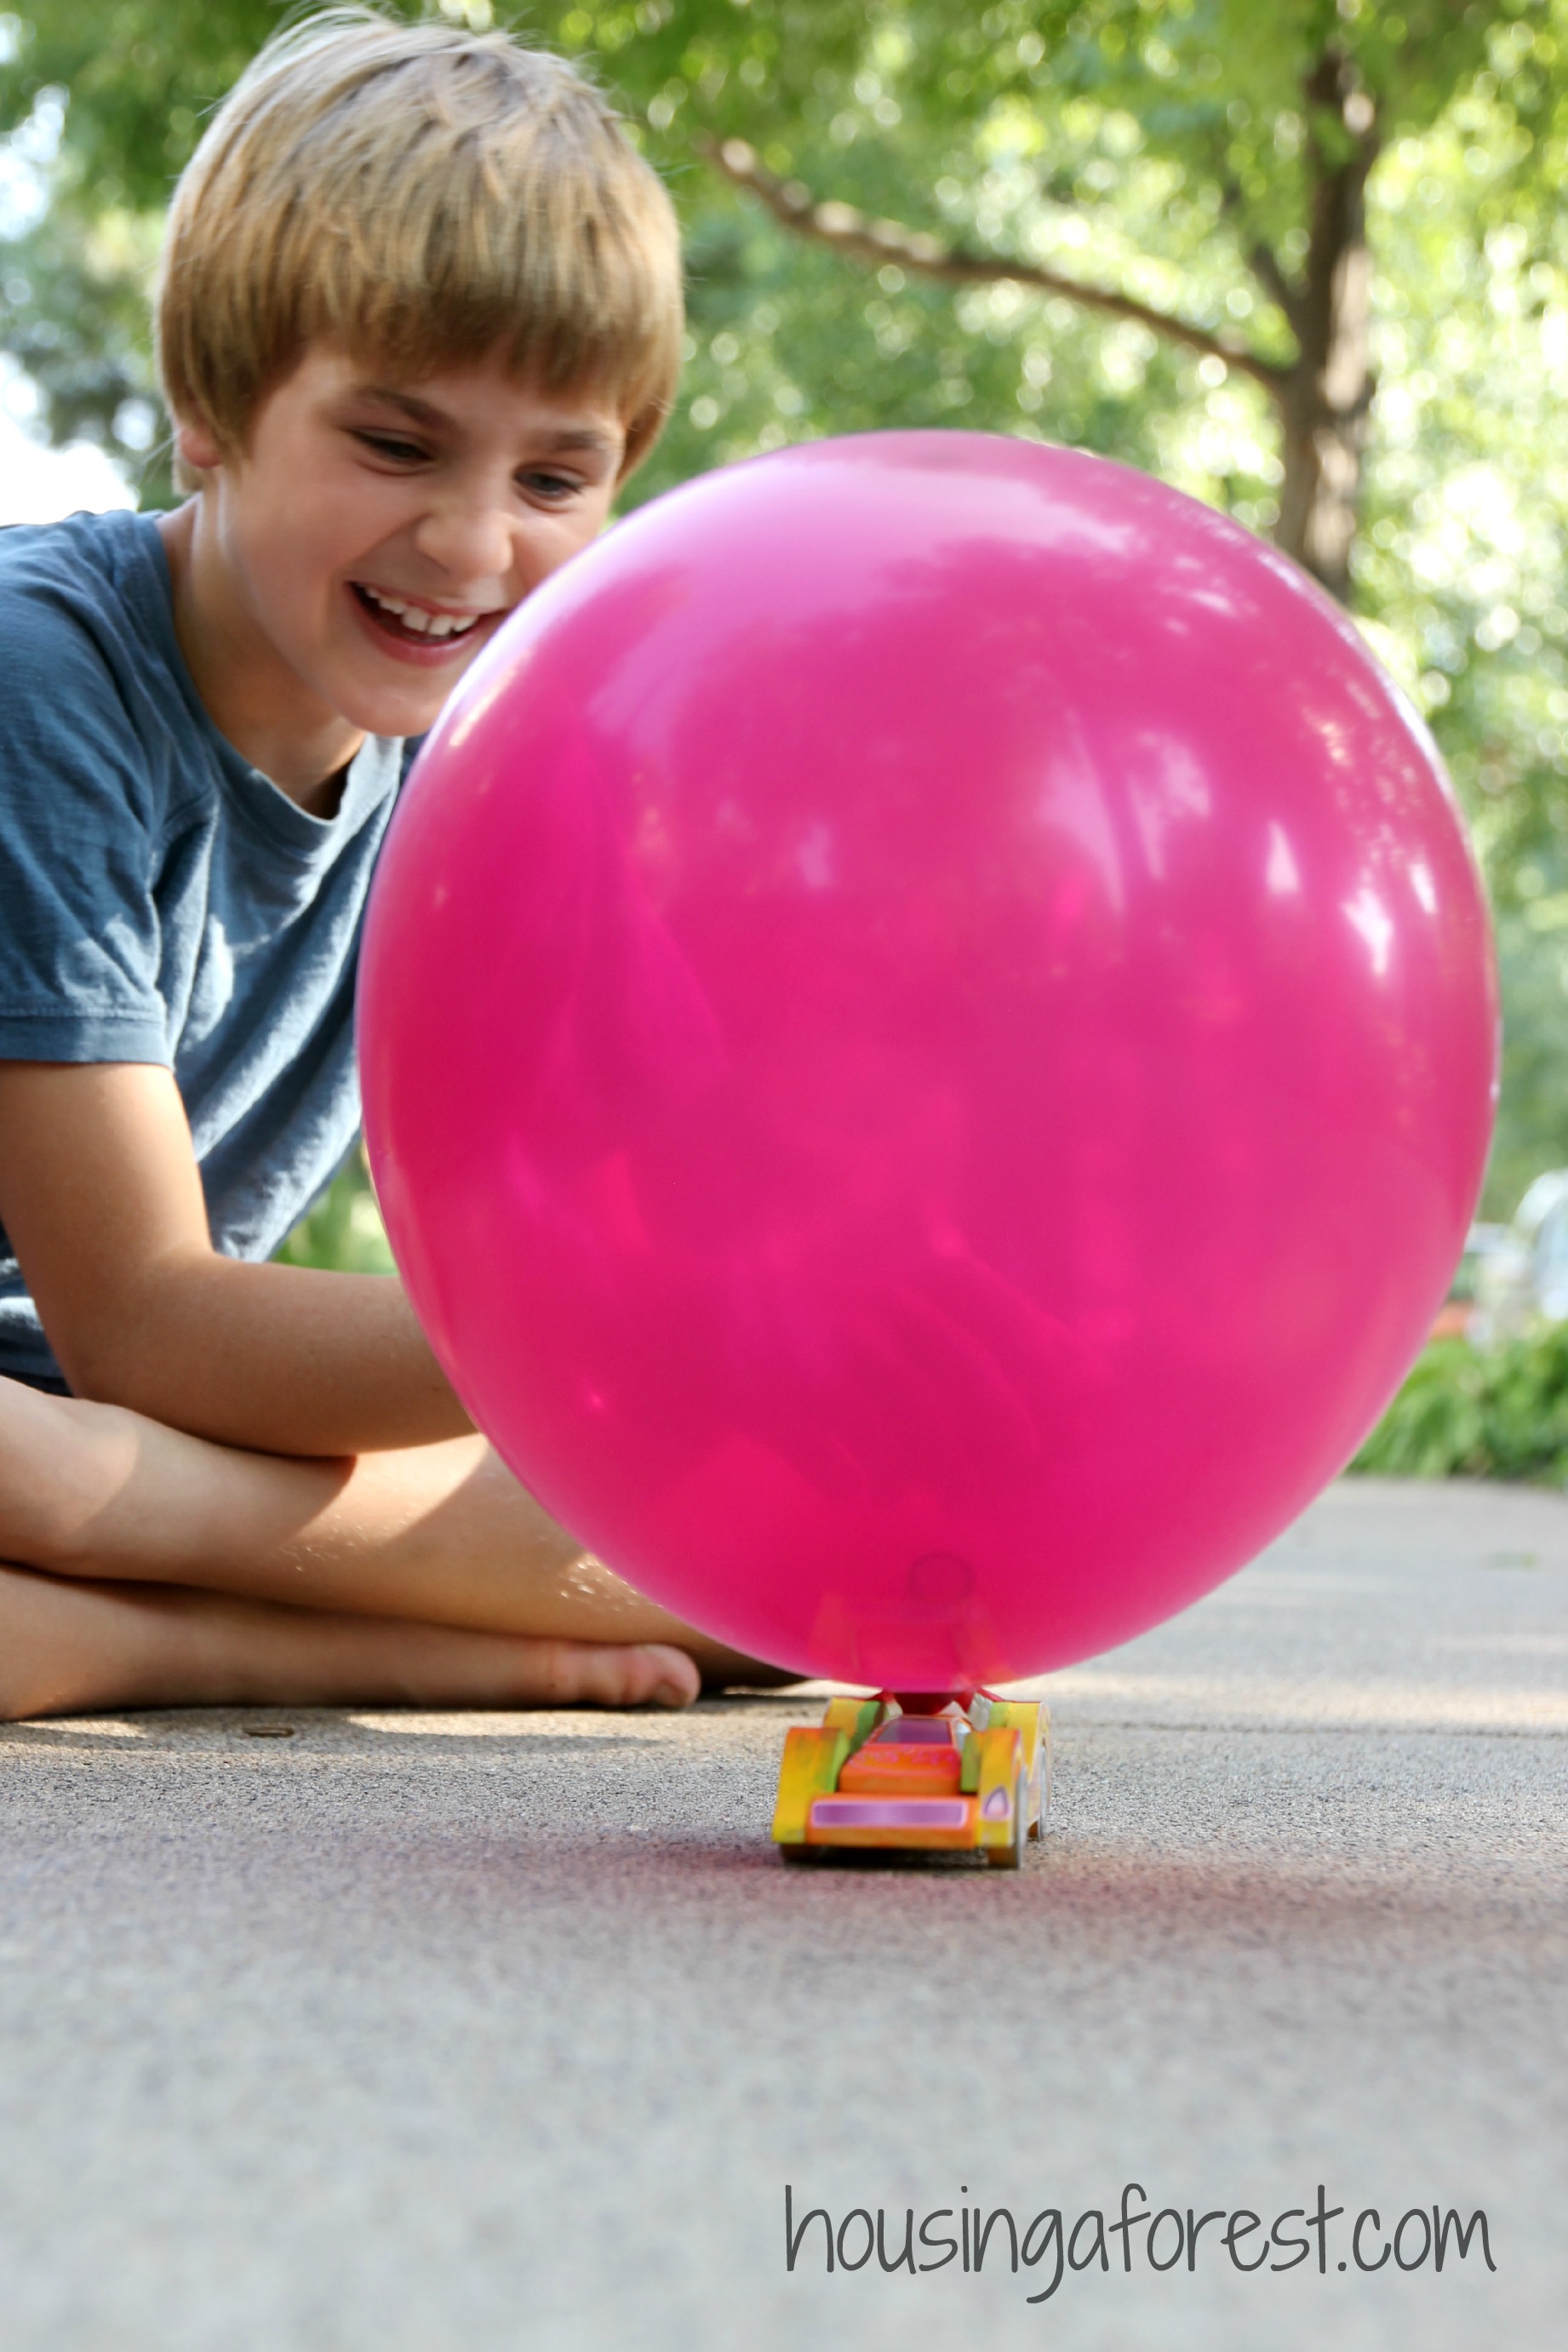
Hold your finger over the end of the tube until you are ready to let your race car speed away. As you can tell, the kids loved it!
DIY Balloon Powered Wooden Cars ~ simple homemade toy that is so fun!

Win Your Own Wooden Car Kit!

Winning your own Made by Me wooden Car Kit is super easy, and I know you want one! Keep reading to find out the rules, I promise entering this competition is super easy.

DIY Balloon Powered Wooden Cars ~ simple homemade toy that is so fun!

To enter the competition…you need to leave a comment on this post by midnight (CST) on Monday September 2nd, 2013, telling us why you would like to win or what you would do with your car kit if you did win. I told you it was going to be easy and painless. I love reading your comments so this is really a bonus for me too:)

My kids will be helping me choose the best answer and that person will win their own Build and Play Kit. We love creativity, so get your thinking caps on and ask your kids to help come up with your best answer! Unfortunately the competition is only open to US residents that are 18 years or older, with a non PO box address (the kit will be shipped via Fed Ex which doesn’t ship to PO boxes).

Competition Rules

  • One entry per person ~ you must be over 18, with a United States non PO box address.
  • You have until midnight (CST) on Monday September 2nd, 2013 to leave your comment.
  • You must give your e-mail address along with your comment, so I can contact you.
  • You must tell me why you want to win this fun Build and Play Wooden Car Kit or what you would do with it. Remember creativity matters, so have fun with your answers!

I will send the winning e-mail address to Craft Project Ideas so that they can arrange the delivery of your Kit.

No sad faces if you don’t win. You can also purchase this wooden car kit at Walmart.

Double Brush Painting

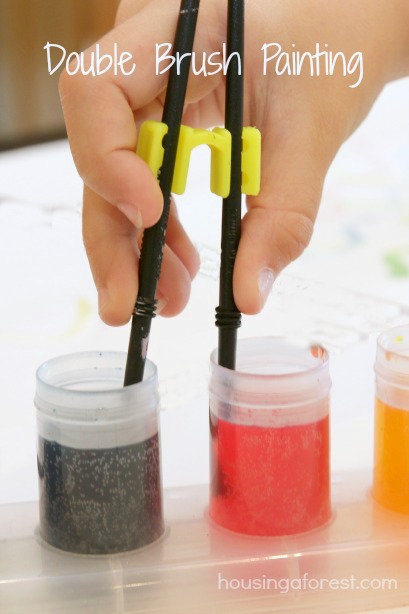
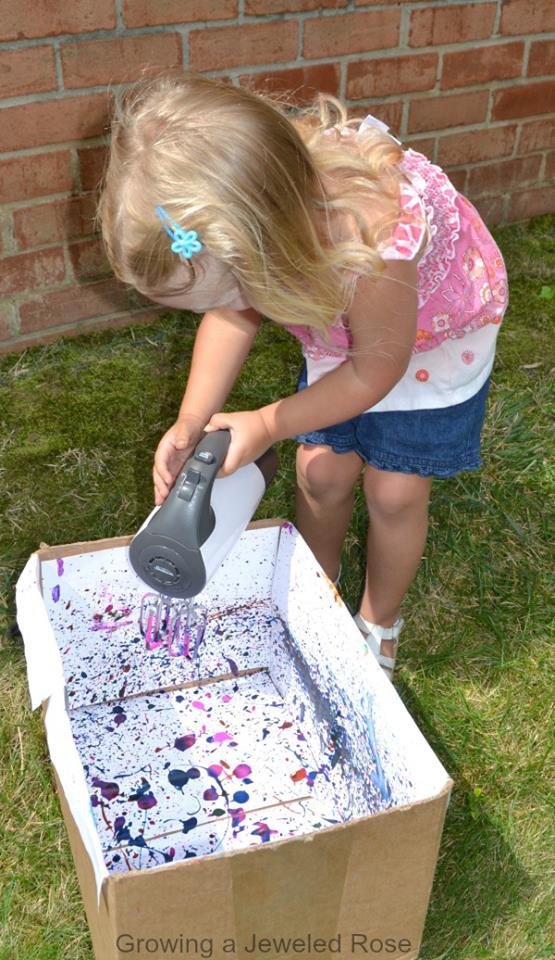
It is time for another Paint and Play weekly challenge.  If this is your first time joining us,  the focus for our weekly series is all about the process, having fun and getting kids excited to create art with fun and unique mediums!  Our challenge this week was to create art with Kitchen Gadgets.  Growing A Jeweled Rose got creative making Electric Art, and we pulled out our Kiddie Chopstick Helpers to create a fun Double Brush Painting technique.

Double Brush Painting ~ fun process art technique that your kids will love.  Its a great way to combine art AND fine motor skills

…………………………………………………………………………………………

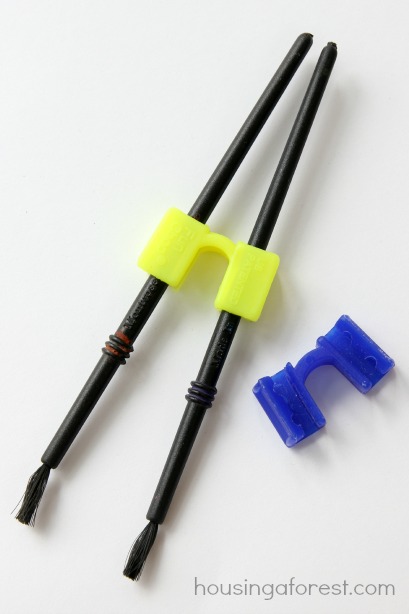
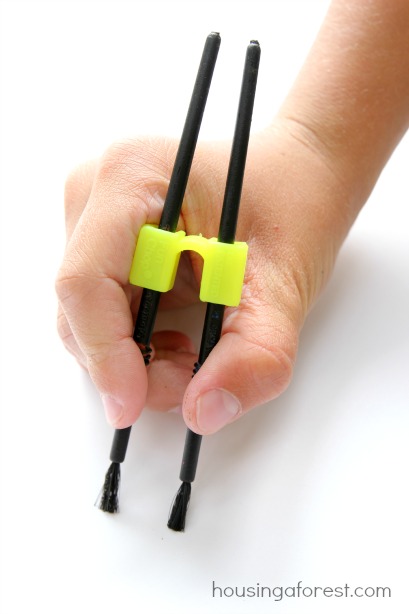
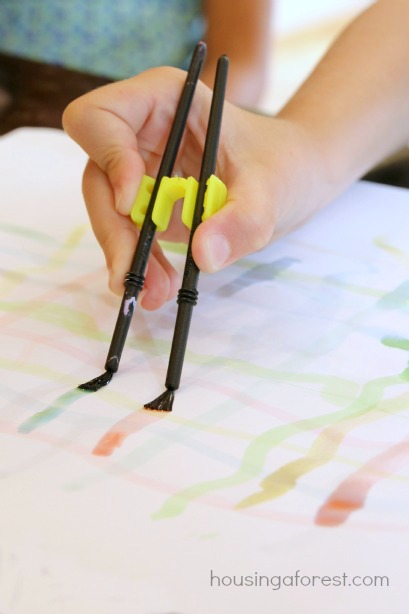
We don’t eat out very often, but my kids love being treated Chinese take-out.  One of our favorite local Chinese restaurants often gives our kids Chopstick Helpers.  The goal with this simple kitchen gadget is designed to help kids get comfortable eating with chopsticks.  My kids and I recently discovered that paintbrushes fit into our Chopstick Helpers perfectly, creating a fun Double Paintbrush.    

Double Brush Painting ~ fun process art technique that your kids will love.  Its a great way to combine art AND fine motor skills

To create your own Double Paintbrush all you need is:

Double Brush Painting ~ fun process art technique that your kids will love.  Its a great way to combine art AND fine motor skills

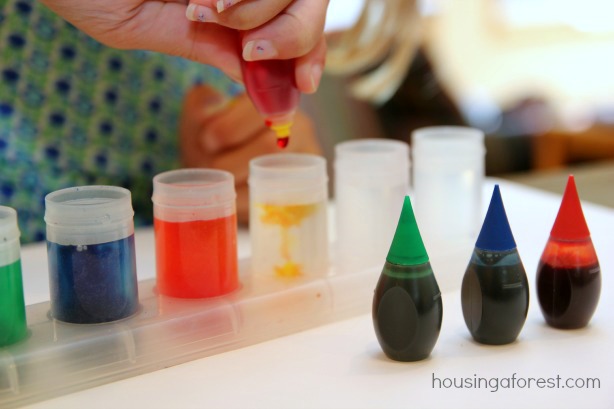
Since our challenge was to create with Kitchen Gadgets, we chose to make our watercolors with food coloring.  Just a few drop of food coloring in some water creates frugal and beautiful watercolors.   Double Brush Painting ~ fun process art technique that your kids will love.  Its a great way to combine art AND fine motor skills

We tried a few different paintbrushes before we found a pair that fit snugly into the Chopstick Helpers.

Double Brush Painting ~ fun process art technique that your kids will love.  Its a great way to combine art AND fine motor skills

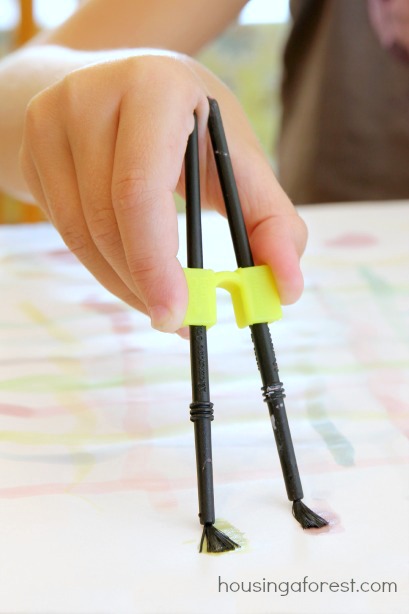
This is a great exercise for kids to work on their fine motor skills.  One paint brush is fun, but two is a blast!

Double Brush Painting ~ fun process art technique that your kids will love.  Its a great way to combine art AND fine motor skills

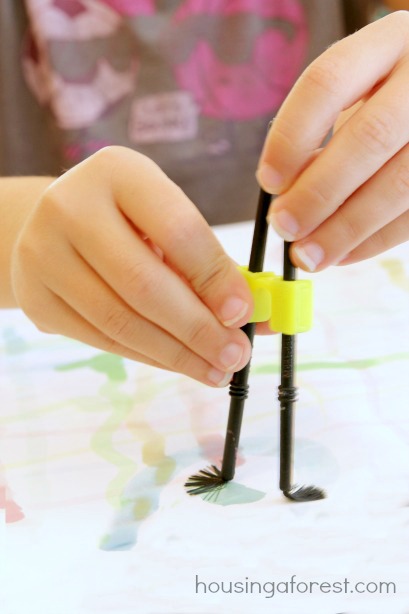
The kids quickly discovered that with a little pressure, you can squeeze the paintbrushes together and release.  This will create a fun and squiggly wavy pattern.

Double Brush Painting ~ fun process art technique that your kids will love.  Its a great way to combine art AND fine motor skills

We had so much fun creating with our simple double paintbrushes.  The patterns that the kids created were beautiful and the process is something that we will play with again.

…………………………………………………………………………………………

I love this fun Electric Art from Growing A Jeweled Rose.  My kids enjoy using an electric drill, so I know that they would love creating art with a hand mixer!

Electric Art

…………………………………………………………………………………………

Don’t miss out on any of our Paint and Play series.

Our kids have had so much fun creating process art.  If you are looking for some fun inspiration, check out what we have created with balloons, spin art, pendulums, candy, ice, marbles, touch painting, bubbles and school supplies.

 Make sure you stop back in next week for more Paint and Play!

…………………………………………………………………………………………

Compass Painting ~ Fun back to school art!

Last week we created this simple Compass Painting which inspired out post today.

If you love process art like us, then check out my Painting Without Brushes Pinterest board.  It is packed full of fun ideas.


DIY Duct Tape Hobby Horse

Today, I am super excited to have Meri from Meri Cherry guest posting on Housing A Forest.  I recently stumbled on Meri’s blog and I am so glad that I did.  She is one creative lady and I have spent quite some time scrolling through her blog!  As you know I am all about creating from our recycle bin, so I immediately fell in love with this creative DIY Duct Tape Hobby Horse that Meri is sharing with us today! Read on for her full tutorial.

…………………………………………………………………………………………….

diy duct tape hobby horse

We’ve had a lot of fun with spaghetti this summer, which has lead to an unusual amount of spaghetti boxes laying around the house. It seemed a shame to throw them all out, so we got creative. Meet Henry. I always loved hobby horses as a kid and to make one for my daughter, Gigi, was a special treat. She has ridden Henry all over town and it cracks me up every time. The materials are simple. You’ll need three spaghetti boxes, duct tape, which we use for all kinds of things, a dowel (found at most craft stores) and an exacto knife. This is the first one we’ve made. I’m excited to make more for gifts and play dates. I can see a whole colorful gang of these guys hanging in our backyard.

diy duct tape hobby horseHere’s how to do it.

Step 1 ~ Duct tape two boxes together for the head and one separate for the neck. Cover each section completely with tape.

Step 2 ~ Add the nostrils to the two boxes taped together on either side. I cut a piece of duct tape, placed it on the box and then with an exacto knife I cut out the nostril shape and peeled the tape off, like a stencil.

Step 3 ~ Tape both boxes together in the shape of a horse, leaving about an inch or so at the top for the ears.

Step 4 ~ Cut two pieces of duct tape the length of one box and tape together tape side to tape side. Cut fringe along the tape and tape it on the length of the single box for the mane.

Step 5 ~ Tape two pieces together tape side to tape side and cut out ears. Tape the ears onto the horse.

Step 6 ~ Cut out a mouth from tape or something else. I used sticker paper for my mouth and drew a mouth on it with sharpie. The mouth could be done in many different ways.

Step 7 ~ Add eyes. I used cupcake holders and large googly eyes. You can do it any way you choose. Get creative!

Step 8 ~ With an exacto knife, cut an x at the bottom of the single box for the dowel. Stick in the dowel until it doesn’t go in any further. Tape the bottom of the box to the dowel and add a few pieces of tape around the dowel where it meets the box to finish it off.

Step 9 ~ Ride.

diy duct tape hobby horsediy duct tape hobby horse

Watching Gigi ride Henry was pretty hilarious. She galloped around and around our backyard making horsey noises for twenty minutes. It’s been so beautiful outside lately. Our backyard has become a haven for all kinds of art play and creativity. With summer coming to an end, I am treasuring every moment.

diy duct tape hobby horsediy duct tape hobby horse

So many times I have had ideas that just sit in my mind or on a list and never make it to fruition. I guess that’s life. Other times, ideas snowball and become this great big thing that I never expected. I am so glad Henry made it to life. He’s the perfect addition to the family and worth every ounce of rainbow spaghetti.

diy duct tape hobby horse

Meri Cherry

Follow along and join in the fun at:

…………………………………………………………………………………………….

Thanks so much for sharing Meri, I can’t tell you enough how much I love this simple DIY Hobby Horse! You combined 2 of my favorite things; recycling and Duct Tape!  What a wonderful recycled toy.  We all love comments, so why not pop over and visit Meri Cherry and tell her how much you enjoyed her post on Housing A Forest.

Here are a few of my favorite posts from Meri Cherry to get you started:
The Invention Box

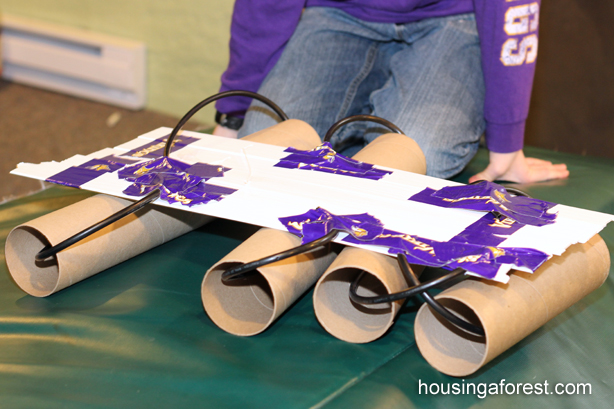
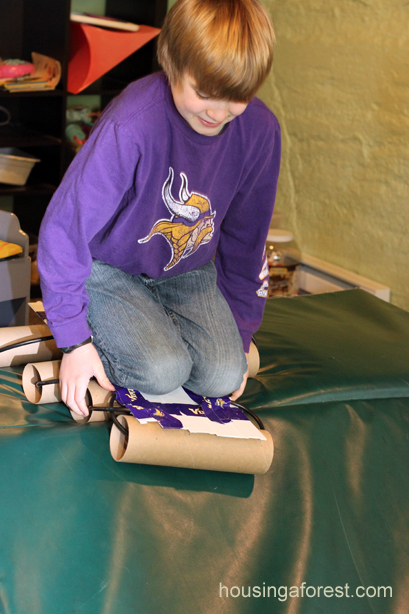
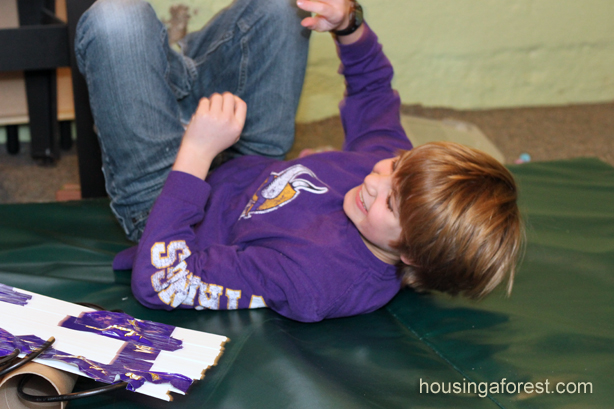
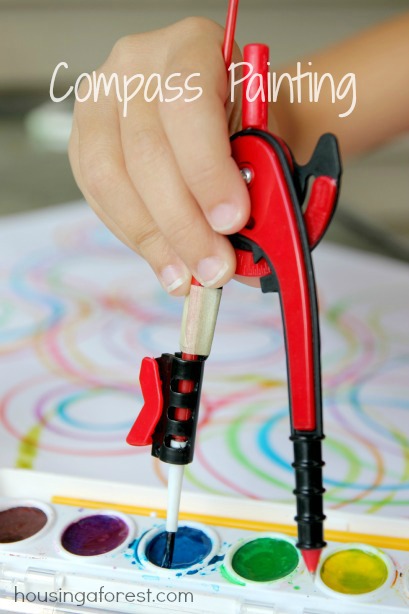
I love watching kids invent and create. The other day, I heard LOTS of silly giggles coming from downstairs and I just had to share with you what the kids had created.  Let me start by saying, we have a box full of odds and ends that are all fair game for kids to create with.  If the kids are looking to build something, The Invention Box is their first stop.  It is packed full of all those loose parts and interesting items that no longer have a home.  Check out the kids latest invention…an indoor sled.

Encourage your kids creativity with a simple Inventions Box ~ perfect place for kids to let their imaginations run wild

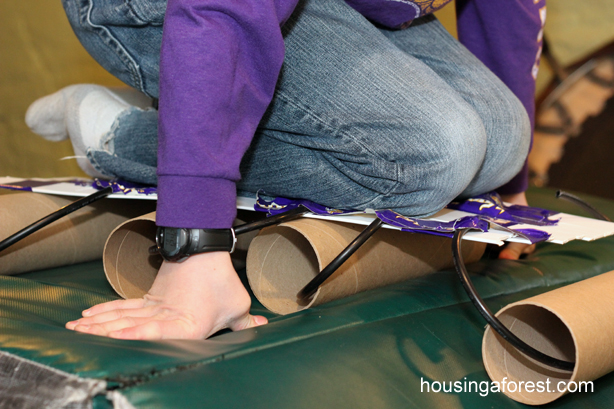
If you are wondering what this wonderful sled like contraption is built from, well so am I;) From what I can tell, they used some large cardboard tubes, plastic coated wire, slats from a old window blind and LOTS of Vikings Duct tape.

The kids wanted to create something that would roll/slide down our indoor wrestling mat that they had stacked on top of the dresser.  I did not investigate how the slide was set up too closely, but I think that they had a rubber tub on top of the dresser as well, just to get a little more height.  According to them, they created the ultimate slide! It is times like these that remind me how much fun it is just being a kid!  They don’t need expensive toys, just a little imagination!

Encourage your kids creativity with a simple Inventions Box ~ perfect place for kids to let their imaginations run wild

If you don’t already, I would totally encourage you to start a simple Inventions Box. It does not have to be anything fancy, a simple cardboard or plastic bin works perfect.  Let the kids know that anything in the box is fair game for them to create with.  Stand back and watch the magic happen.

Items that are perfect for an Inventions Box:

  • Paper cups and plates
  • Pie tins
  • Cupcake liners
  • Straws
  • Foil
  • Cotton balls
  • Balloons
  • Old CD’s
  • Cereal boxes
  • Plastic containers
  • Tin cans
  • Bottle tops
  • Toilet and paper towel tubes
  • Milk cartons
  • Bubble wrap
  • Egg cartons
  • Yarn
  • Gems and sparkly items
  • Pom poms
  • Clothespins
  • Pumps from shampoo bottles
  • Missing parts from games
  • Wire and pipe cleaners

If you find something interesting laying around the house that does not serve a purpose anymore; throw it in the box!  You might be surprised at how the kids re-purpose it.

My kids also have full access to tape, glue, staples, string etc.  You never know what adhesive will be best for the current project, so having lots on hand is a good idea.  The dollar store is a great place to stock up on these items.

Encourage your kids creativity with a simple Inventions Box ~ perfect place for kids to let their imaginations run wild

I absolutely love this simple creation.  It may not have worked out exactly how they intended it to, but boy did they have fun!  It was so sweet watching the kids play for hours with something they made.  The best part is that the whole creation (minus the tape) would have been thrown into garbage or recycling if we did not have an inventions box.  Free creations are totally the best!

Encourage your kids creativity with a simple Inventions Box ~ perfect place for kids to let their imaginations run wildDo you have and Inventions Box in your house?  I would love to add some new items to our Invention Box, what are some of your kids favorite things to create with?

If you are looking for more Inventions Box ideas or Junk Drawer Creations check out my ABC’s of crafting on a budget.  Lots of simple ideas that your kids will love!