Fall Centerpiece Craft for Kids

Autumn Paper Pulp Branch ~ Fall Kids Craft
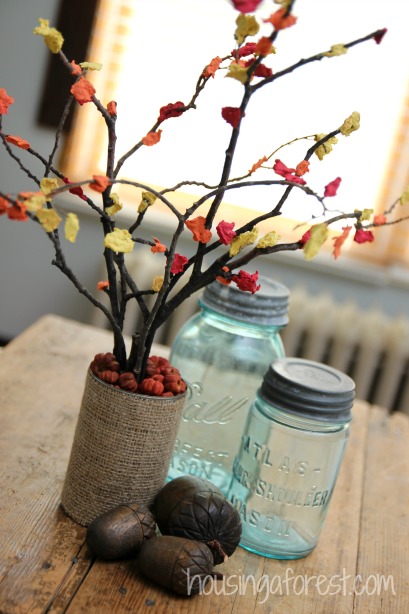
Fall Centerpiece Craft for Kids ~ Simple craft and sensory experience rolled into one. This is not your traditional tissue paper craft. Check out what was used to create the leaves! My kids LOVED this!

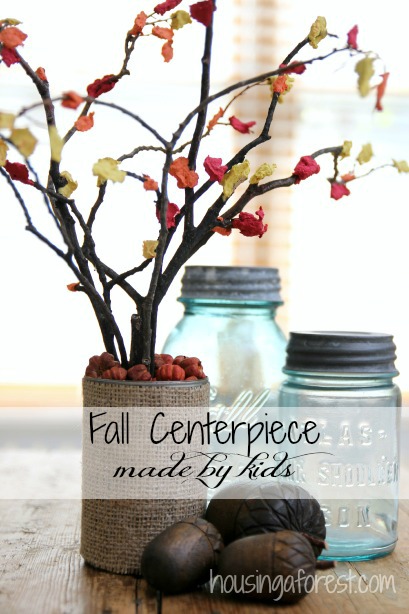
Its Day 5 of our Fall Play Recipe Series.  If you missed any of our series, check out our edible Pumpkin Spiced Marshmallow Dough, Homemade Cranberry Fall Paint, Glowing Bread Clay and our Erupting Fall Playdough.  Today we are sharing a fun Nature Play Recipe.  Our adorable Fall Centerpiece Craft for Kids is so simple to make and will look great as part of your Thanksgiving display.
Fall Centerpiece Craft for Kids ~ Simple craft and sensory experience rolled into one. This is not your traditional tissue paper craft. Check out what was used to create the leaves! My kids LOVED this!

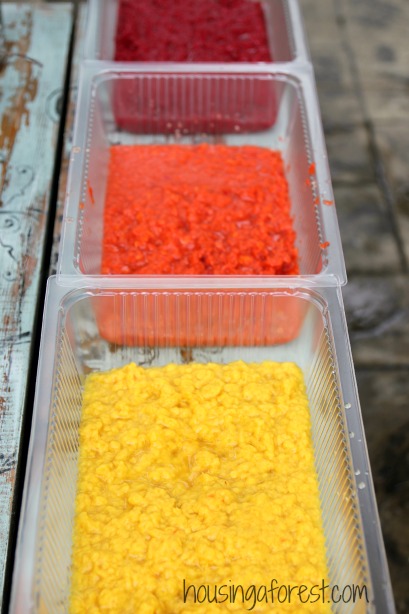
Making Paper Pulp is really simple…

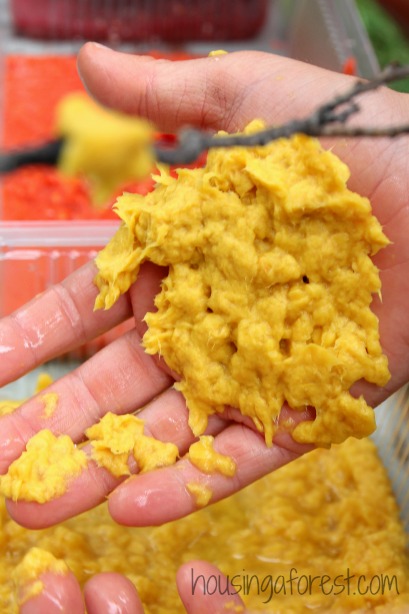
  • Have the kids sort paper scraps by colors into separate bowls and tear them into little pieces (we actually cheated and used the paper shredder).  Since we were making fall leaves, we used yellow, orange and red paper.
  • Pour boiling water over the shredded paper and let it sit for a few hours.  This will help loosen the paper fibers and make it easier to blend it into pulp.
  • Scoop small batches of softened paper and water mixture into a blender and pulse into a smooth pulp.
  • Super easy!

Fall Centerpiece Craft for Kids ~ Simple craft and sensory experience rolled into one. This is not your traditional tissue paper craft. Check out what was used to create the leaves! My kids LOVED this!

The watery pulp is so fun to play with.  My kids described it as reaching into a squishy, spongy, mushy, cold material that totally rocks!  Ha!  They played in the pulp for quite a while, before we started to create our Fall Trees.
Fall Centerpiece Craft for Kids ~ Simple craft and sensory experience rolled into one. This is not your traditional tissue paper craft. Check out what was used to create the leaves! My kids LOVED this!

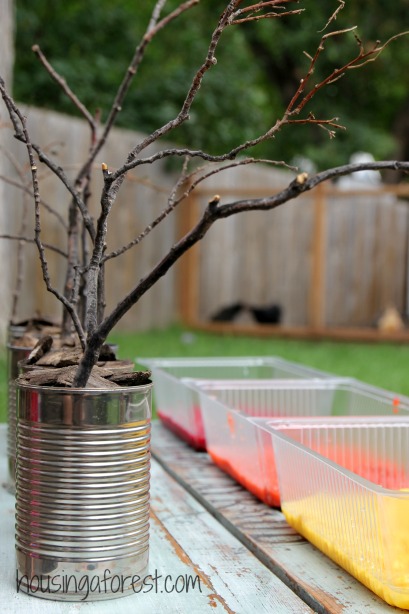
The kids collected tree branches and wood chips from our back yard and arranged them in a tin can (make sure your can does not have sharp edges).

Fall Centerpiece Craft for Kids ~ Simple craft and sensory experience rolled into one. This is not your traditional tissue paper craft. Check out what was used to create the leaves! My kids LOVED this!

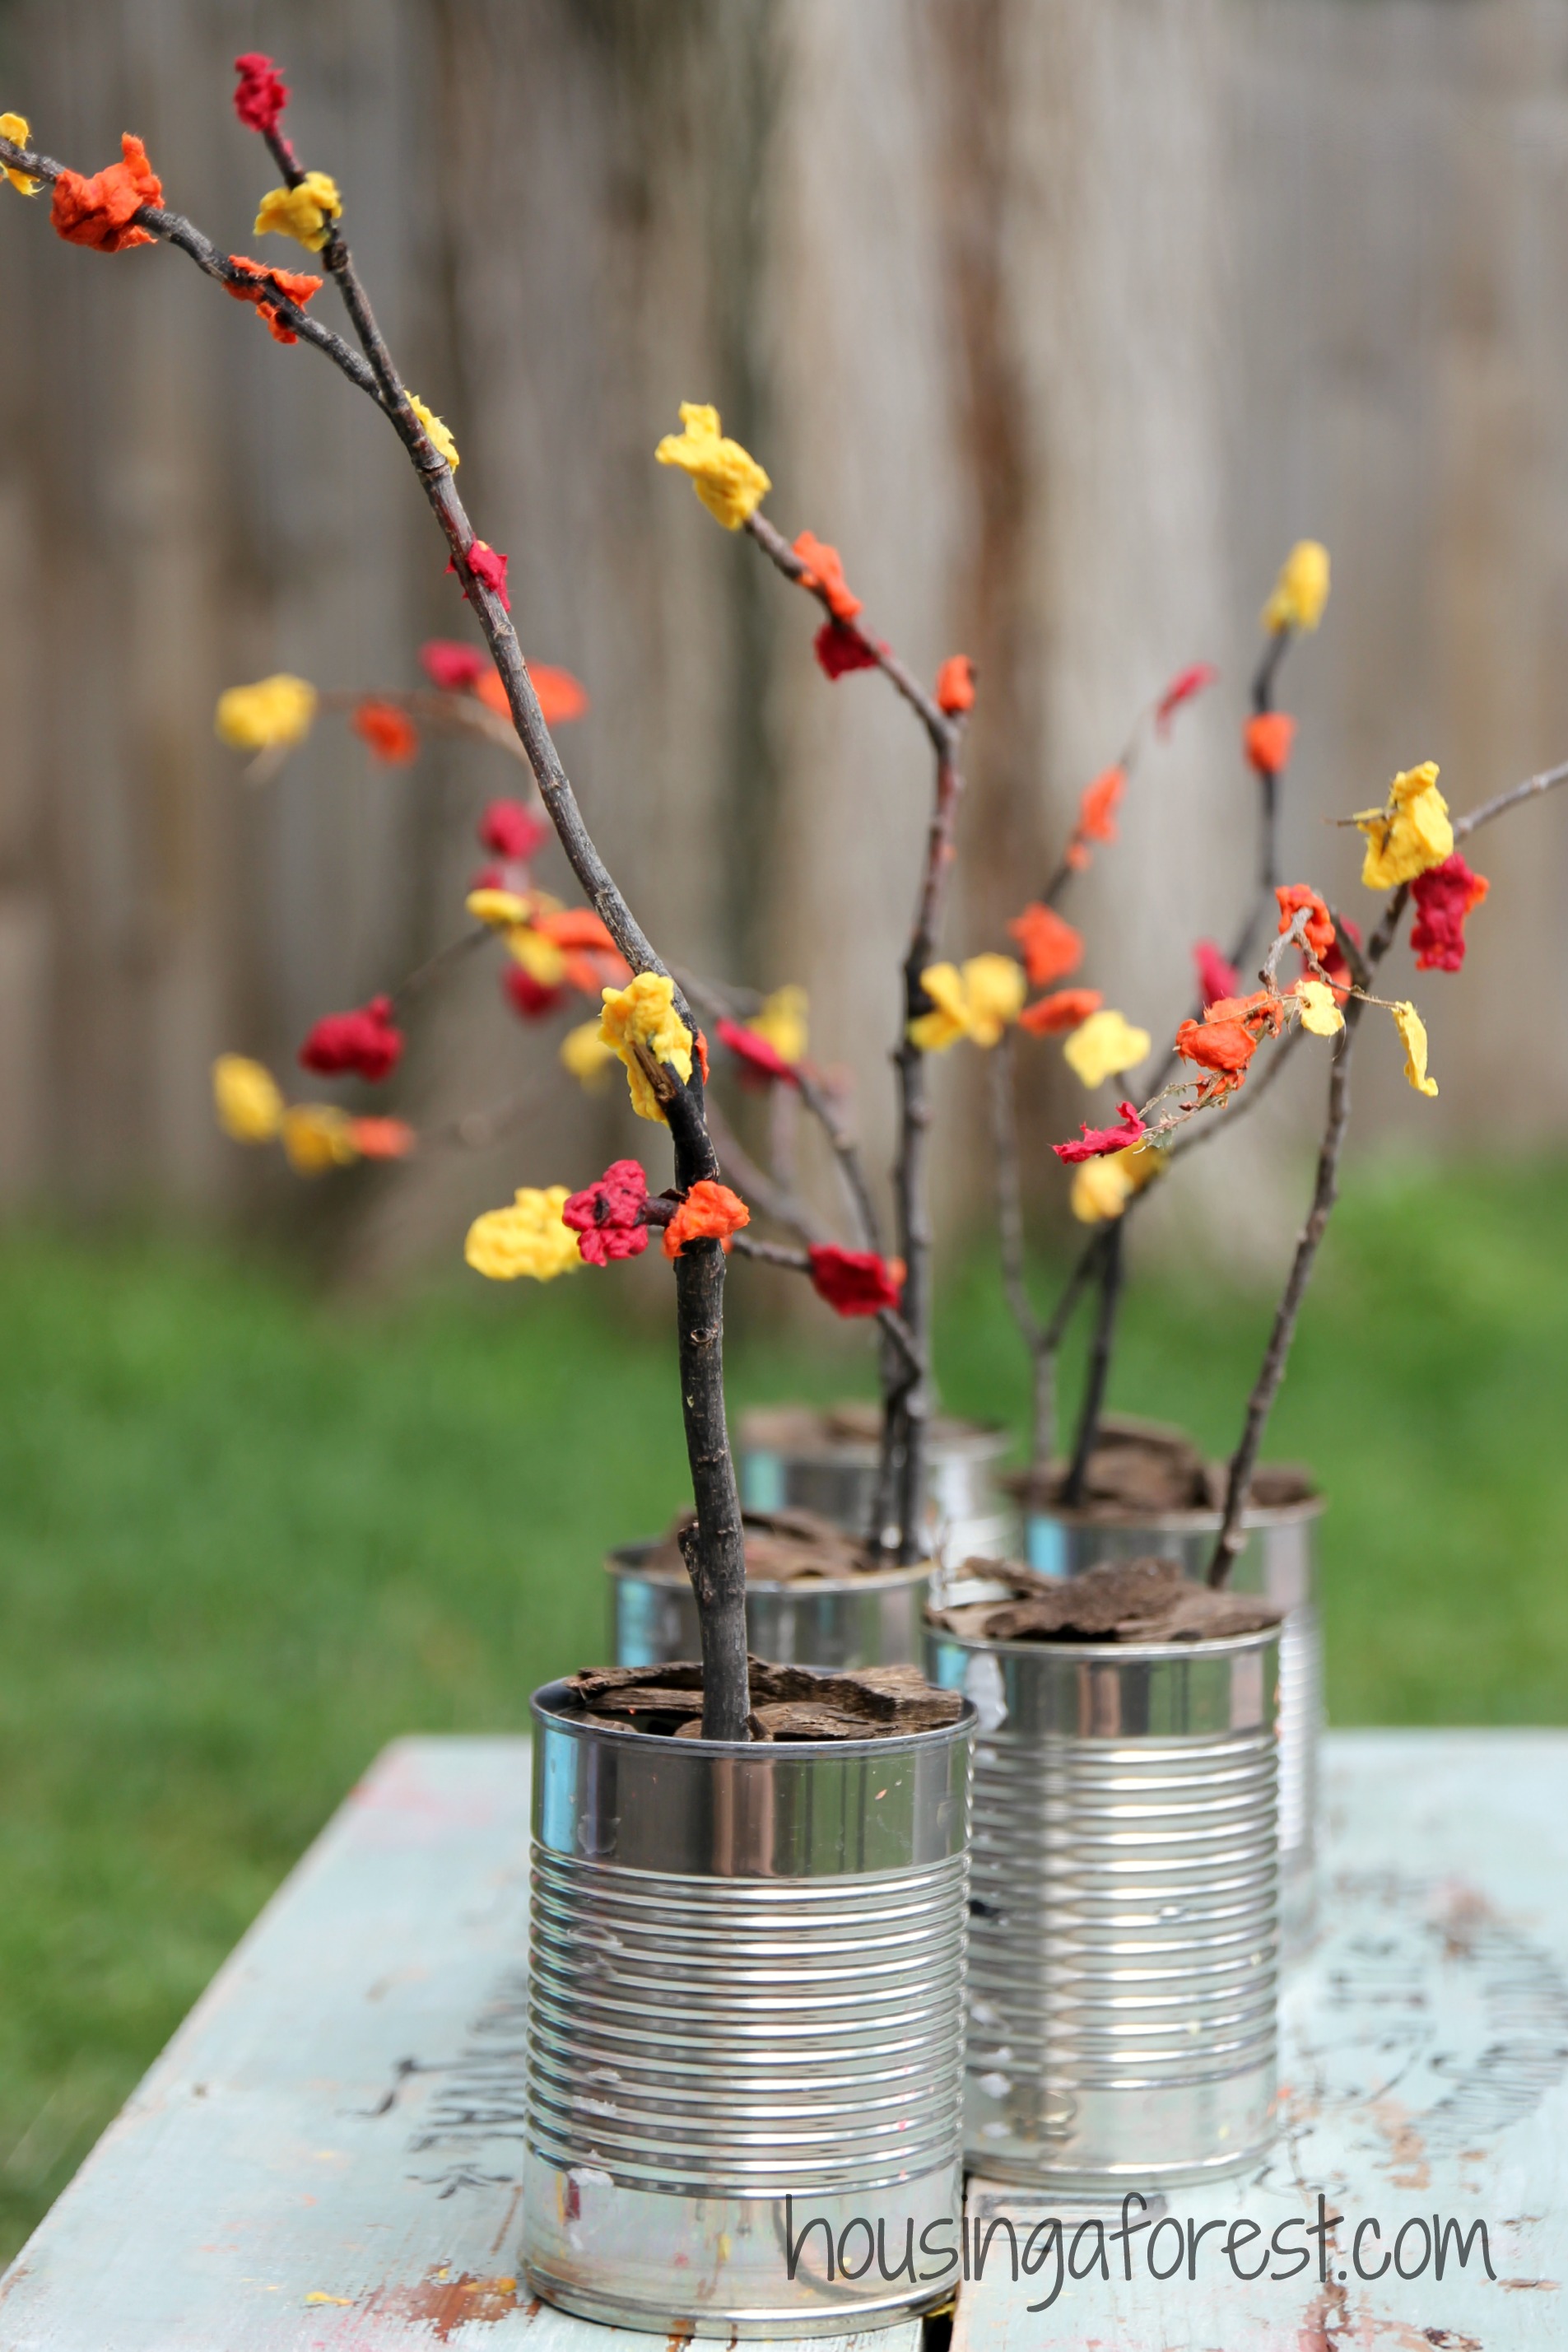
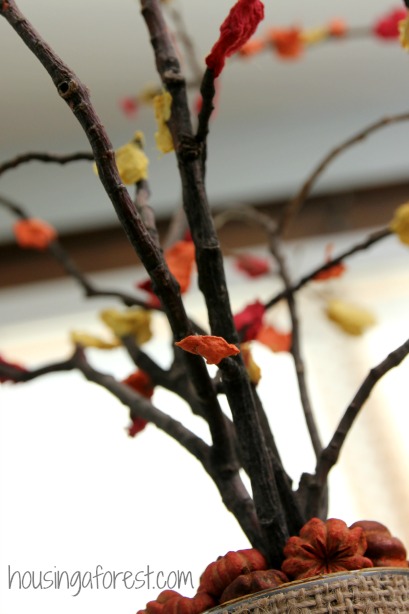
Once the kids are ready to start creating, have them squish the wet paper pulp onto the branches.  This will create the look of brightly colored fall leaves.  How simple is that!  The paper will dry and have a wonderful texture.

Just to be clear, we are simply adding the wet paper directly onto the branch.  We did not adding anything to the pulp/water mixture.  I love how beautiful and textural the paper pulp looks when it is dry.

Fall Centerpiece Craft for Kids ~ Simple craft and sensory experience rolled into one. This is not your traditional tissue paper craft. Check out what was used to create the leaves! My kids LOVED this!

The less planned the leaves are, the better it looks.  Just sit back and let the kids create:) Our little branches supported thick leaves, small leaves, chunky leaves, skinny leaves and each one looked great!
Fall Centerpiece Craft for Kids ~ Simple craft and sensory experience rolled into one. This is not your traditional tissue paper craft. Check out what was used to create the leaves! My kids LOVED this!

Once the kids have deemed their branch finished, set it in the sun to dry.  Depending on how thick the pulp is, will depend on drying time.  Ours were completely dry by morning.

Fall Centerpiece Craft for Kids ~ Simple craft and sensory experience rolled into one. This is not your traditional tissue paper craft. Check out what was used to create the leaves! My kids LOVED this!


I can’t believe how beautiful our little Fall branches turned out!  They will make the perfect Thanksgiving centerpiece.


The dried paper pulp is stunning and the kids were so proud of their creations!  I think we may need to make a larger version for my front entry.
Fall Centerpiece Craft for Kids ~ Simple craft and sensory experience rolled into one. This is not your traditional tissue paper craft. Check out what was used to create the leaves! My kids LOVED this!

Just remember that we did not add anything to the paper, just water.  The dried pulp with turn back into a squishy pulp if it get wet.  You could coat your trees with a spray varnish if you are worried about them getting damaged with water.  This is an inside decoration for sure;)
Fall Centerpiece Craft for Kids ~ Simple craft and sensory experience rolled into one. This is not your traditional tissue paper craft. Check out what was used to create the leaves! My kids LOVED this!

This beautiful project ended up being totally free!

  • Paper ~ My kids are always cutting and creating, so we started a little scrap paper bin.  It a bin where we collect all the little bits of paper that would normally end up in the recycle “just in case” we need them.  I love that we were able to find all the colors we needed.
  • The branches and wood chips were found in our backyard
  • Tin cans ~ recycle bin
  • Burlap ~ We love creating with coffee bags.  I get them for free from my local coffee shop.  One of my favorite crafting secrets:)
Fall Centerpiece Craft for Kids ~ Simple craft and sensory experience rolled into one. This is not your traditional tissue paper craft. Check out what was used to create the leaves! My kids LOVED this!

For more fun inspiration follow my Art and Play Recipe board on Pinterest.

Be sure and visit these other fantastic sites to see their Nature play, and come back each day this week for more fall recipes for play!

 Kid-Made Fall Nature Wreath from Fun at Home with Kids

 Fall Sensory Jars from Blog Me Mom

Sparkly Clean Mud Recipe from Learn Play Imagine
Erupting Fall Playdough

Fall Playdough Recipe ~ Scents of Fall

I am loving our Fall Play Recipe Series!  If you missed the first few post, let me catch you up.  So far we made edible Pumpkin Spiced Marshmallow Dough, painted with Homemade Cranberry Fall Paint and created with Glowing Bread Clay.  Today we are sharing fun ways to incorporate the Scents of Fall into our play.  I love the smell of fall, so we added it to our Erupting Fall Playdough.  I have to say it smells delicious and has a fun magical element that you kids will love!

Erupting Fall Playdough Reicpe ~ Fall sensory Play

Our Erupting Fall Playdough was inspired by Mess for Less’s super fun recipe.  I love the idea of making a play dough with baking soda and then watching it erupt, and I knew my kids would love it too.  We used a few different ingredients, so make sure you check out Vicky’s fun recipe for more play inspiration! (you can find our Erupting Fall Playdough recipe is at the bottom of this post)

Erupting Fall Playdough Reicpe ~ Fall sensory Play

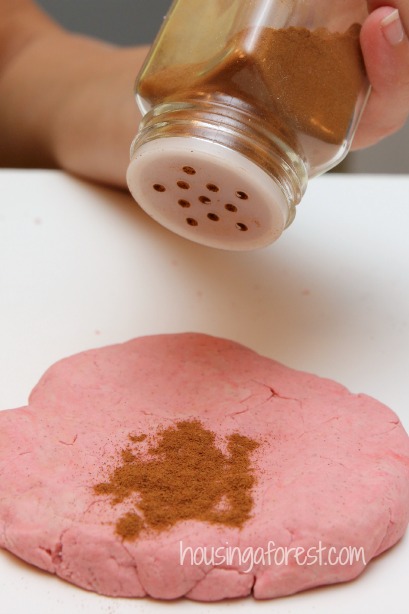
We divided our dough into 4 balls.  Each playdough ball received a different color and spice treatment.  The smell of the spices was amazing as the kids were playing.   It smelled just like someone was baking a yummy dessert.

Red food coloring and 1 tbsp of Cinnomon = Spiced Cinnamon Playdough

Orange food coloring and 1 tbsp of pumpkin pie spice = Spiced Pumpkin Pie Playdough

Yellow food coloring and 1 tbsp of ginger = Spiced Ginger Playdough

3 tbsp of leaf glitter (real leaves crumpled into small bits) = Leaf Glitter Playdough

Erupting Fall Playdough Reicpe ~ Fall sensory Play

In the fall, the kids love creating colorful Leaf Glitter and adding it to everything.

Erupting Fall Playdough Reicpe ~ Fall sensory Play

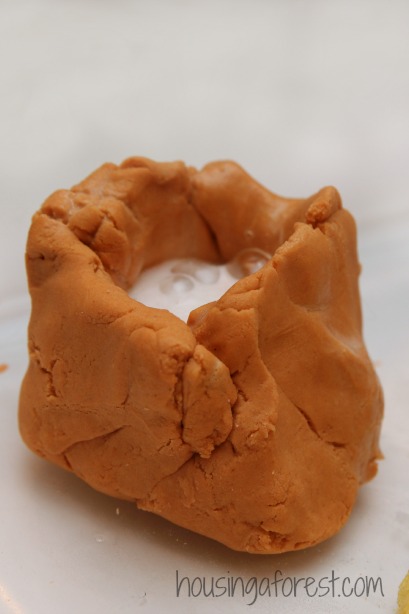
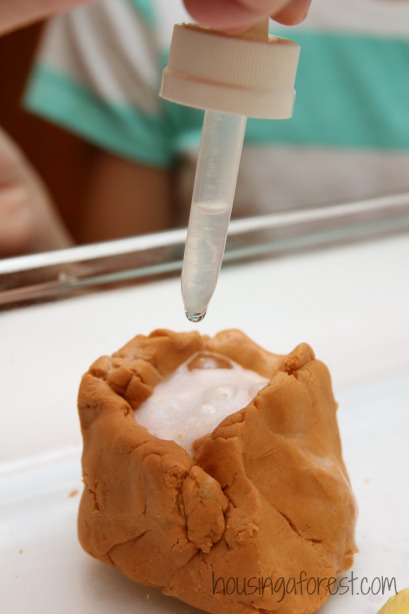
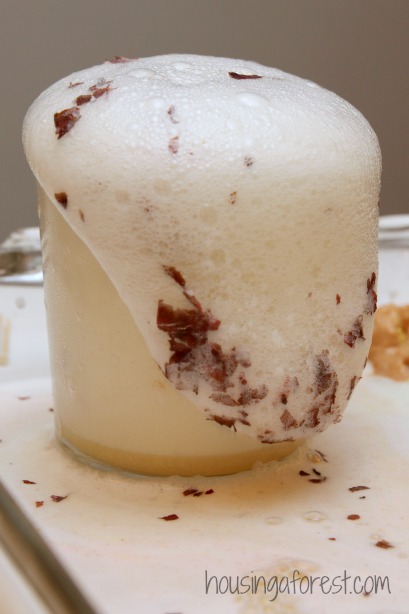
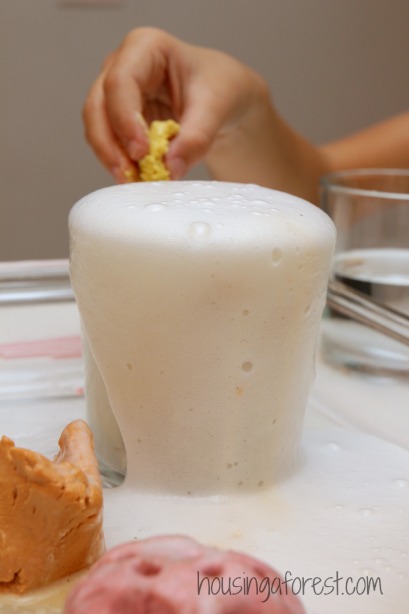
Our dough is primarily made up of baking soda…I bet you know where this is going:)  All you need to do is add vinegar and wonderful erupting bubbles form out of nowhere.  We have made a ton of volcano’s and played with baking soda and vinegar in lots of different ways (including decorating our Easter Eggs), but this is the first time we actually made a dough that erupted.   Let me tell you the kids thought this totally rocked!

Erupting Fall Playdough Reicpe ~ Fall sensory Play

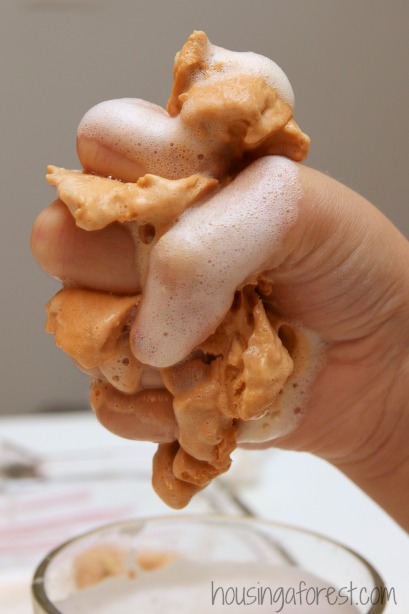
The kids loved watching the bubbles form everywhere they dropped vinegar.  It was like magic.  This was our Spiced Pumpkin Pie Dough, and it smelled just like pumpkin pie as it was erupting.

Erupting Fall Playdough Reicpe ~ Fall sensory Play

The bubbling/foaming face makes me smile every time I see it!  OK its a little creepy, but in a creepy cool kind of way;)

Erupting Fall Playdough Reicpe ~ Fall sensory Play

We got a surprise when the kids added chunks of the Leaf Glitter Dough to the vinegar.  Colorful leaf glitter spill over the edge with the erupting bubbles.  So fun!  This was by fall the favorite dough to erupt.

Erupting Fall Playdough Reicpe ~ Fall sensory Play

The kids also loved playing with the dough after it was done erupting and the bubbles settled down.  It had a softer, squishier texture, but still held together nicely.  Gooey, squishy fun that perfect for Halloween.

Erupting Fall Playdough Recipe:

  • 1/2 cup Glue
  • 1/2 cup Baking Soda
  • 3 TBS Dish Soap ~ makes the eruptions even bubblier!
  • 3 TBS Flour (just enough to remove the stickiness)
  • Leaves, food coloring, cinnamon, pumpkin pie spice and ginger for added sensory fun!

I love that our Erupting Fall Playdough is No Cook, making it simple enough for your kids to create.  Plus my kids are all about trying new science experiments, so this seemed like the perfect opportunity.  We had a blast playing with our fun fizzing and erupting dough and will be trying it again soon.

Erupting Fall Playdough Reicpe ~ Fall sensory Play

For more fun inspiration follow my Art and Play Recipe board on Pinterest.

I am loving all the creative ideas that are being shared during our Fall Play Recipe Series.  Click on the flowing links to find more creative ideas to incorporate Fall Scents into your play.

Pumpkin Spice Latte Oobleck from Learn Play Imagine

Scented Tea Pretend Play from Fun At Home With Kids

Homemade Fall Spices scented candles from Blog me Mom


Glowing Bread Clay Recipe

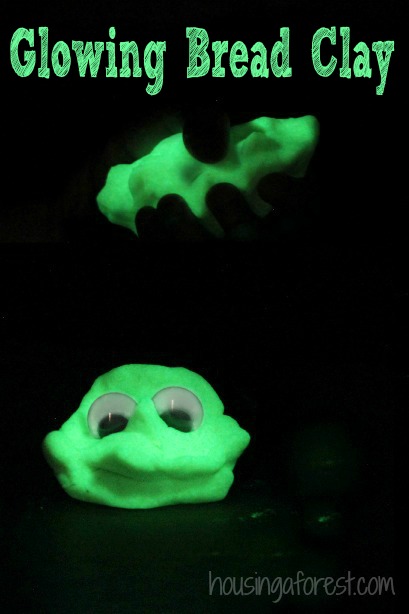
Fall Recipe for Play ~ Glowing Bread Clay.  No Black light needed!

Glowing Bread Clay ~ Glowing Play Dough that air dries

We are back for day three of our Fall Play Recipe series.  So far we have shared an edible Pumpkin Spiced Marshmallow Dough recipe and a Homemade Cranberry Fall Paint Recipe.  My kids could not help but be excited about today’s Glowing Theme!  We have been wanting to make Bread Clay for a while, and this seemed like the perfect opportunity.  Look for our Glowing Bread Clay Recipe at the bottom of this post.

Glowing Bread Clay ~ Glowing Play Dough that air dries

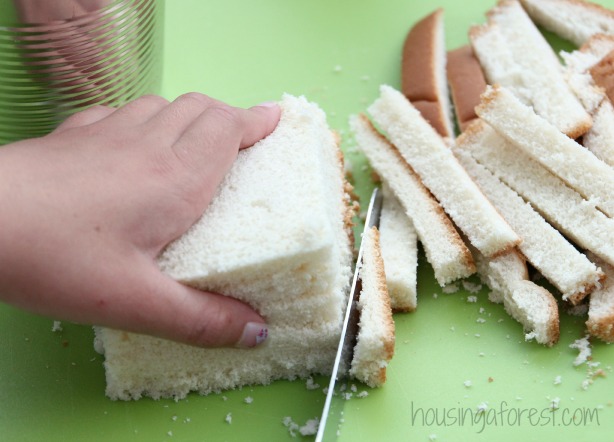
Start by cutting the crusts off your bread.  (You can leave them on, but it will change the texture of the bread slightly).  Parents may want to do this step, just to keep little fingers safe.

Glowing Bread Clay ~ Glowing Play Dough that air dries

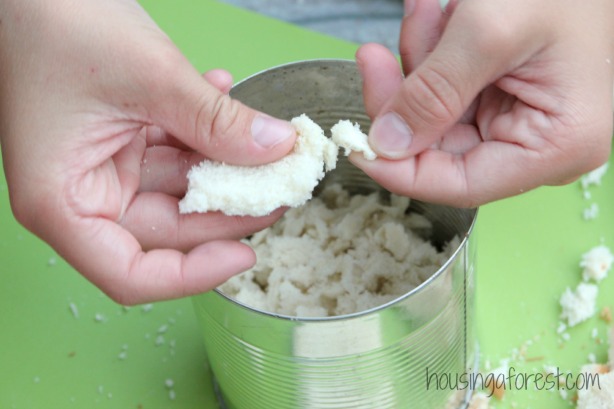
Next, tear the crust-less bread into tiny pieces.  To make clean up easy, we decided to mix everything in a rinsed out tin can (please make sure your tin can does not have sharp edges!)  The smaller the crumbles of bread are, the smoother your dough will be.

Glowing Bread Clay ~ Glowing Play Dough that air dries

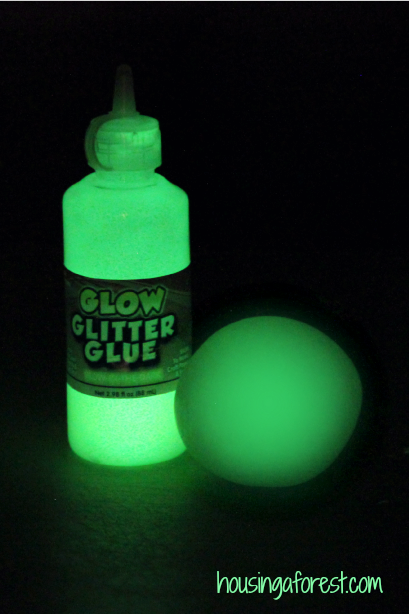
Add the white glue to the bread crumbs and stir with a plastic spoon.  Next the kids added the Glowing Glitter Glue. (We received our glitter glue from Craft Project Ideas to for free.  I have to say, it is super easy to charge and glows really bright.  Way better than any of the glowing paints that we have tried in the past.)  The glitter glue worked perfectly for this project.  Not only did it glow brightly, but it also worked as part of the binder that holds the clay together.

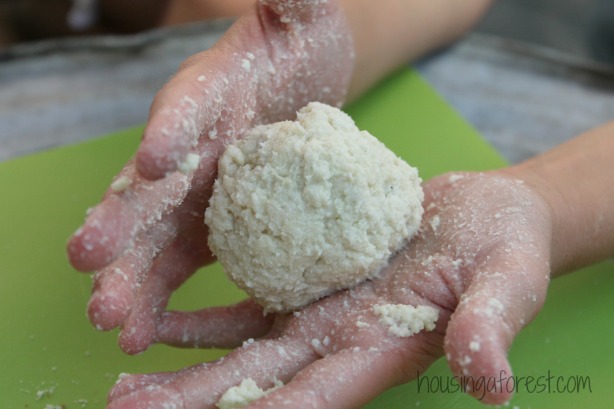
The dough will start out feeling sticky and gummy.  As you work with it, it should start feeling similar to a porcelain clay.  If you are finding the dough is sticky/wet, then add a few more bread crumbs.  If it feels dry and cracks, then add a little more glue.  The dough will eventually have a stretchy and pliable texture that is perfect for molding.

Glowing Bread Clay ~ Glowing Play Dough that air dries

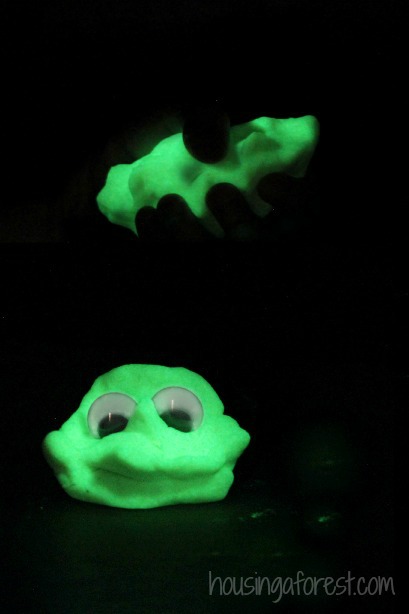
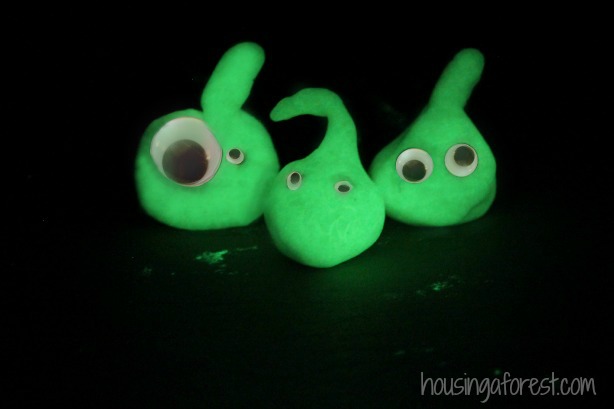
The kids loved adding googly eyes to add to their silly monster creations.

Glowing Bread Clay ~ Glowing Play Dough that air dries

Glowing Bread Clay Recipe:

  • 5 Slices of white bread ~ stale bread works great (as long as it is not too dried out)
  • 3 Tbsp of White School glue
  • 3 Tbsp of Glow Glitter Glue

Glowing Bread Clay ~ Glowing Play Dough that air dries

Don’t have a Black light?  No problem, neither do we:)  The kids just kept a LED flashlight by them and charged the dough as needed.  The kids loved creating and building with their glowing dough.  Recharging it with a flashlight was half the fun.

The Glowing Dough will air dry in about 1-3 days depending on how thick your creations are.  We have not had any trouble with the dough cracking as it was drying.  This recipe is perfect for making glowing beads, jewelry, and small creations.  You are limited only by your imagination.  Remember that this dough is will dissolve if it becomes wet.  To preserve your creation then once they are dry, coat them with a 50/50 water/glue mixture or a varnish.

You can also save the dough to play with another day.  Simply wrap tightly in plastic and store in the refrigerator.  It should last a few weeks this way.  If it dries slightly you can try adding more glue to see if you can revive it or work with it in damp hands.

Glowing Bread Clay ~ Glowing Play Dough that air dries


For more fun inspiration follow my Art and Play Recipe board on Pinterest.

We had so much fun with this glowing challenge.  Make sure to stop by and check out the other posts in this fun Fall Play Recipe series.

Homemade Glow-in-the-Dark Window Clings from Blog Me Mom

Glowing Magic Milk Experiment from Learn Play Imagine

Edible Glowing “Spiderwebs” Sensory Play from Fun at Home with Kids

Tomorrow we are back sharing some of our favorite Scents of Fall!  Yummy!!!!


Homemade Cranberry Fall Paint Recipe

Fall is right around the corner, and I am ready to embrace everything that I love about this colorful season. If you are just joining our Fall Play Recipe series, yesterday we shared 4 fun fall dough recipes including our edible Pumpkin Spice Marshmallow Dough.  My kids had a blast molding, shaping and tasting our sugary mixture. Today our challenge was to create a fall paint recipe. Since cranberries are a staple at our house around Thanksgiving, we decided to create a Homemade Cranberry Fall Paint Recipe.

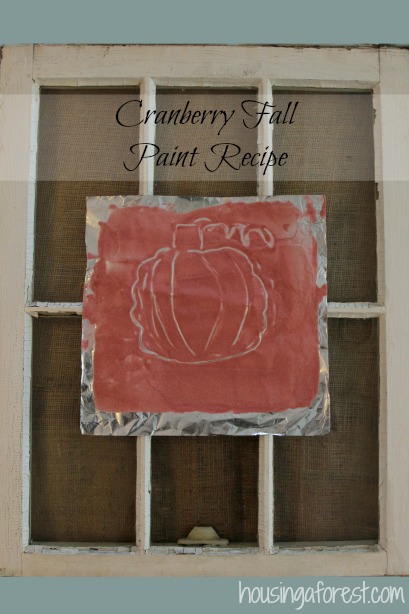
Cranberry Fall Paint Recipe ~ paint that is perfect for fall and it smells great

This paint smells just like cranberries and the kids loved the texture.

Cranberry Fall Paint Recipe ~ paint that is perfect for fall and it smells great

I am not sure about your house, but cranberry sauce is a staple at our Thanksgiving table. You know the kind that is a jelly and comes in a can.  After the meal is over, it is inevitable that there are leftover cranberries in our fridge for weeks.  No one wants to throw them out, but no one wants to eat them either.  So instead of being wasteful, we decided to create a fun Fall Paint Recipe that smells wonderful!

Cranberry Fall Paint Recipe ~ paint that is perfect for fall and it smells great

This paint smells just like cranberries making it perfect for fall.  It is thicker and stickier than traditional paint, making it just right for creating beautiful foil paintings.

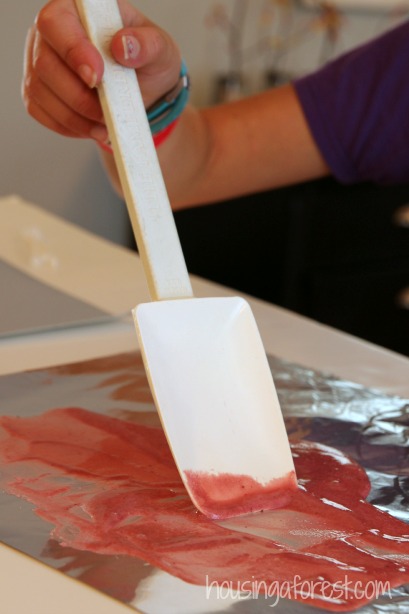
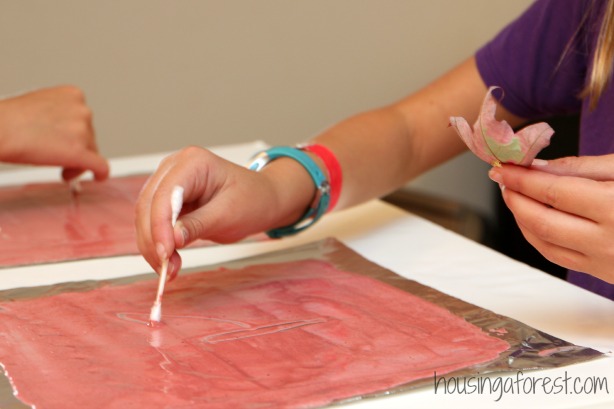
Start by spreading a thin layer of Cranberry Paint (recipe at the bottom of the post) onto a sheet of tinfoil.  You can use a paint roller or a spatula, the kids had fun using both.  Don’t worry too much about how it looks at this point.  You don’t want super thick areas, but the paint will tend to “level” itself slightly.

Cranberry Fall Paint Recipe ~ paint that is perfect for fall and it smells great

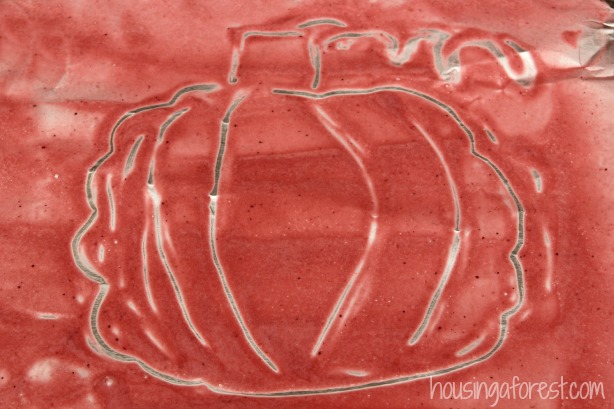
Once the paint is spread on the tin foil, grab a q-tip and start creating.  Bree immediately ran outside to find a pretty fall leaf to copy.  Love that!  The q-tip will remove paint and reveal the shinny foil below.  The best part is the kids can simply roll over their painting and start drawing again.

Cranberry Fall Paint Recipe ~ paint that is perfect for fall and it smells great

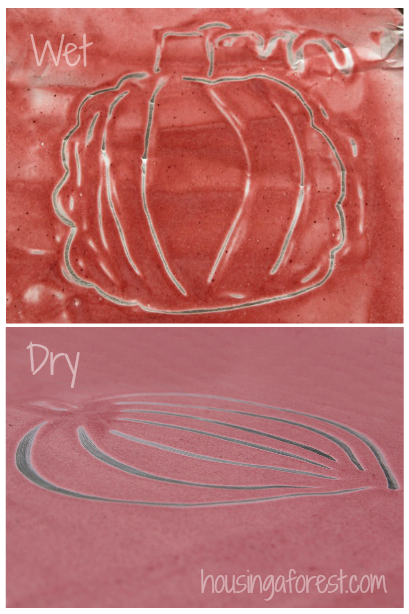
I love the little speckles of cranberries in the paint.  This is what it looks like when the kids painting are still wet.  The paint will dry in a few hours.

Cranberry Fall Paint Recipe ~ paint that is perfect for fall and it smells great

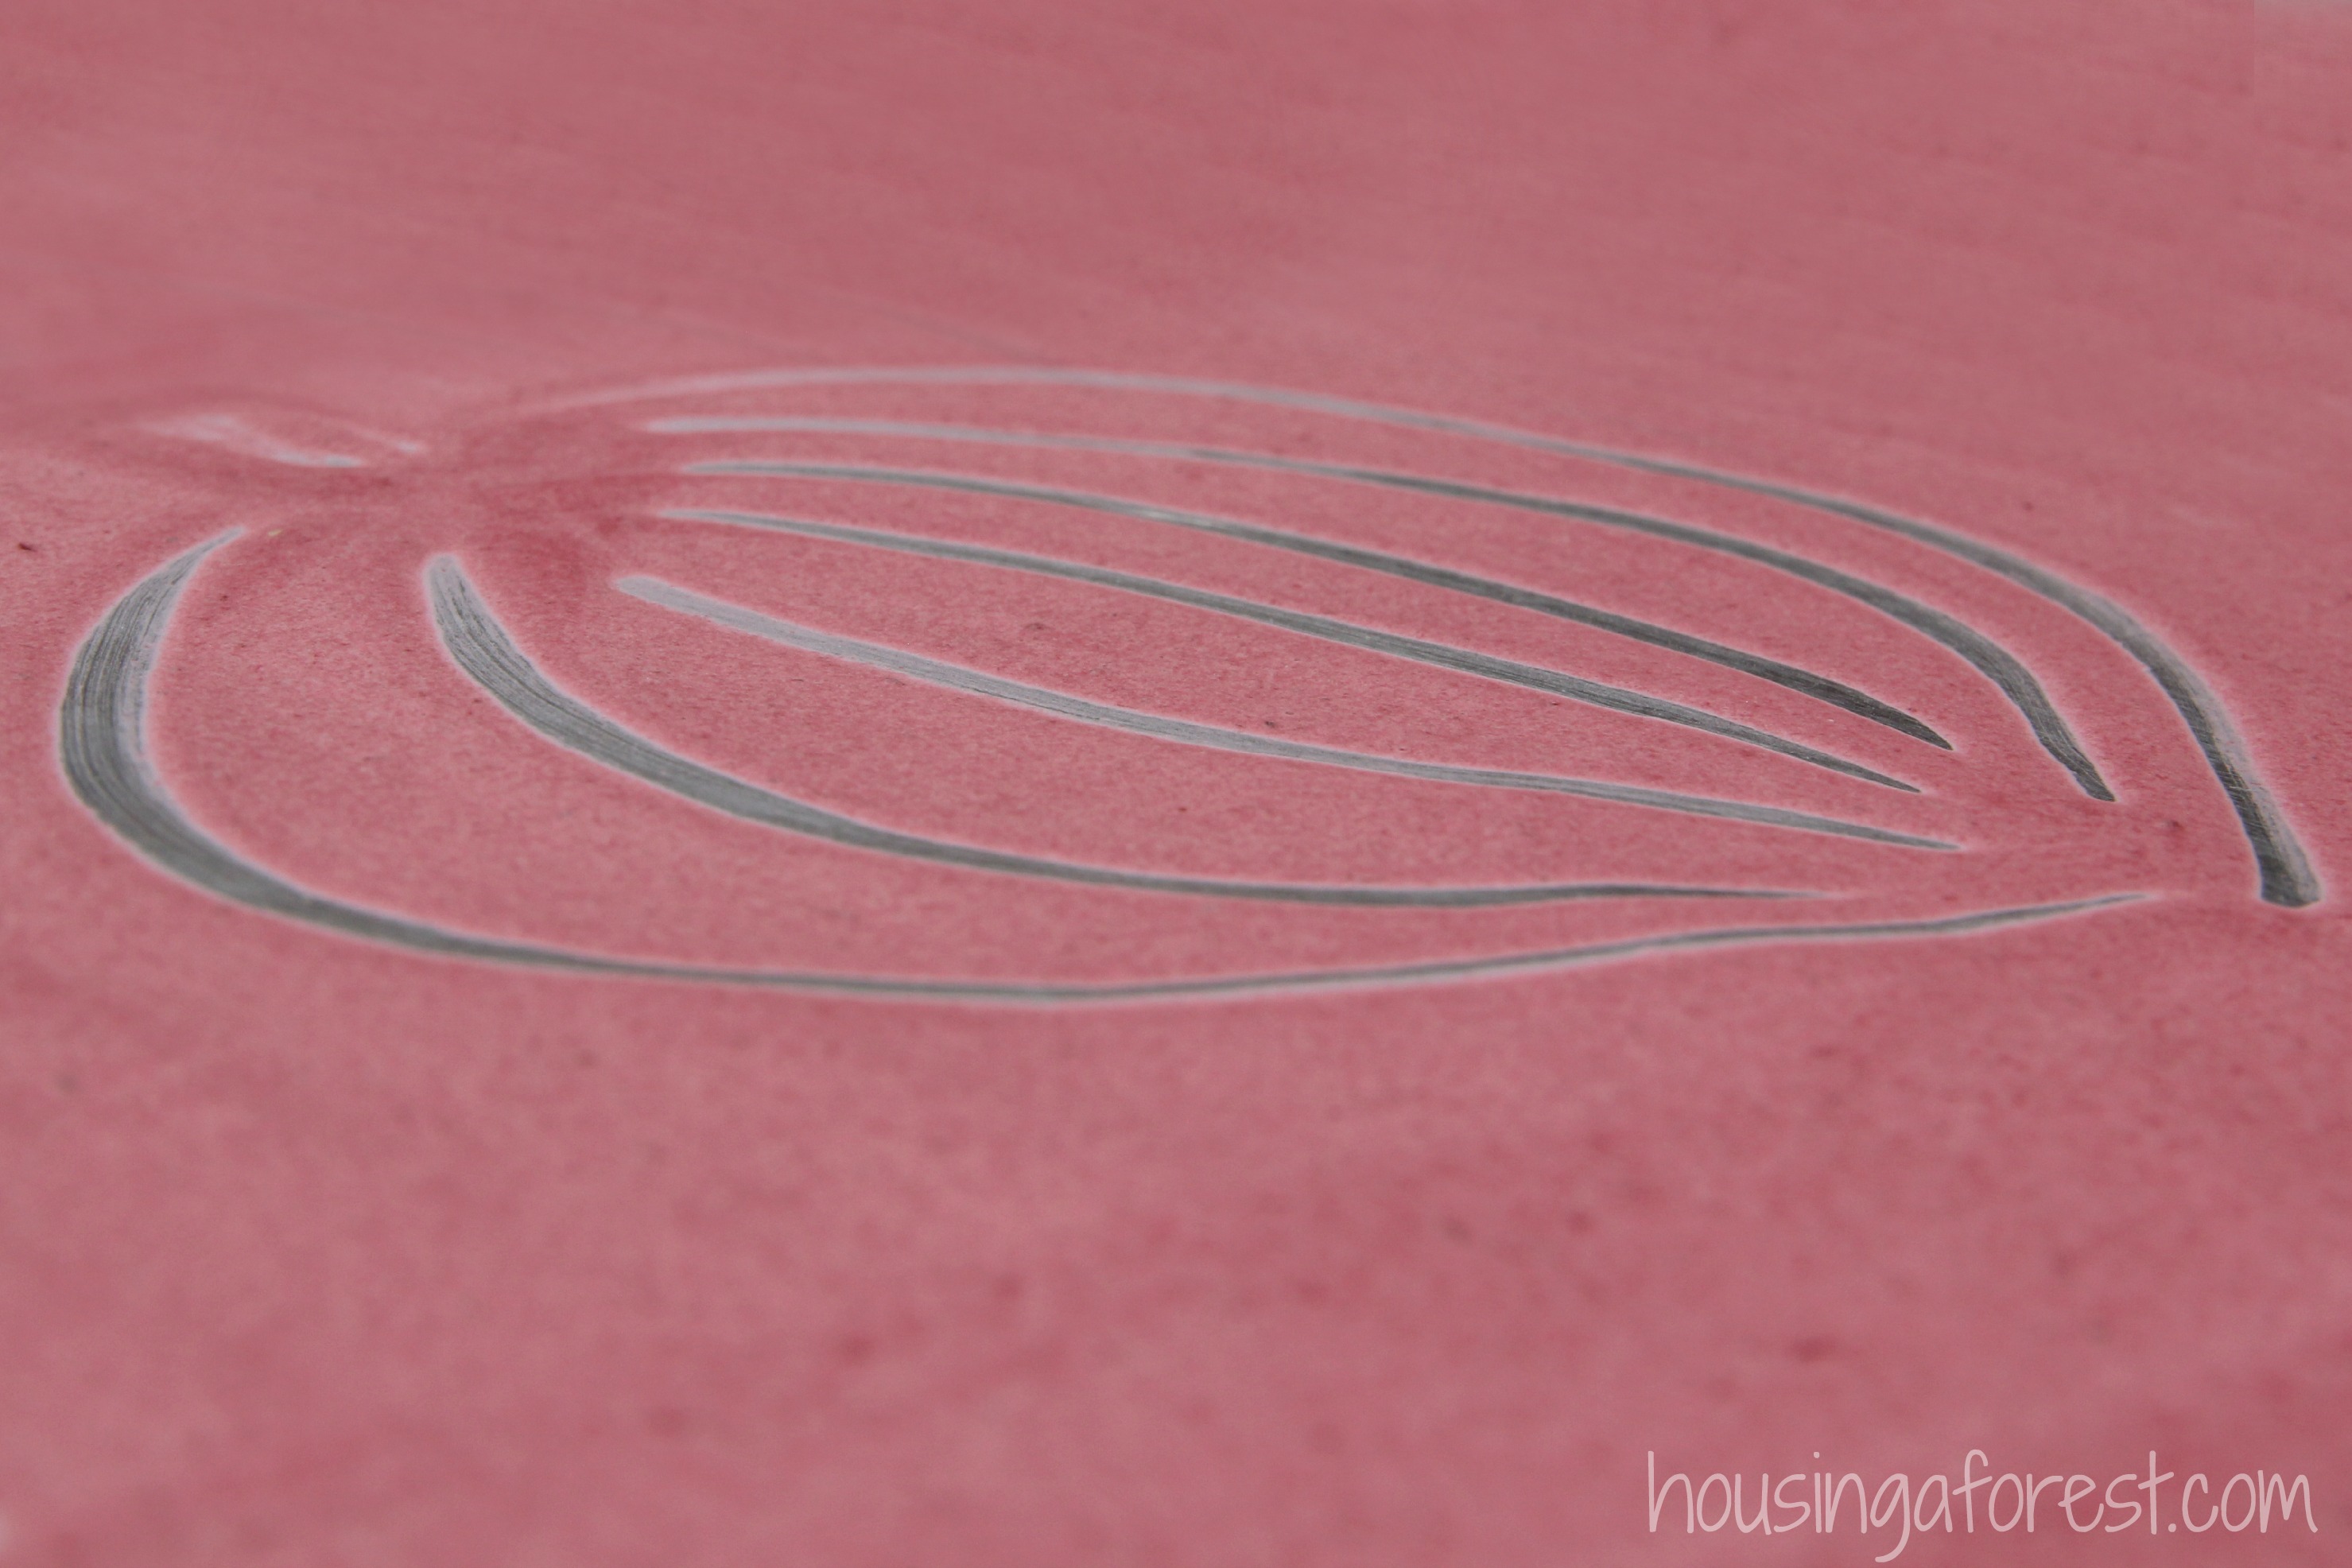
I love how beautiful the paint looks when dry, and it still smells just like cranberries.  Who would have thought that cranberries would make such a wonderful textured paint, and dry so beautifully.  This is one that your kids will want to try!

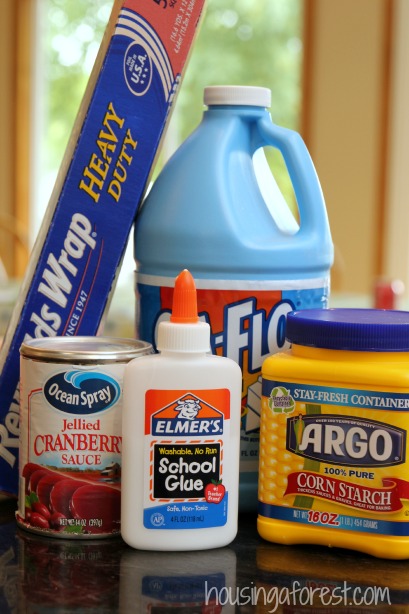
To make your own Homemade Cranberry Fall Paint Recipe:

  • 1/2 cup Cranberry Sauce
  • 3 TBS White School Glue
  • 1/4 cup Corn Starch
  • 2 TBS Liquid Starch
  • You will also need Tinfoil, q-tips and a spatula or paint roller.

Cranberry Fall Paint Recipe ~ paint that is perfect for fall and it smells great

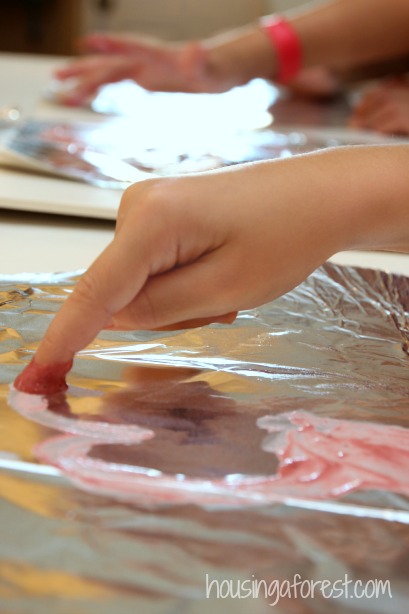
The thick texture our Cranberry Fall Paints is perfect for using as a finger paint as well.  The kids had a blast sliding the sticky paint along the smooth texture of the tinfoil.

Cranberry Fall Paint Recipe ~ paint that is perfect for fall and it smells great


For more fun inspiration follow my Art and Play Recipe board on Pinterest.

Make sure to check out the other three Paint recipes that are a part of our fun Fall Play series!  There are some really creative ideas shared, and I know my kids will want to try them all.

 Fall Scented Whipped Edible Paints from Fun at Home with Kids

Scented Edible Apple Paints from Blog Me Mom

Apple Printing Eruptions with Sidewalk Chalk Paint from Learn Play Imagine

Tomorrow we are back sharing Fall Glowing Recipes that totally rock!!!!  I have peeked at a few and I have to say, they are really amazing.  This is going to be one post you wont want to miss:)

Pumpkin Spice Marshmallow Dough

I am excited to be part of a week long series all about Fall Play Recipes. For this series I will be collaborating with 3 creative friends, Learn Play Imagine, Fun at Home with Kids, and Blog Me Mom. We selected a different fall theme for each day, which means 4 creative play recipes will be shared each day. By the time our series is done, you will be armed with 20 new play recipes that I know you will want to try;) Can you tell I’m over the moon with excitement? Today’s theme is all about creating a fun Fall Dough Recipe.  I had my kids help brainstorm some things that made them think of fall.  They had lots of creative suggestions, including marshmallows and pumpkin pie.  Yes please!  Check out the kids super simple and edible Pumpkin Spice Marshmallow Dough.

Pumpkin Spice Marshmallow Dough

…………………………………………………………………………………………………. 

No-Cook Fall Play Recipe that’s Edible!

Pumpkin Spice Marshmallow Dough

Pumpkin Spice Marshmallow Dough Recipe:

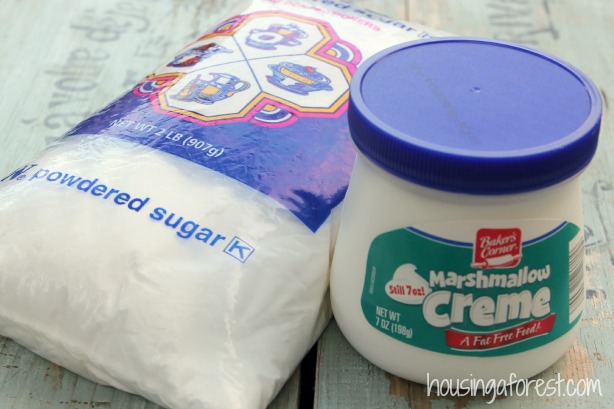
  • 1 Jar of Marshmallow Creme (7oz) ~ or also called Marshmallow Fluff
  • 3 – 4 cups of Icing Sugar ~ more to dust the dough to keep it from sticking
  • Pumpkin Pie Spice
  • Graham Crackers
  • Sprinkles ~ just for fun

You are basically making a Marshmallow Fondant which is normally used to ice cakes.  However, this simple recipe is no-cook and contains only 2 ingredients.  We are all about making this simple!

Pumpkin Spice Marshmallow Dough

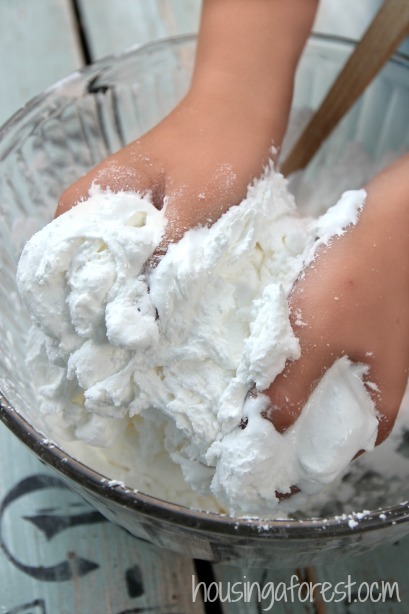
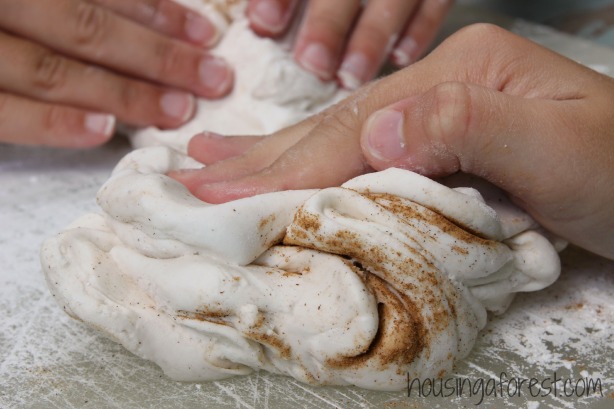
You are welcome to mix the marshmallow cream and the icing sugar in a stand mixer, however you will be missing out on half the fun.  My kids had a blast squishing and mixing the sticky mixture into a dough with their hands.  No special instructions, just dump everything together and mix.  Let me tell you, it is super sticky to begin with, but with a little elbow grease (and lots of icing sugar) it will become a smooth and wonderful dough.

Pumpkin Spice Marshmallow Dough

My kids informed me it was hard work to get the dough to form, but the sticky mess was so worth it.  Depending on the age of your kids, you may want to help with the mixing.  they also enjoyed tasting the dough in at all its different sticky stages.  The dough is a type of fondant, so in moderation it is totally safe to eat.

If you are feeling like your dough is more the constancy of warm gooey marshmallows, then try adding more icing sugar.  We also found that the dough preformed best when it was cool.  We wrapped ours in plastic and placed in the fridge to cool down.

Pumpkin Spice Marshmallow Dough

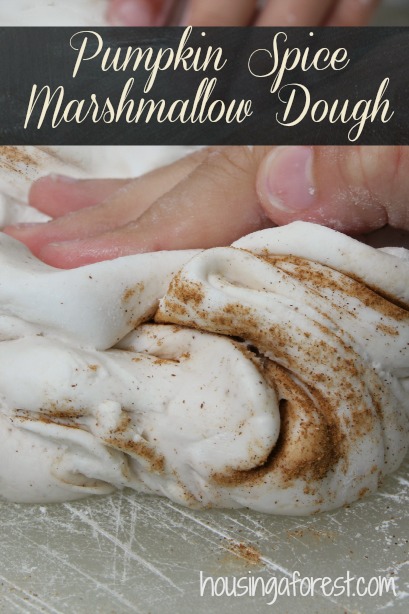
You are welcome to add the Pumpkin pie spice at any time.  We were having so much fun playing, that we forgot to add it until our dough was already formed.  Don’t worry, the spices were easy to fold in and smelled delicious.

The combination of marshmallows and pumpkin pie spice reminds me of fall and thanksgiving.  Growing up one of our traditional Thanksgiving side dishes was a sweet potato casserole with a marshmallow topping.  This dough totally brings me back to sweet childhood memories.

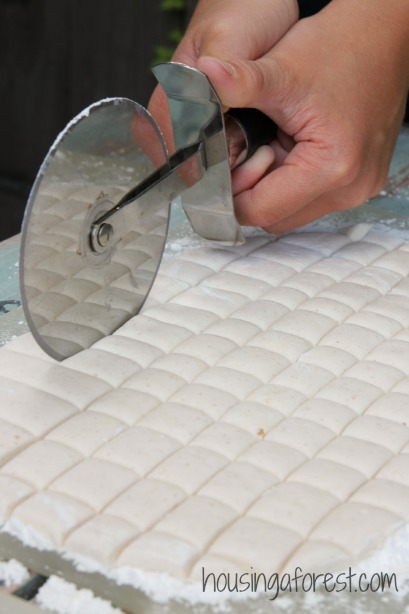
Pumpkin Spice Marshmallow DoughThe kids loved this little bakery set up.  They had a blast rolling, cutting and playing with the yummy spiced dough.  These little marshmallow pillows were a favorite to create with the pizza cutter.

Pumpkin Spice Marshmallow Dough

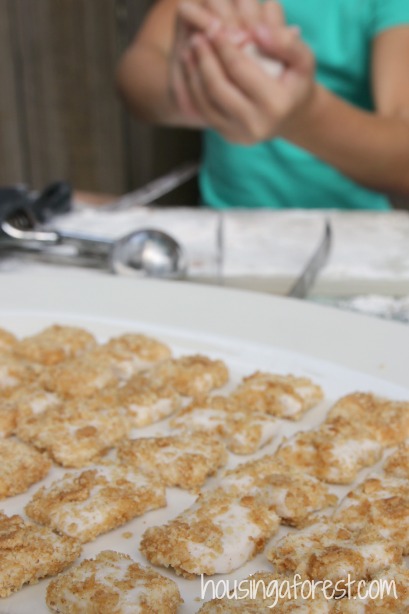
Since this is an edible dough, the kids wanted to make an “after work” treat for their Dad. They excitedly made bit sized s’more treats by rolling the spiced dough in crushed graham crackers.  How fun.  Chuck was a great sport and totally went right along.  Love that guy!

Pumpkin Spice Marshmallow Dough

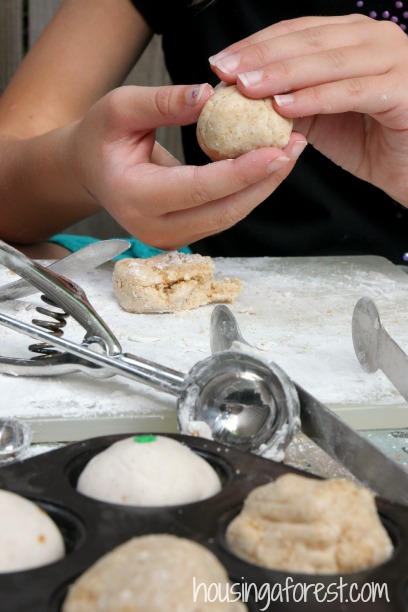
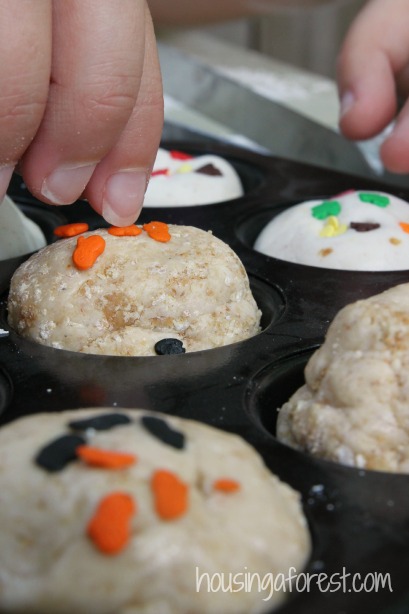
Mini cupcakes were the next item to be created at their little bakery. To make different varieties of cupcakes, they added graham cracker crumbs right into some of the dough.

Pumpkin Spice Marshmallow Dough

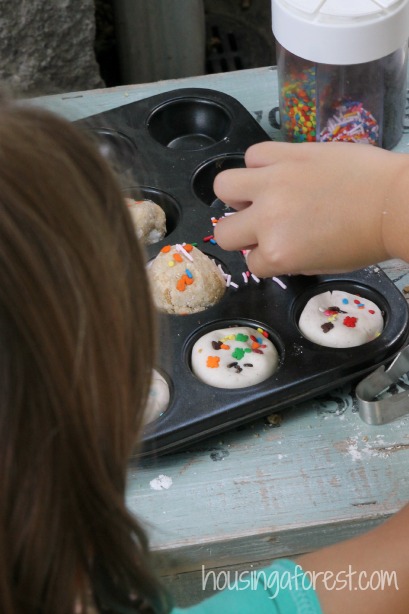
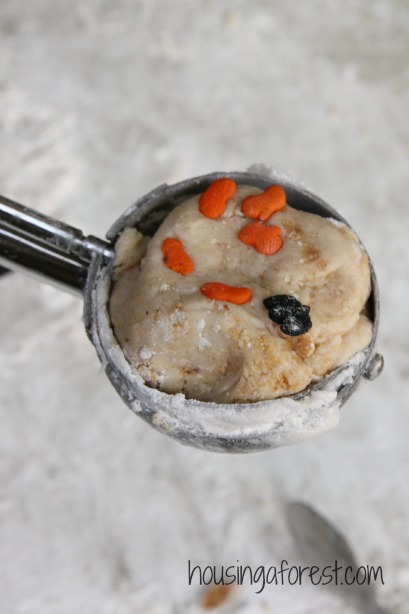
Like any great bakery, you always need lots of sprinkles!   I was surprised at how carefully the sprinkles were added.  Each sprinkle was placed with care on top of the cupcakes.  I love the pumpkin and bat sprinkles, perfect for fall.

Pumpkin Spice Marshmallow Dough

Our marshmallow dough was easy to form into balls and roll out with the rolling pin.  Although, we found it became sticky the longer it was held and played with it.  We kept a container of icing sugar handy so they could keep dusting their hands, creations and the work surface which worked great.  Plus icing sugar is just plain fun to play with!

Pumpkin Spice Marshmallow Dough

The kids had so much fun playing and creating in their mini bakery.  It always surprises me how long kids will play with the simplest set up.  We used utensils straight from my kitchen cupboards and a few baking goods from the pantry, creating hours of endless play.

I love that it this simple fall recipe was cheap to make and easy to create with!  It also stores well in the fridge wrapped in plastic.  We may have to try our hand at decorating a cake next time we pull it out:)

………………………………………………………………………………………………….

For more fun inspiration follow my Art and Play Recipe board on Pinterest.

For more Fall Dough Recipe inspiration check out these creative ideas:

 Fall Playdough Recipe from Learn Play Imagine

Pumpkin Spice Salt Dough For Ornaments from Fun at Home with Kids

Fall Activities Apple Dough Recipe from Blog Me Mom

Tomorrow we will each be sharing a creative Fall Paint Recipe.