


Fall Recipe for Play ~ Glowing Bread Clay. No Black light needed!

We are back for day three of our Fall Play Recipe series. So far we have shared an edible Pumpkin Spiced Marshmallow Dough recipe and a Homemade Cranberry Fall Paint Recipe. My kids could not help but be excited about today’s Glowing Theme! We have been wanting to make Bread Clay for a while, and this seemed like the perfect opportunity. Look for our Glowing Bread Clay Recipe at the bottom of this post.
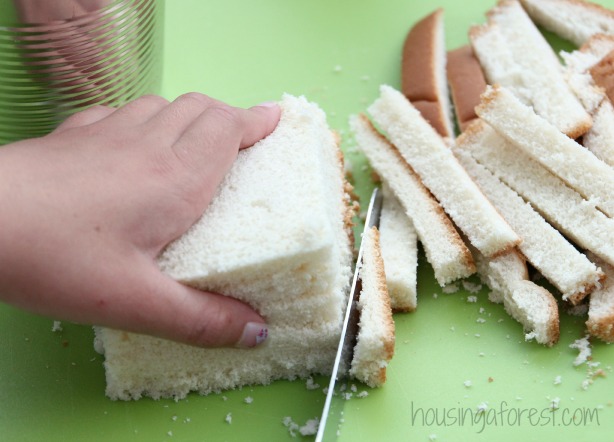
Start by cutting the crusts off your bread. (You can leave them on, but it will change the texture of the bread slightly). Parents may want to do this step, just to keep little fingers safe.
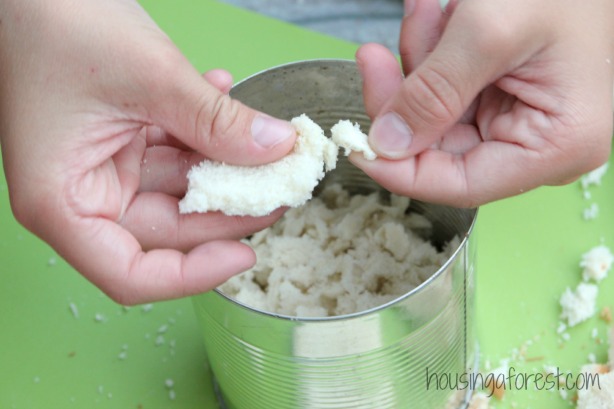
Next, tear the crust-less bread into tiny pieces. To make clean up easy, we decided to mix everything in a rinsed out tin can (please make sure your tin can does not have sharp edges!) The smaller the crumbles of bread are, the smoother your dough will be.

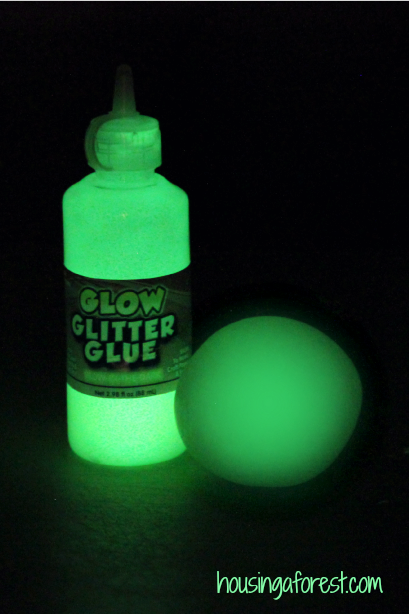
Add the white glue to the bread crumbs and stir with a plastic spoon. Next the kids added the Glowing Glitter Glue. (We received our glitter glue from Craft Project Ideas to for free. I have to say, it is super easy to charge and glows really bright. Way better than any of the glowing paints that we have tried in the past.) The glitter glue worked perfectly for this project. Not only did it glow brightly, but it also worked as part of the binder that holds the clay together.
The dough will start out feeling sticky and gummy. As you work with it, it should start feeling similar to a porcelain clay. If you are finding the dough is sticky/wet, then add a few more bread crumbs. If it feels dry and cracks, then add a little more glue. The dough will eventually have a stretchy and pliable texture that is perfect for molding.

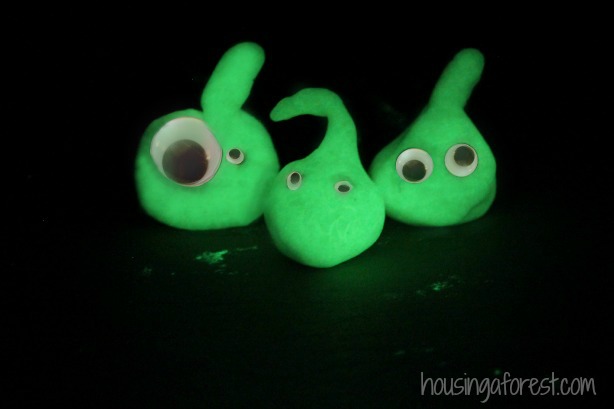
The kids loved adding googly eyes to add to their silly monster creations.
Glowing Bread Clay Recipe:
- 5 Slices of white bread ~ stale bread works great (as long as it is not too dried out)
- 3 Tbsp of White School glue
- 3 Tbsp of Glow Glitter Glue
Don’t have a Black light? No problem, neither do we:) The kids just kept a LED flashlight by them and charged the dough as needed. The kids loved creating and building with their glowing dough. Recharging it with a flashlight was half the fun.
The Glowing Dough will air dry in about 1-3 days depending on how thick your creations are. We have not had any trouble with the dough cracking as it was drying. This recipe is perfect for making glowing beads, jewelry, and small creations. You are limited only by your imagination. Remember that this dough is will dissolve if it becomes wet. To preserve your creation then once they are dry, coat them with a 50/50 water/glue mixture or a varnish.
You can also save the dough to play with another day. Simply wrap tightly in plastic and store in the refrigerator. It should last a few weeks this way. If it dries slightly you can try adding more glue to see if you can revive it or work with it in damp hands.

For more fun inspiration follow my Art and Play Recipe board on Pinterest.
We had so much fun with this glowing challenge. Make sure to stop by and check out the other posts in this fun Fall Play Recipe series.
Homemade Glow-in-the-Dark Window Clings from Blog Me Mom
Glowing Magic Milk Experiment from Learn Play Imagine
Edible Glowing “Spiderwebs” Sensory Play from Fun at Home with Kids
Tomorrow we are back sharing some of our favorite Scents of Fall! Yummy!!!!


So stinking cool! I love the little monsters.
We have never made bread dough. This is super cool!
We have never made bread dough. This is super cool! My son would love it.