Painting with Balloons

Process Art ~ Painting with Balloons

You know how much we love process art!  Thats why I’m so excited to announce a NEW weekly Paint and Play Series that I am doing with my friend Crystal from Growing A Jeweled Rose.  The focus for this series is all about the process, having fun and getting kids excited to create art!  Each week we will be choosing a topic and then both of us will post fresh ideas centered around the chosen topic.

To kick off our series, we are both sharing ideas all about Painting with Balloons and creating engaging process art that your kids will love.

Balloon Drip Painting ~ Process Art

Balloons are one of those things that you never grow out of.  They are perfect for indoor games, creating paper mache, launching as balloon rockets  and seeing who can make the best ear piercing squeaky noise.  You know the sound I’m talking about.  The one that most parents cringe when they hear:)

#1 ~ Painting with Air from a Balloon ~ Blow Painting

My kids had a blast painting with the air from a balloon.  For our first balloon painting activity we tried our hand at Balloon Blow Painting.

Balloon blow Painting ~ Process Art

Materials needed for Balloon Blow Painting:

  • Cardboard
  • Paint ~ we used acrylics
  • Balloons
  • Straws
  • Tape

Balloon blow Painting ~ Process Art

The kids squirted paint onto a thick piece of cardboard.  We used ours straight from the paint tube and layered it on nice and thick.  Having a thick layer of paint, makes it easier for the air from the balloon to move the paint.

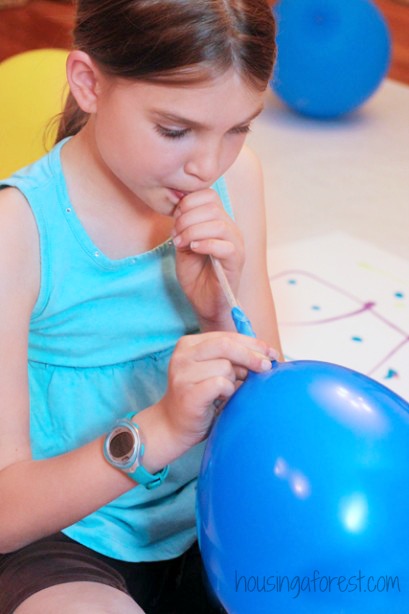
Next the kids placed a straw inside the balloon and secured it with tape.  Once they made sure they had a good seal and no leaks, they blew the balloon up with the straw.

Now all you have to do is aim the straw at the paint and let the air out.  The air will blow the paint around and create amazing swirled patterns.  You can either just let the air escape through the straw or squeeze the balloon and “forced” the air out.  The kids found both techniques to work well.

Balloon blow Painting ~ Process Art

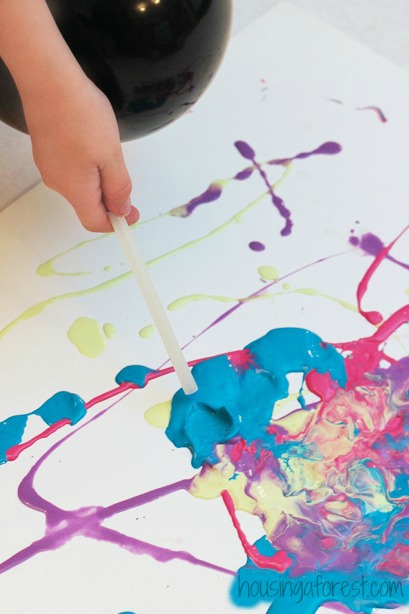
It was so fun to watch the paint swirl and mix on the cardboard.

Balloon blow Painting ~ Process Art

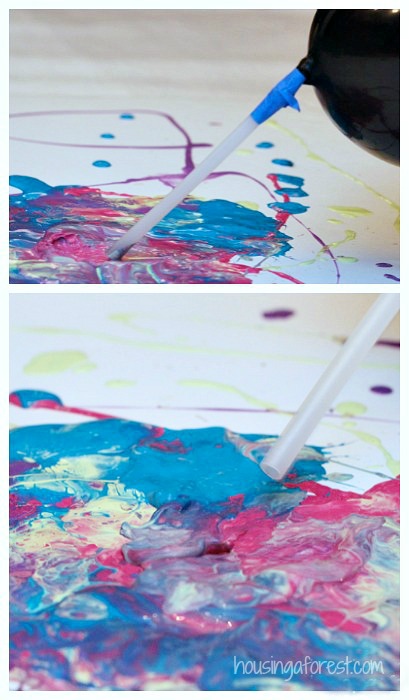
The kids also tried blowing the paint with just the balloon and no straw.  Also a fun technique.  I love all the tiny waves of paint it creates.  We will be trying this again soon.  The kids loved painting with air!

#2 ~ Painting with Balloons ~ Balloon Drip Painting:

The next activity we tried was Balloon Drip Painting.  This took a bit more setup, but the process was just as fun!

Balloon Drip Painting ~ Process Art

Materials needed for Balloon Drip Painting:

  • Film canister or similar container
  • Nail
  • Balloon
  • Large sheet of paper or cardboard
  • Paint ~ we used Acrylic

Balloon Drip Painting ~ Process Art

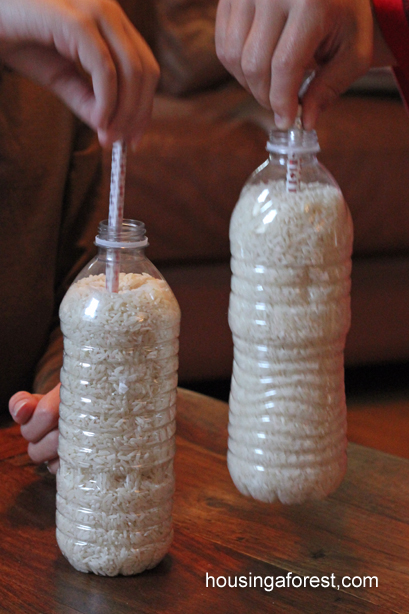
We used a film canister to contain our paint and poked a hole in the bottom of it with a nail.   Any container would work, as long as the balloon will stretch over the opening and you can poke a hole in the bottom of it.

Make sure to hold your finger over the hole when you fill it with paint, or you will end up with a huge mess:)  Each paint we used was a little different consistency  but you want your paint thin enough to drip out, but not run straight out the hole.  However, if your paint is too thick or it won’t drip at all.  We found that about 70% paint and 30% water worked the best for us.  We used acrylic paint, but I’m sure that tempera paint would work great too:)

Balloon Drip Painting ~ Process Art

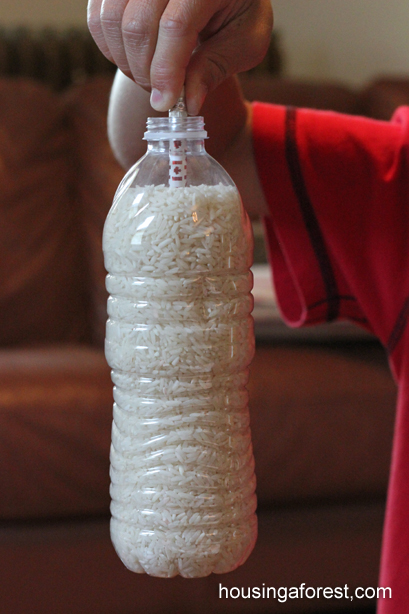
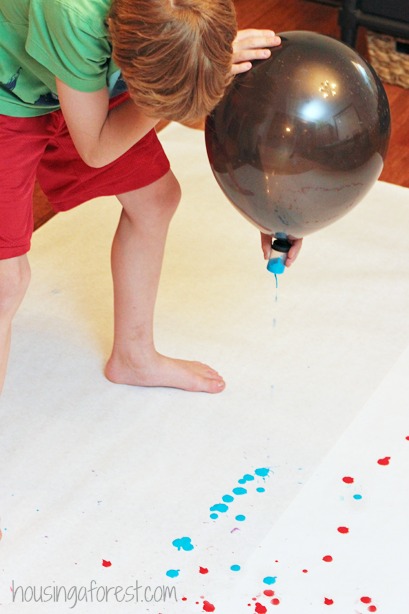
Once you have the canister full of paint, stretch a blown up balloon over the top of the canister.  This may require 2 people.  One person to keep their finger over the hole so the paint does not drip out and one to stretch the balloon over the canister.

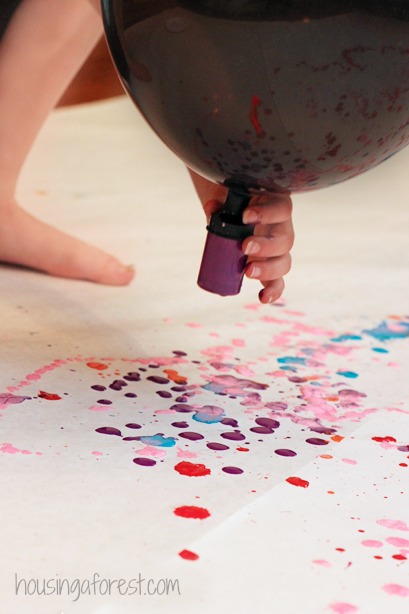
When you are ready to start painting, simply remove your finger and let the drips begin.

Balloon Drip Painting ~ Process Art

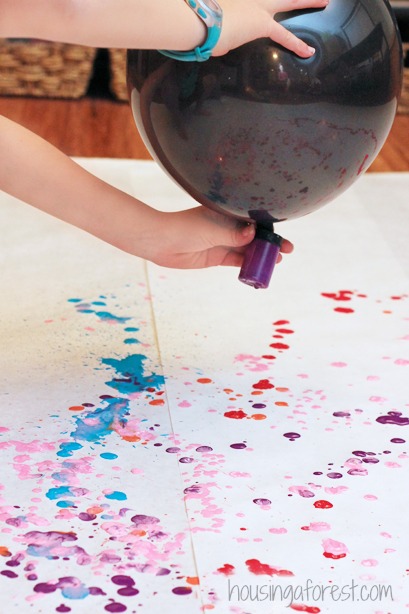
The kids loved this process!  We did ours indoors because of the weather, but I think this would make a fun backyard art project.  If you have a number of film canisters laying around, one of our favorite art projects so far has to be our Exploding Art.  It is a fun summer art project with a little science thrown in for good measure.

 ……………………………………………………………

Don’t forget to hop on over to  Growing A Jeweled Rose and check out all the amazing fun they had creating with their balloons.

5 fun ways to paint with balloons

 ……………………………………………………………

We had so much fun Painting with Air!

Painting with Air ~ Process Art

If you love process art like us, then check out my Painting Without Brushes Pinterest board.  It is packed full of fun ideas.  I would love to hear how you have used balloons to create or play with your kids.

Top Pinterest Boards for Kids

I adore Pinterest and get inspired scrolling through my Pinterest feed.  I love stealing a few moments curled up with a cup of coffee scrolling though all the wonderful DIY projects, kids activities and art projects.  If you were to ask my hubby, he would say I was a Pinaholic:)  You can find me on Pinterest here and it would totally make my day if you followed me!  I pin a wide variety of things, but my favorite pins are engaging ideas all about PLAY and LEARNING activities for kids.

Housing A Forest on Pinterest

Finding creative/fresh content can feel like a shot in the dark.  I love having my feed packed full of inspiring images that make me want to click though, however finding those “must follow pinners” can be challenging.  If you are a parent, teacher, homeschooler, or caregiver, then you will love that I compiled a list of my Top Pinterest Boards for Kids.  Each of the boards are packed full of the best activities to play and learn right along with your kids!

…………………………………………………………………………

   Top Pinterest Boards for Kids

Top Pinterest boards for KIDS ~ My favorite kid pinners all in one easy place!  Each of the boards are packed full of the best activities to play and learn right along with your kids! Follow along so you don't miss any of the fun.

  • Growing A Jeweled Rose ~ Crystals board is packed full of fun and educational activities for kids.  Her 2 girls are always having fun and enjoy learning though messy play.  She has some of the best Play recipes that I have seen.  
  • In Lieu of Preschool ~ Genny is a former teacher who enjoys engaging her two kids in fun Preschool activities at home.  Her board is packed full of exciting activities for little ones that you won’t want to miss.
  • Mom to 2 Posh Lil Divas ~ Bern’s Pinterest board is a wonderful resources for crafts, learning and parenting activities.  Being a teacher, she is always creating and finding fun educational activities to do with her 2 lil divas.
  • B-Inspired Mama ~ Krissy is a former art teacher and busy mom of 3 kiddos.  She loves bringing moms simple ideas for crafts, recipes, learning fun and creative parenting ideas.
  • Train-Up a Child ~ Allison’s board is packed full of play, parenting and learning.  She loves playing right along with her kids and gives them plenty of opportunity to do lots of hands on learning and messy play.
  • Housing A Forest ~ I love inspiring my kids to spend time creating, experimenting and playing.  You will find lots of inspiring ideas all about creating though play and discovery.
  • Mess For Less ~ Vicky is a former teacher that loves creating her kids.  Her boards are full of engaging crafts and activities, fun food, parenting tips, and making memories on a budget.
  • Fun at Home with Kids ~ Asia is a fun loving mom and former teacher.  She loves encouraging her 2 little ones to be creative with lots of fun open-ended play activities.  Her photography is beautiful and I love scrolling through all her wonderful images.
  • Coffee Cups and Crayons ~ Megan’s board is full of fun and useful ideas for modern parents.  She shares lots of engaging ideas for fun and easy learning activities, kids crafts, party inspiration and acts of kindness for families.
  • Fantastic Fun and Learning ~ Shaunna is a homeschooling mamma that shares lots of engaging learning activities, play ideas and crafts that are perfect for preschoolers.  Her board is packed full of wonderful resources for preschoolers
  • Plain Vanilla Mom ~ Jennifer is on a mission to make every “plain vanilla” day special.  Her board is full of fun learning ideas and yummy baking recipes.  I love her photos as well, makes me want to jump right in a play along:)
  • Twodaloo ~  Stephanie is fascinated by natural learning philosophies and creates lots of open-ended play, process art, and nature posts. Her board is packed full of early childhood activities, parenting, and post all about living a creative life.

Top Pinterest boards for KIDS ~ My favorite kid pinners all in one easy place!  Each of the boards are packed full of the best activities to play and learn right along with your kids! Follow along so you don't miss any of the fun.

…………………………………………………………………………

Another one of my favorite Kid focused Pinterest boards is our PLAY group Pinterest board.  It is packed full of great ideas to keep your kids busy, having fun and learning.

PLAY group on Pinterest

…………………………………………………………………………

I love finding new Pinterest boards to follow.  Feel free to share a link to your favorite kid focused board in the comments.  I can’t wait to check out what you are pinning!

How to Blow a Bubble with Your Hands

My kids have always loved playing with bubbles.  Kaleb could hardly wait to show us the new “trick” he learned at school.  Yep, apparently when the boys were to be washing their hands, they were secretly creating beautiful big bubbles.  Here is Kaleb’s simple tutorial on how to blow a bubble with your hands.  Love it!

How to blow a bubble with your hands

Materials needed to blow big bubbles with your hands:

  • Sink with water
  • liquid hand soap.
  • and your hands:)

How to blow a bubble with your hands (4)

To make your bubbles you will need to:

  • Wet your hands
  • Then generously rub your hands with soap
  • Place your hands back in the running water, like you are about to wash them
  • Rub them together until you have super slippery and soapy hands,  Make sure that you don’t wash all the soap off, you just want to wet your hands until they are slippery.
  • Place your hands in a circle (you can either use one hand or both hands)
  • Create a “soap skin” (like when you use a bubble blower) and gently blow
  • You will need to keep re-applying soap every few bubbles to keep your hands slippery.

How to blow a bubble with your hands (4)

It can take a bit of practice to get the bubbles to float off your hands, but the kids got super excited when it worked.

How to blow a bubble with your hands (4)

How to blow a bubble with your hands (4)


If you blow really gently, you will be able to make a bubble almost as large as your head.  They also discovered that they could also get the bubbles to stretch between both their hands.  Eventually the bubble would divide into 2 large bubbles, one for each hand.
How to blow a bubble with your hands (4)

I love that these simple bubbles can be made anywhere, and really need no special tools or materials.  No fancy bubble solution needed, just regular soap.  Love it!

For more fun ways to play with bubbles, check out our:

Rainbow Bubble Snakes

Bubble Painting

Soap Free Bubbles

How to make Frozen Bubbles

Engaging Activities For Boys

Welcome back to the Weekly Kids Co-op!  With summer right around the corner, I am compiling a list of fun things that I know my kids will want to try.  I love summer break, and I can hardly wait for my kids home all day.  Their break never seems like it is long enough to accommodate all the things we want to do, so I am starting planning now:)   I love this list of Engaging Activities For Boys linked up from the Weekly Kids Co-op.

Engaging Activities for Boys

If you were featured this week, feel free to grab a Housing A Forest button.

Come back every Thursday to see if your creative ideas were featured and link up any new ideas! (I will be using one image and a link back to your blog.)

Weekly Kids Co-op


Floating Rice Bottle

As you know, we love simple science experiments.  When my kids saw this fun science experiment/trick on Steve Spangler Science and had to try it.  I love that it uses things we have around the house and it was so easy to set up.  Next time you have friends over, wow them with this simple Floating Rice Bottle Trick.

Floating Rice Bottles

All you need to amaze your friends with this simple trick is:

  • 2 plastic water bottles ~ empty and dry
  • 2 pencils or chopsticks
  • Dry Rice
  • Funnel ~ to fill the bottles with rice

Floating Rice Bottles

Before you preform your trick, you will need to do a little behind the scenes work.  Fill one bottle with dry rice about 1″ from the top.  Fill the 2nd bottle to the top and gently tap it on the counter.  Pack the rice in the 2nd bottle as much as possible (you may need to add more rice and keep packing).  You could also push the pencil into the bottle a few times to pack it further.  Make sure that when you are done, both bottles appear to have the same amount of rice in them.

My kids had so much fun setting their trick up.  They set the 2 bottles on the table along with the pencils and called their friends in.  If you are looking for a fun way to perform your trick, check out how Steve Spangler explains lite and regular rice.  My kids loved this part:)

Floating Rice Bottles

Have your friend push a pencil into bottle #1 (unpacked rice) while you push a pencil into bottle #2 (packed rice).  Your friends pencil will just slide in and out easily.  However, you will be able to pick up your bottle of rice with only just the pencil.  Your friend will question what he did wrong or if you did something to your pencil.  You can offer to switch pencils and try again.  You will find the same result.  Bottle #1 stays on the table while bottle #2 is easily lifted.

You are able to lift bottle #2 with a pencil because of friction and density.  Make sure to click on the above link to check out the full scientific reason why and how it works.

Floating Rice Bottles

If you are up for revealing your secrets, dump each bottle of rice into their own measuring bowl.  You will be able to see how much extra rice was packed into Bottle #2.  You might be surprised at how much it will hold.

I hope your kids have fun amazing their friends with this simple friction trick.  If you are looking for more scientific inspiration  then check this list of our favorite experiments (just click on the red link)