How to Regrow Celery ~ from kitchen scraps
We have a small backyard garden and we love to grow our own food. Growing celery seems too fussy until I found this post. We always have a celery stalk in the fridge, and until now the base has been simply discarded to the chickens. No longer! Ready to learn how regrowing celery works?
Sustainable Food Scraps ~ gardening with kids
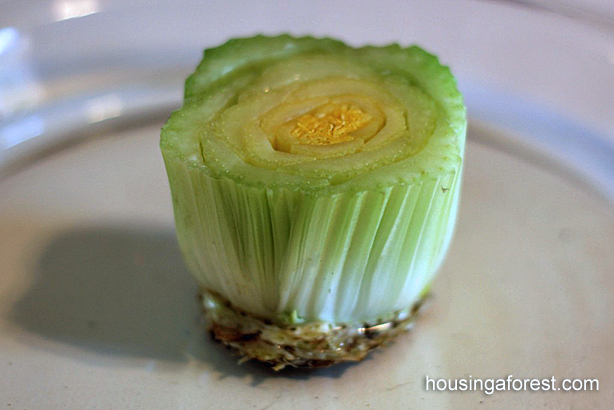
Simply chop the base from the celery stalk, leaving about 2 inches. Place it in a dish of water in a sunny location. Something that easy sounds too good to be true. But that is all you need to do.
Notice how yellow the center leaves are. That is the area that we will be watching for growth.
You will start noticing changes quickly. After just a couple days in the water, you should see the celery’s center leaves starting to grow. No roots will be visible yet.
After just 1 week, the center leaves should change color and starting to poke up a little bit. Still no roots at this point.
Make your own mini green house
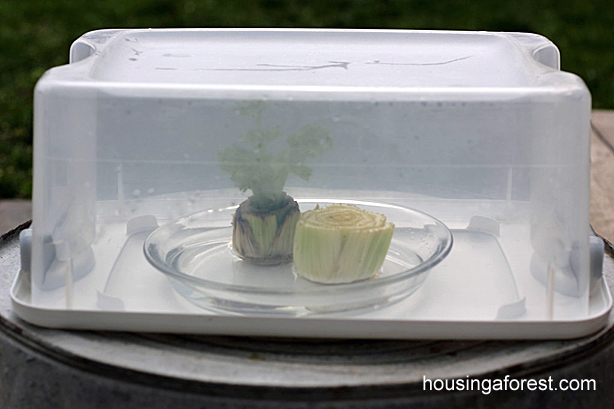
Since our house does not have wonderful sunny windows for growing plants. So we resorted to creating a mini green house, and taking the celery outside. The weather is warming up, but it is still cool outside at nights. The inverted plastic box helped to regulate the temperature and keep it moist. Notice all the moisture on the side of the container. This is also a great way to start seeds, but just make sure you are checking on your plants/seeds, so they don’t get too hot or dry out.
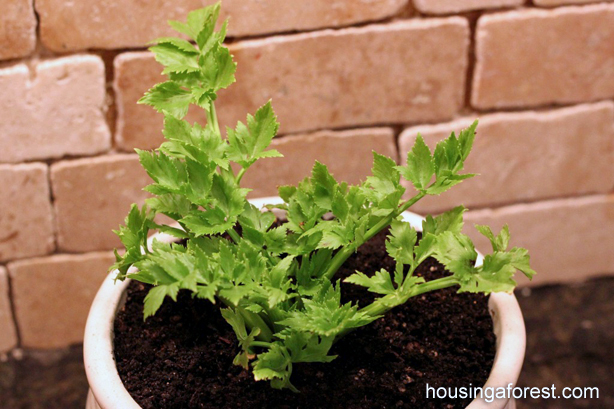
Our celery has been growing in only water for three weeks. We are just getting aroung to transplanting it into soil. This step could be done sooner. I am amazed at how little attention our little celery plant needed. Which is perfect for our house:)
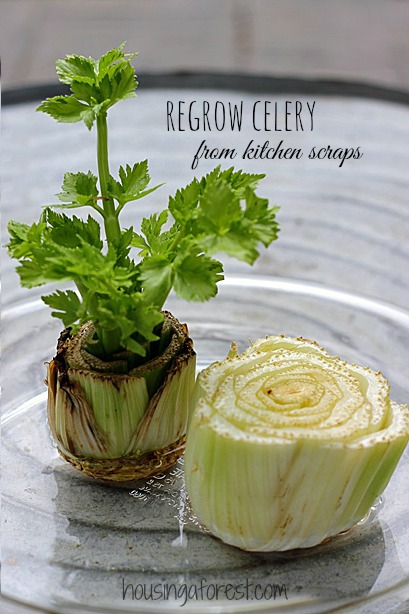
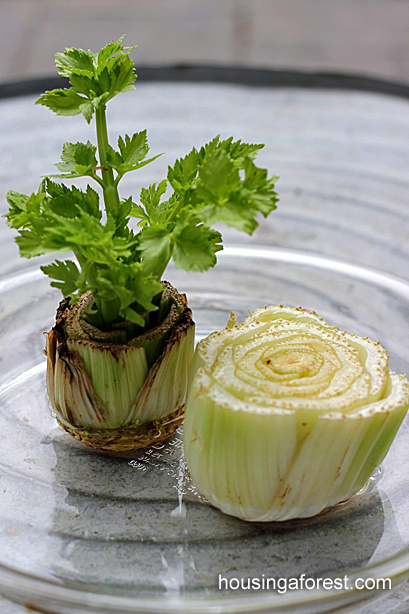
Notice the difference between the 3 week old celery plant and the “new” celery base. There is no growth on the new plant yet, but it will happen really quickly!
We finally transplanted our little celery and he is so happy! I am curious how long it will take before our little celery plants are ready to be eaten.
Tips for growing Celery:
- Celery does not grow well in hot conditions, so make sure you give your celery plant adequate water and shade during the hottest part of the day. If your plant does not receive enough water, it will become tough and stringy. YUCK! So keep your plant hydrated!
- You can remove only a few stalks of celery at a time. No need to harvest the whole plant. When doing this, make sure you remove the outer stalks first and let the less developed inner stalks continue growing. Take care not to damage the rest of the plant if removing individual stalks.
The kids love snacking on celery, so we are really excited to see how it tastes! They think it will be AMAZING to run out to the garden and “sneak” a celery stalk. There is something about growing your own food that is really satisfying!







a trick I learned from my great-grandma for growing long celery stocks is to shade the plant by placing a 3 or 5 gallon pail that has had the bottom cut out of it around the plant. Otherwise, I find the celery bushes out and makes lots of leaves rather than nice long juicy stalks. Hope that helps!
I work as the curriculum developer for a museum and I stumbled onto your ideas today and look forward to using variations of your creative project ideas for some of our science based summer camps. So on behalf of educators and moms alike, thanks!
As for the celery hydration conundrum, try using polymer crystals. You can usually get them at a craft store already hydrated to put into flower vases, but you can also buy them “dry” (I get mine from SteveSpanglerScience.com). Kids LOVE watching them expand right before their eyes and you can start seeds (and watch as the roots develop) or “pot” plants in them and never have to worry about watering them. I hydrate them with liquid nutrients designed for hydroponics systems, and then grow tomatoes on my balcony in south Florida. Chemistry, Biology, and Nutrition education all wrapped up in one!
I live up here in Anchorage Alaska.Just started regrowing celery and green onions 3 days ago. Summer days here are approx 15 hrs of sun a day.I live on the third floor and am growing a salad so to speak on a small balcony. Sugar snap peas,leaf lettuce,jellybean tomatoes,and now the regrowing celery and green onion. Big pots and old pallets are the containers.will have herbs growing from the pallets soon.I am very excited!!!! will be a learning experience.
Okay, I’ve tried this 3x now and each time the celery starter rots and turns to mush in the ground, taking down the new growth with it. At first I thought it was too dry, so the next one I kept moist and we got a lot of rain that week. I’m in Houston, so lots of sun even though it’s December, and not too hot. Other than keeping it in the water for 3 weeks instead of the 1-2 days it takes to sprout a good inch or two from the starter, what am I doing wrong???
In Md I have no trouble growing them, but when in Fl I have the same problem. I’m not sure why, but I suspect heat. I’m going to try it in Oct and see if it works better.
Pingback: The ABCs of…Farming for Children G-L | Glittering Muffins
so cool, i had no ideas this works – will definitely try with my kids!
Every time I try this the celery base composts in a couple of days and the entire thing dies.
Pingback: Grow Vegetables In Water | Mom to Madre Kids
WOW, who da thunk! Thanks for sharing
Would love to hear how this turned out! I’ve heard conflicting information. Does it work?
It works great! We tried it a few times now and only had one celery stalk not grow. I think it was because it was too wet. It is totally worth trying since you are just going to compost that piece anyway:)
Pingback: Easter and Spring Activities - Housing a ForestHousing a Forest
There’s a celery stalk in our fridge that will now be getting a second chance at life!
I love it Jessica. Let me know how it goes!
What a cool idea. I’ve done this with pineapple, but never considered doing the same with celery. I hope you’ll consider sharing this at Look What We Did, a month long link up hosted by HammockTracks. -Savannah http://www.hammocktracks.com/buttons/
how do you grow a pineapple?
Chop the top off, eat pineapple, and plant top 🙂 Takes about a year to get another pineapple, but so rewarding when you do!!!
Cut off the top(leaf with about 3/4 to 1 inch of the fruit still attached. Stick the fruit section in the soil. Walah. Watch it grow. It grows best in well drained sandy soil as that found in South Florida. We got 15 pineapples from our front yard last summer and so far we have gathered 4 this summer. My husband buys Dole pineapples and puts the head wherever he finds a sunny spot. They do not like too much water.
Oh If you have no time to plant it after cutting the top you can just leave in a shady spot outside for up to a week or 2. It will still grow .
This is so awesome! I heard this method works great with green onions too 🙂
Thanks for the tip. We may have to try that next:)
I have tried this with so far perfect results….but now I am wondering how or what is the best way to transfer celery without damaging the plant?
Pingback: Saving Seeds | Housing a ForestHousing a Forest
what kind of soil do you use ?
Thank you!
We just used regular potting soil
Works great with Bok Choy also!
Thanks for the tip. We may have to try that next:)
Pingback: Da zero al VERDE » Come coltivare il sedano in vaso partendo…dal gambo
Pingback: DIY: Regrow Green Onions and Celery
We have three in different stages. The one we started first has about five inch of growth, the second is just starting to grow, then today we put another in water. My grandson is loving this. We will be doing green onions soon. I was wondering when I take the first one and plant it how much sun should it get. I’m in Oklahoma and we can get up to 110 F so I’m a bit worried about where to plant. Also at this time all three are in water floating and growing but from what I read on here should I empty a lot of the water? My grandson is so excited I don’t want to do something wrong now lol 🙂
I like your idea as I have one in the fridge.. But on the note of putting a bucket over the celery, we have tried and were having good luck with that plastic pipe, the white kind. after the plant get so high and you want to bleach the celery put on the pipe, the celery will continue to grow. But the celery itself will start the bleaching of the celery. That way the bitterness of celery Is gone and you get the light green color of the tender centers . We used this in Alaska and it worked out good. Some times the milk cartons are not tall enough as the celery grows.
This I am going use with my 2nd graders this year. Love it.