


I am in love will the You Tube video of Holton Rower’s Tall Painting. It is so amazing and inspiring. If you have not seen his video yet, you need to check it out! Soon after we watched the video(for the 15th time!), Pepper Paints posted an art lesson she did. This is something that I am going to try with my kiddos over the summer.

Tall Painting by Holton Rower
The tall paintings were our inspiration to create a focal painting for Annika’s Art Party. We used cheap craft paint, but I am on the hunt for bright house paint which would make this an even more affordable project. There are places that you can drop off unwanted paint, I wounder if they would let me pick it up as well? Hmmmm…something to check into.
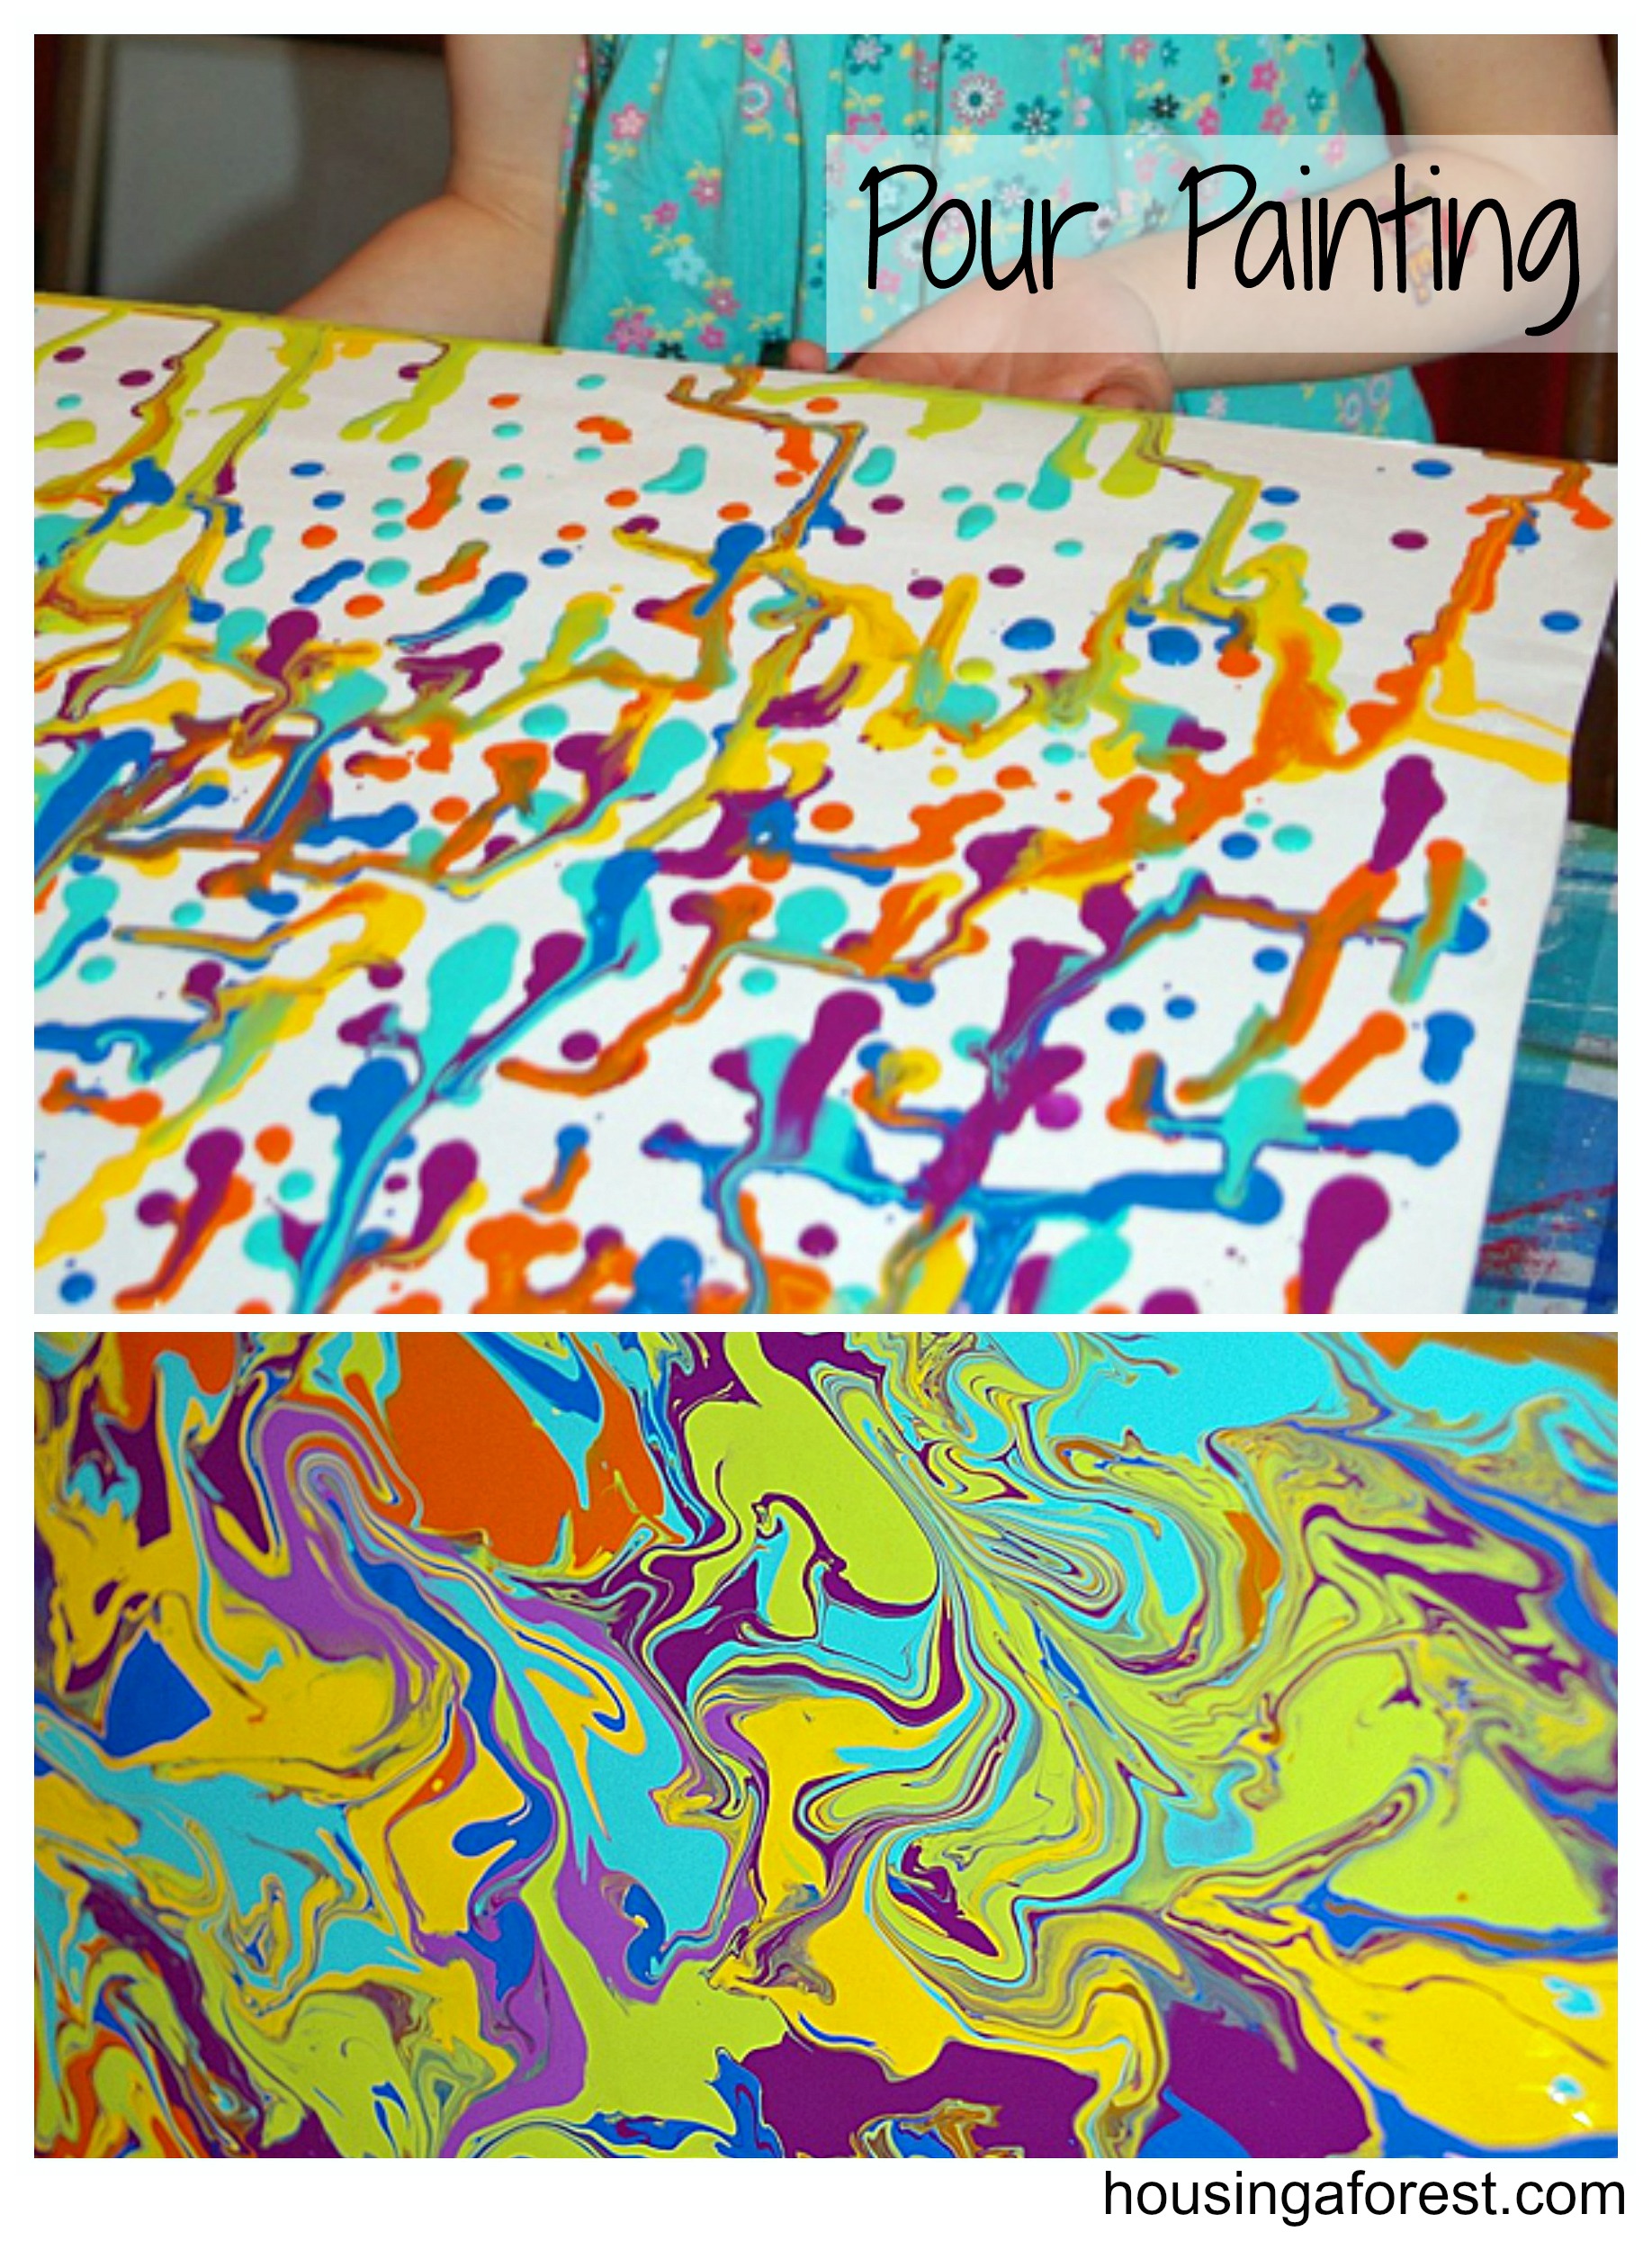
Make sure to cover your painting surface with thick plastic table cloth, since you will be encouraging paint to drip off the edge of the matting board. Cover the board with a quick layer of paint. Painting the surface before you start pouring is important. It encourages the paint to spread over the entire mat board vs making trails of paint. While the paint is still wet start pouring paint directly out of the container onto the board.

Once you are happy with how it looks, tip the board in all directions allowing the paint to run together. Some paint will run off the edges and that is OK. Just simply just tip the board in a new direction.

Lay the board back down and pour on more paint, tipping the board again. Repeat this process until the entire surface is covered. Annika repeated this process about 10 -15 times. She loved watching all the colors mingle and create fun designs.

I think that Annika might have chosen the paint colors to match her shirt. Too funny! Nothing like sweet concentration to create a master piece!

The painting only took over night to dry which I was amazed at. I thought that since the paint was in thick layers it would take a lot longer. I love how it turned out! We will need to try this again with the rest of the kiddos.


WOW! Thank you SO much for linking up! I’d love to feature you blog sometime and all of the awesome art projects you’ve done! Would you be interested?? Please email me and let me know! 🙂
This is an awesome interpretation of the tall paintings! I definitely have to give this a try!!
Jamie
I love that video too. I posted it on my blog right when I saw it first. It is amazing to watch and I love how you made it come to life in your home. Thanks for the inspiration! I am excited to have found your blog today.
What a great way to tie in a bunch of colors. I love it!
Your painting is beautiful!! Totally similar effect. I can’t wait to try this. Thanks for the link!!
What a fun alternative to the “tall” painting. Thanks for sharing the idea.
How absolutely creative and beautiful. I’m sharing this for sure! Thanks for linking up to It’s Playtime!
Rachele @ Messy Kids
Too bad you didn’t post this a few months ago. We got rid of all the paint our previous house owners left us! You can also get the oops paint from hardware stores for reduced prices.
I love this, I’ve seen Tall Paintings on Teacher Tom’s site and have wanted to try it but think my girls are too young for it, this is a perfect interpretation. Thanks for sharing on It’s Playtime! that’s where I saw this 🙂
Looks beautiful !! Great idea… What paints did you use? Love the bright colors:) Also will cardstock hold so much paint? what was ur painting surface?
Thanks for sharing
We used small bottles of acrylic paints, the kind that you can buy in craft stores. The painting was created on mat board. Mat board can be purchased in large sheets from a framing shop. I got mine when a local frame shop was going out of business, so it was really inexpensive. You could also use stiff cardboard, you just need a sturdy base that wont buckle with all the wet paint. Hope this helps.
You can put the mat board onto a cookie sheet…the ones with sides. Then you can move it around and also catch the drips which can be blotted up with paper towel.
This lesson made the Weekly Top Twenty best art lessons over at The Art Fairy. Come by and pick up your button if you get a chance. Great project!
We recreated a tall painting this week too. I LOVE your interpretation. I think that would be a great extension to what we have just done. Thank you!
Donna 🙂 🙂
This is wonderful! THanks for the inspiration!
Oh my goodness – this is amazing! I will have to try this at preschool.
Love this!
Wow wow wow! What fun – and an amazing result too. I love it!
I featured your lovely post on this weeks It’s Playtime. Thank you again for sharing with us!
Wow, this turned out so great!
Okay, that is amazing! My daughter will LOVE this!!
I love this project. I am the art teacher for next year for our homeschool co-op. I can’t wait to do this project. The kids will love it. Thank you for posting.
It?s really a cool and helpful piece of info. I am satisfied that you simply shared this helpful information with us. Please stay us up to date like this. Thanks for sharing.
Awesome work Annika. Simply beautiful. Loved the choice of colors. Can you tell which paint was used? Is it Acrylic or something else?
We used acrylic craft paint and regular house paint. Both worked great.
I was just confirming that you painted the mat board first right? Did you let that dry or paint the whole board and then carried on with the coloured paint?
Paint the board with a base coat and while the paint is still wet start pouring all the fun colors. We found that if the board was dry when we started pouring the paint ran in trails instead of covering the whole board. Good luck.
Tried this this week with a combination of house paint and craft acrylic..Worked great. So fun! Thanks for the idea!
Hi! Just wanted to say thanks for the great idea! Also I wanted to give a suggestion for putting a fun twist on this. Try this same project with paint made from sweetened condensed milk and food coloring. It makes a very thick paint that dries shiny. Because the paint is thick it works best to use poster board or other heavier duty paper and actually hang the paper or prop it up (with something underneath to catch the drips) while it slowly drips down the paper. But the effect you get with the thicker shiny paint is really cool especially because the colors don’t mix.
Love this idea and for younger children or to cut down on the “mess” You could get a boot/shoe box and place the poster board (cut to size) inside and they could tip it back and forth to make it run and just tip the box up to make it run down or up…A shoe box could also be used for smaller paintings and then used to make a greeting card….Glitter Tempera would look good.
Thanks for a great idea…will be trying it soon…
Great suggestions! I love the idea of making mini ones in the bottom of shoe boxes, we might have to try that.
Great Art !! ..and my daughter ( 11) is named Annika 🙂
Your blog is so inspiring. Art is so important for kids…yet so easy to neglect. Thanks for encouraging us in that direction.
Thanks for your sweet comments. I totally agree that art is important for kid and adults too:) There are so many great skills that kids learn through art.
Did the paint made with condensed milk draw ants?
FYI: The Habitat for Humanity Re-stores sell house paint very inexpensively. It’s an inexpensive way to get your paint AND it supports a fantastic cause!
habitat for humanity’s Re-Stores always have leftover paint for sale
Most paint stores have “oops” paint that they sell very cheaply. These are colors that were mixed incorrectly or maybe never picked up. Ask around.
Pingback: Crafting with Handmade Charlotte: Frame Worthy Painting Projects For Kids | Paint Me Plaid
Pingback: Top Activities of 2011Housing a Forest
Pingback: The ABC's of Crafting on a Budget - Letters K-O - Housing A ForestHousing a Forest
Pingback: Top 10 Ways to Learn with Paint - Housing a ForestHousing a Forest
Wow! This looks awesome!!! I HAVE to try this! Thanks for the inspiration!
Wow, that came out great! I can’t wait to try this out.
I did this with my campers last summer and it was so much fun! Love the big canvas idea. We stacked canvases in different sizes. Always meant to do a post on it but never got around to it. So cool!