


We were at a beach with some friends and one of the Dads showed Kaleb a cool trick. Kaleb was amazed when he shot the cap of a water bottle about 20 feet in the air by simply twisting the bottle. Nothing special is needed, just an empty water bottle and some muscles. Kaleb thought this little water bottle popper was the coolest thing. Now he is constantly on the hunt for recyclable water bottles.
 It is tough to get the bottles to start twisting. Younger fingers will have a really hard time, so it might be best to just let them watch. Please be cautious when trying this. The cap will shoot off like a rocket, so make sure it is pointed in a safe direction!

Keep twisting the bottle until it won’t twist any further. The twisting builds pressure in the bottle, so the tighter you twist it; the higher your cap will shoot. We never had any of our bottles pop while twisting, but it is possible for this to happen. Please be careful.

Check out how clear the bottle is at this point. Once the bottle can no longer be twisted any further, slowly open the cap. It will eventually reach a certain point when the cap just shoots off.
 Notice the vapors coming out just after the cap shoots off, and how cloudy it is inside the bottle.
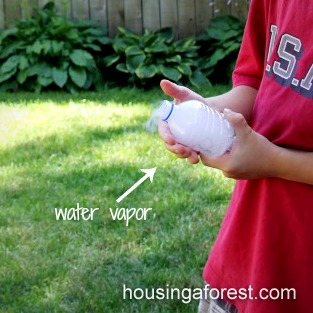
I don’t know the exact science behind it, but it is because of the pressure that is built up inside the bottle. I would love to hear the explanation for why this happens.
 Some of our caps shot about 20 feet in the air so be prepared. We found some brands of bottles work better, so you might have a bit of trial and error. Be safe, and have fun!
Here is a link to a fun list of great experiments that my kids love.


Kudos to you for doing such great hands-on science with your children! Here is why the vapor forms in the bottle: Even though we don’t see them, water molecules are in the air all around us. These airborne water molecules are called water vapor. When the molecules are bouncing around in the atmosphere, they don’t normally stick together.
Twisting the bottle forces the molecules to squeeze together or compress. Releasing the pressure allows the air to expand, and in doing so, the temperature of the air becomes cooler. This cooling process allows the molecules to stick together – or condense – more easily, forming tiny droplets. Clouds are nothing more than groups of tiny water droplets.
This is so helpful! Thanks so much for taking the time to explain it. Kaleb was really excited to hear a clear explanation as to what was happening. Thanks again!
and i thought the rainbow bubbles idea was cool! i am showing my husband this idea. i’m sure it will be fun for him to share with the kids. very cool! thanks for sharing.
I was all prepared to write an answer as to why the cloudy vapors formed when I noticed that another commenter had already answered the question (and far better than I could have, probably!) Cool experiment!
Pingback: KEEN Fourth of July: 5 Family Activities « The KEEN Blog
Awww, I was all set to answer that one too. Actually you can liquify oxygen too, but we can’t do that outside of a lab because of the amounts of pressure neccessary.
I have tried and tried this experiment but when I go to let the cap off, the air escapes and it goes nowhere! What am I doing wrong?
We have had a bit of trial and error at first as well. Some brands of water bottles work better that others. If you release the cap too slowly, it tends to just give a “puff” of air and the cap does not go anywhere. We found that the water bottles that are made of the lightest weight plastic and have the smaller lid size work the best for us. Hope this helps.
Explanation of the Physics. It’s been years, but I think I understand it.
The air pressure in the bottle increases as the bottle is twisted, as the air pressure increases so does the temperature inside the bottle. I believe it is the temperature difference between the air inside the bottle and the air outside the bottle that causes condensation.
What brands work best
We have found the ones that are made out of thinner plastic work the best, which usually end up being off brands. Aquafina bottles are hard to make work.
Deer Park works well. Thin “store brand” bottles work well, too.
Pingback: Science Sunday: Manta Rays | Adventures in Mommydom
This will be just as fun for me 🙂 Can’t wait to try it!
Pingback: The ABC's of Crafting on a Budget - Letters A-E - Housing a ForestHousing a Forest
Pingback: Get Out and Play with ideas from The PLAY Group Nature and Play
Pingback: Recycled Crafts & Activities from the PLAY Group | Housing a ForestHousing a Forest
Please go retrieve your bottle cap. They are not recycled in most locations and are responsible for the deaths of many birds.
Wow, this is so cool! I can’t wait to impress my husband with this. Oh yeah, and the kiddo. 🙂
Hi Tammy your site is very cool. My sun has two Kids party buffet and just jokes and plays are doing at parties. There are no electronic games in his buffet. On the other hand , as chemistry teacher I used to develop activities for children. In this specific activity I agree 100% with the Julie Gintzler commentaries. This is the right explanation for the fenomenum, is the fast expansion of the gas that turns the temperature to decrease and the water vapour to condense. Sory my mystakes. Congratualtions