Sewn Valentines

DIY Valentines Day Cards ~ Made by kids

I’ve been on the lookout for a simple and adorable idea the kids can make for school Valentines.  While searching on Pinterest for fun handmade Valentines, I came across these little cute love notes.  The cards are adorable and I had to try making a set with the kids.  They turned out AMAZING!  The perfect project for my budding little seamstresses.

Sewn Heart Valentines ~ DIY Valentines card

I wish I had taken pictures of our family card making night.   It was adorable and involved the entire dining room table and all 5 of us.  Yep, we even roped my hubby into helping with this one;)  Heres how we broke it down…

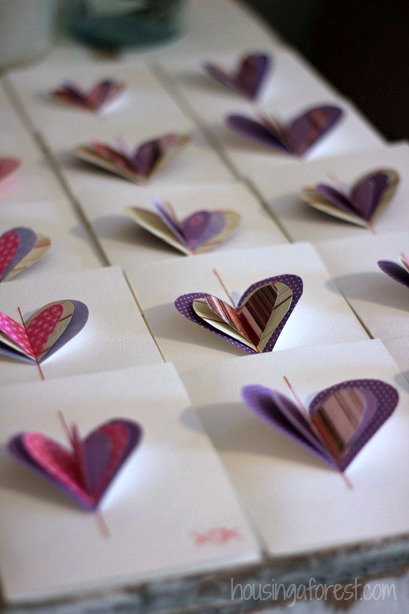
  • Chuck and Kaleb teamed up to cut out the paper hearts.  We used scraps of patterned paper from a recent project.
  • Bree just learned how to use the sewing machine and couldn’t wait to show off her new skills.  She used the sewing machine to stitch all the hearts on.  It was simple straight stitch so really easy.  Plus sewing on paper is way easier than sewing on fabric.
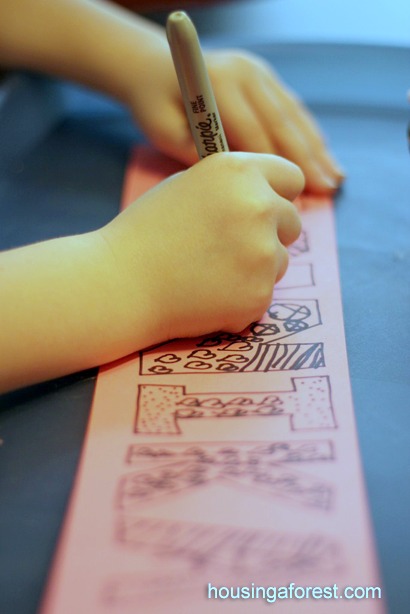
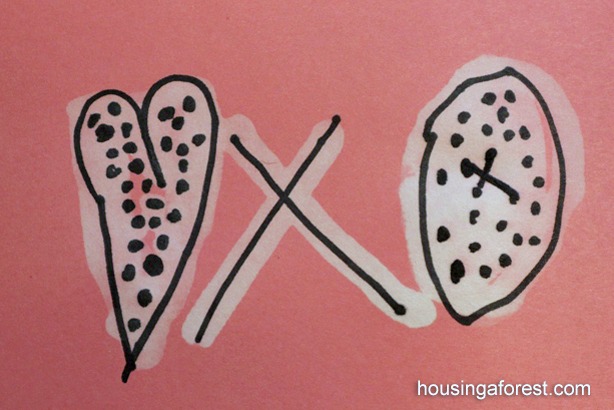
  • Annika wrote the cute little XOX’s at the bottom of each card and cut all the strings.  She loved that she was given 2 jobs and could finish her part faster than everyone else.
  • My job was to keep the whole assembly line rolling;)

Sewn Heart Valentines ~ DIY Valentines card

Everyone loves receiving handmade cards, especially when they are made with love from kiddos.  These little cards take no time at all to make and are perfect for the last moment gift.

Sewn Heart Valentines ~ DIY Valentines card

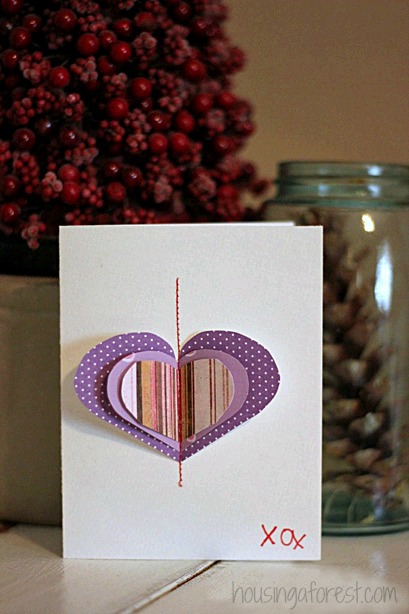
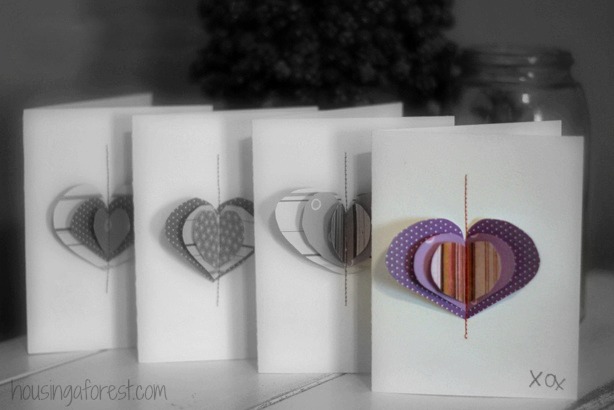
They turned out so cute!  I love that the kids choose shades of pinks and purples for the paper hearts and red thread for the stitching.

Tips for helping kids use a sewing machine:

  • If your sewing machine has a speed control turn it to a reasonable speed they can handle.  Sewing is not a race.   The slower controlled speed does 2 things.  1) little fingers are less likely to get somewhere they shouldn’t and 2) the speed is constant so no crazy speed pulsating.
  • Use blue tape to act as a sewing guide.  Just lay a piece of tape right onto the the sewing machine.  The plate should have measurements on it already, but it is hard for kids to see.  The blue tape is an easy mark to follow.  By lining the edge of the card up with the the tape, each of the hearts were centered and the stitches were in a straight line.

Sewn Heart Valentines ~ DIY Valentines card

Leave a link to your favorite hand made Valentines Day Cards.  I would love to see them.

Click here to find a list of my favorite Valentines activities, crafts and games.

Mending Snow Pants

Bree got passed down a pair of snow pants from her brother.  I have no idea how Kaleb managed it, but he wore right through the first layer of fabric on the knees.  I’m thankful they are reinforced.  We are so close to being done with winter, I hated the thought of buying a new pair.  Bree was not super excited about worn knees and plain black, but she is too sweet to complain. She wore them for a bit before I took pity on her and made a trip to the fabric store.

Notice the happy smile now.  She wad so excited about the new look.  It was a really simple, cheap fix.  The knee patches are made with PUL waterproof fabric that is normally used for making cloth diapers. It is waterproof which is a definite must for keeping out the snow.

I cut the fabric to the same size as the reinforced factory patch that was already on the snow pants.  This project had to be no sew, so I used permanent fabric glue that is washable.  I smeared a generous amount of permanent fabric glue on the back side of the patch and attached it to the knee.   I was a bit nervous that the edges would come up after playing so I painted a thick bead of the same fabric glue around the entire patch to try and seal it.

The flower was Bree’s adorable addition.  I love the jewel center.  She was so excited that they are now girly and not just plain black.  I’m not sure how well the patch will stand up, but even if it only last the rest of this winter I’m totally happy.  This is definitively a cheap upcycle.

I also heard that you can use sheet duct tape to mend snow pants.  I love that they are making duct tape is so many fun colors now!

Valentine Owls

So If I must confess I have had these sweet little Spring oil pastels (link to how we made them) up since last spring.  I love them.  They are hanging in our bathroom.  I have recently received a few comments about having Easter pictures hanging above the Christmas tree.  Ha!  Well since spring is right around the corner and these little guys will soon be back in season, I finally switched them out.  I know backwards right, but when you see the little Valentines Owls my kiddos made you will understand.  I think that I need to have the kids make a complete set of seasonal artwork that I just rotate between!.

With a bit of patience each of my kiddos created a background of beautiful repetitive text.  I gave them a fine red sharpie marker.  Kaleb choose hearts, Bree wrote I love you and Annika made a pattern of XOX’s.  They turned out so cute!

With a black sharpie each of the kiddos drew their version of an owl.  Since we were making Valentines art, the kids found fun ways to sneak in as many hearts as possible.

The kids then painted the owls with watercolors.  After they were done painting, we traced back over the owl with black sharpie again.  This step really cleaned everything up.

I love how each of the Valentine owls turned out.

If you don’t want to miss out on any of the fun we are having at Housing A Forest, make sure to follow us on PinterestFacebook and Twitter.

Bleach and Sharpie Valentines

All our black sharpies dried up.  I have tried reviving them with rubbing alcohol, but they were beyond help. I LOVE sharpies, and use them all the time.  While I was at the craft store tonight, as I was looking at the rack of beautiful, colorful sharpie caps.  Am I the only one that gets lost in all the wonderful colors and styles?  I had a hard time coming home with only just a boring black Sharpie.  Oh well, another day that perfect Aqua Sharpie will hop into my cart!

So once I was armed with the fresh black sharpie, I needed a project.  We decided to revisit a project that we played with in my pre-blogging days, making Bleach and Sharpie Valentines.  All you will need is a sharpie, card stock, q-tips and a bleach solution that is 50% bleach and 50% water.  Please take the necessary precautions when working with chemicals and your precious little ones!

Bleach and Sharpie Valentines

The kids doodled all over their paper with the black sharpie.  We tried this with construction paper, but the results were better when using the card stock.  Carefully dip the q-tip in the bleach solution and draw over the sharpie lines.  The sharpie color will not be effected, but the paper will loose color where the bleach is drawn.

Bleach and Sharpie Valentines

This process can take a few moments before the bleach will work, so be patient.  The kids thought the disappearing paper color was pretty cool!

Bleach and Sharpie Valentines

Valentines will soon be on us.  I love that my kiddos are making sweet little cards and notes leaving them all over the house.  There is something that makes me smile when I see little animals and flowers made out of hearts!


Minute To Win It # 2

Minute to Win It Family Night

We are enjoying playing Minute To Win It family games.  We recently invited another family and a few gaming friends to join us in our challenge.  Nothing like a few friends to giggle with as we compete in these silly challenges!  We Played Bite me and Junk in the Trunk.  Both games were a huge hit producing lots of giggles.

Bite Me ~ minute to win it game

The challenge was to pick up 5 paper bags cut at varying heights using only our mouths and place them on a table.  Flexibly and short legs were a huge advantage for this game;)  Nothing like late night games in pj’s with friends.

Bite Me Supplies:

  • 5 paper bags cut at varying heights ~ cut to the sizes of 10″, 8″, 6″, 4″, and 2″.
  • A one minute timer or stopwatch
  • Low Table

How to Play:

Place the bags, open and standing, on the floor leaving about 4′ between each bag.  Have a low table near by to place the bags on.  When the timer starts, start with the tallest bag, bending to pick it up with your mouth, then placing it on the table.  Make sure to only use your mouth, no hands!  Continue with the rest of the bags, working from tallest to shortest.  Once all the bags are on the table your task is complete.

Make sure that your knees or hands don’t touch the floor!  That is what makes this game so difficult.

Bree has amazing flexibility, so for her this game was a breeze.  As for the rest of us, well let just say I won’t be posting any photos of anyone over nine:)  We were all rolling with laughter, and with only one nose plant I would definitely call this game a hit!

Junk in the Trunk ~ minute to win it game

The challenge was to tie an empty Kleenex box around your waist and fill your “trunk” with 8 ping-pong balls.  Wiggle, wiggle and wiggle some more until the box is empty.  I still love listening to the kids chant…”you have a minute to win it in 3, 2, 1 go!”

Junk in the Trunk Supplies:

  • Kleenex box
  • Belt
  • Duct tape
  • 8 ping pong balls

Our “Junk in the Trunk” box was simply constructed.  We emptied out all the Kleenexes and removed the plastic window from the box.  Chuck cut slits on each side of the box large enough to slip a canvas belt through.  The corners were reinforced with duct tape.

How to Play:

The player puts on the belt and box contraption, making sure that the box is resting just above their backside. Place all 8 ping pong balls in the box. When the one-minute timer begins, jump, wiggle and shake trying to remove all eight of the balls out of the box. Complete the task before the timer runs out.

I loved watching everyone’s different “wiggle” style.  The quickest finish was 4 seconds!  Now that’s some serious wiggling!

I love that face, pure joy and concentration!  The kids are eager to have another Minute to Win It game night.  We would love to hear if you have any fun family night games that your family loves!

For more Minute to Win It Games, check out our:

Cup Stacking ~ Stack Attack

Floatacious

Don’t Blow the Joker