Travel Timeline

We are loving summer and loading the car for our next family adventure.  Since we go on long trips with the kids often, I have learned that an organized car and a few extra tricks are key to the trip going smooth.  Here is one of my favorite tricks for helping my kids visualize our road trip. All it is, is a simple Travel Timeline.  Kids love to be a part of whats going on and this simple visualization tool gives them just that.  A simple way to make a connection to how much further before we reach the next landmark.  Visual references or maps help kids understand where they are and keeps the “how much further” question to a minimal.  That a win in my book!

Travel Timeline All you will need to pack in the car to make your own time line need is a little string, a hole punch, paper squares, makers and a few paper clips.  Nothing crazy, and basically mess free.

Before we leave on our trip, I have Chuck install the string clothes line.  Having it ready to go makes the craft even that much easier.  Make sure to hang the clothes line in an area that is out of the way.  We strung ours between the hooks on the ceiling, which works great for us since the kids only use one of the vans sliding doors on trips.

You could make all the visuals at home, but I like to have the kids make them as we are driving.  That way it helps pass some more time in the car.  We punched a hole in the top of the paper and hung it on the string with a paper clip.  Super simple and easy.

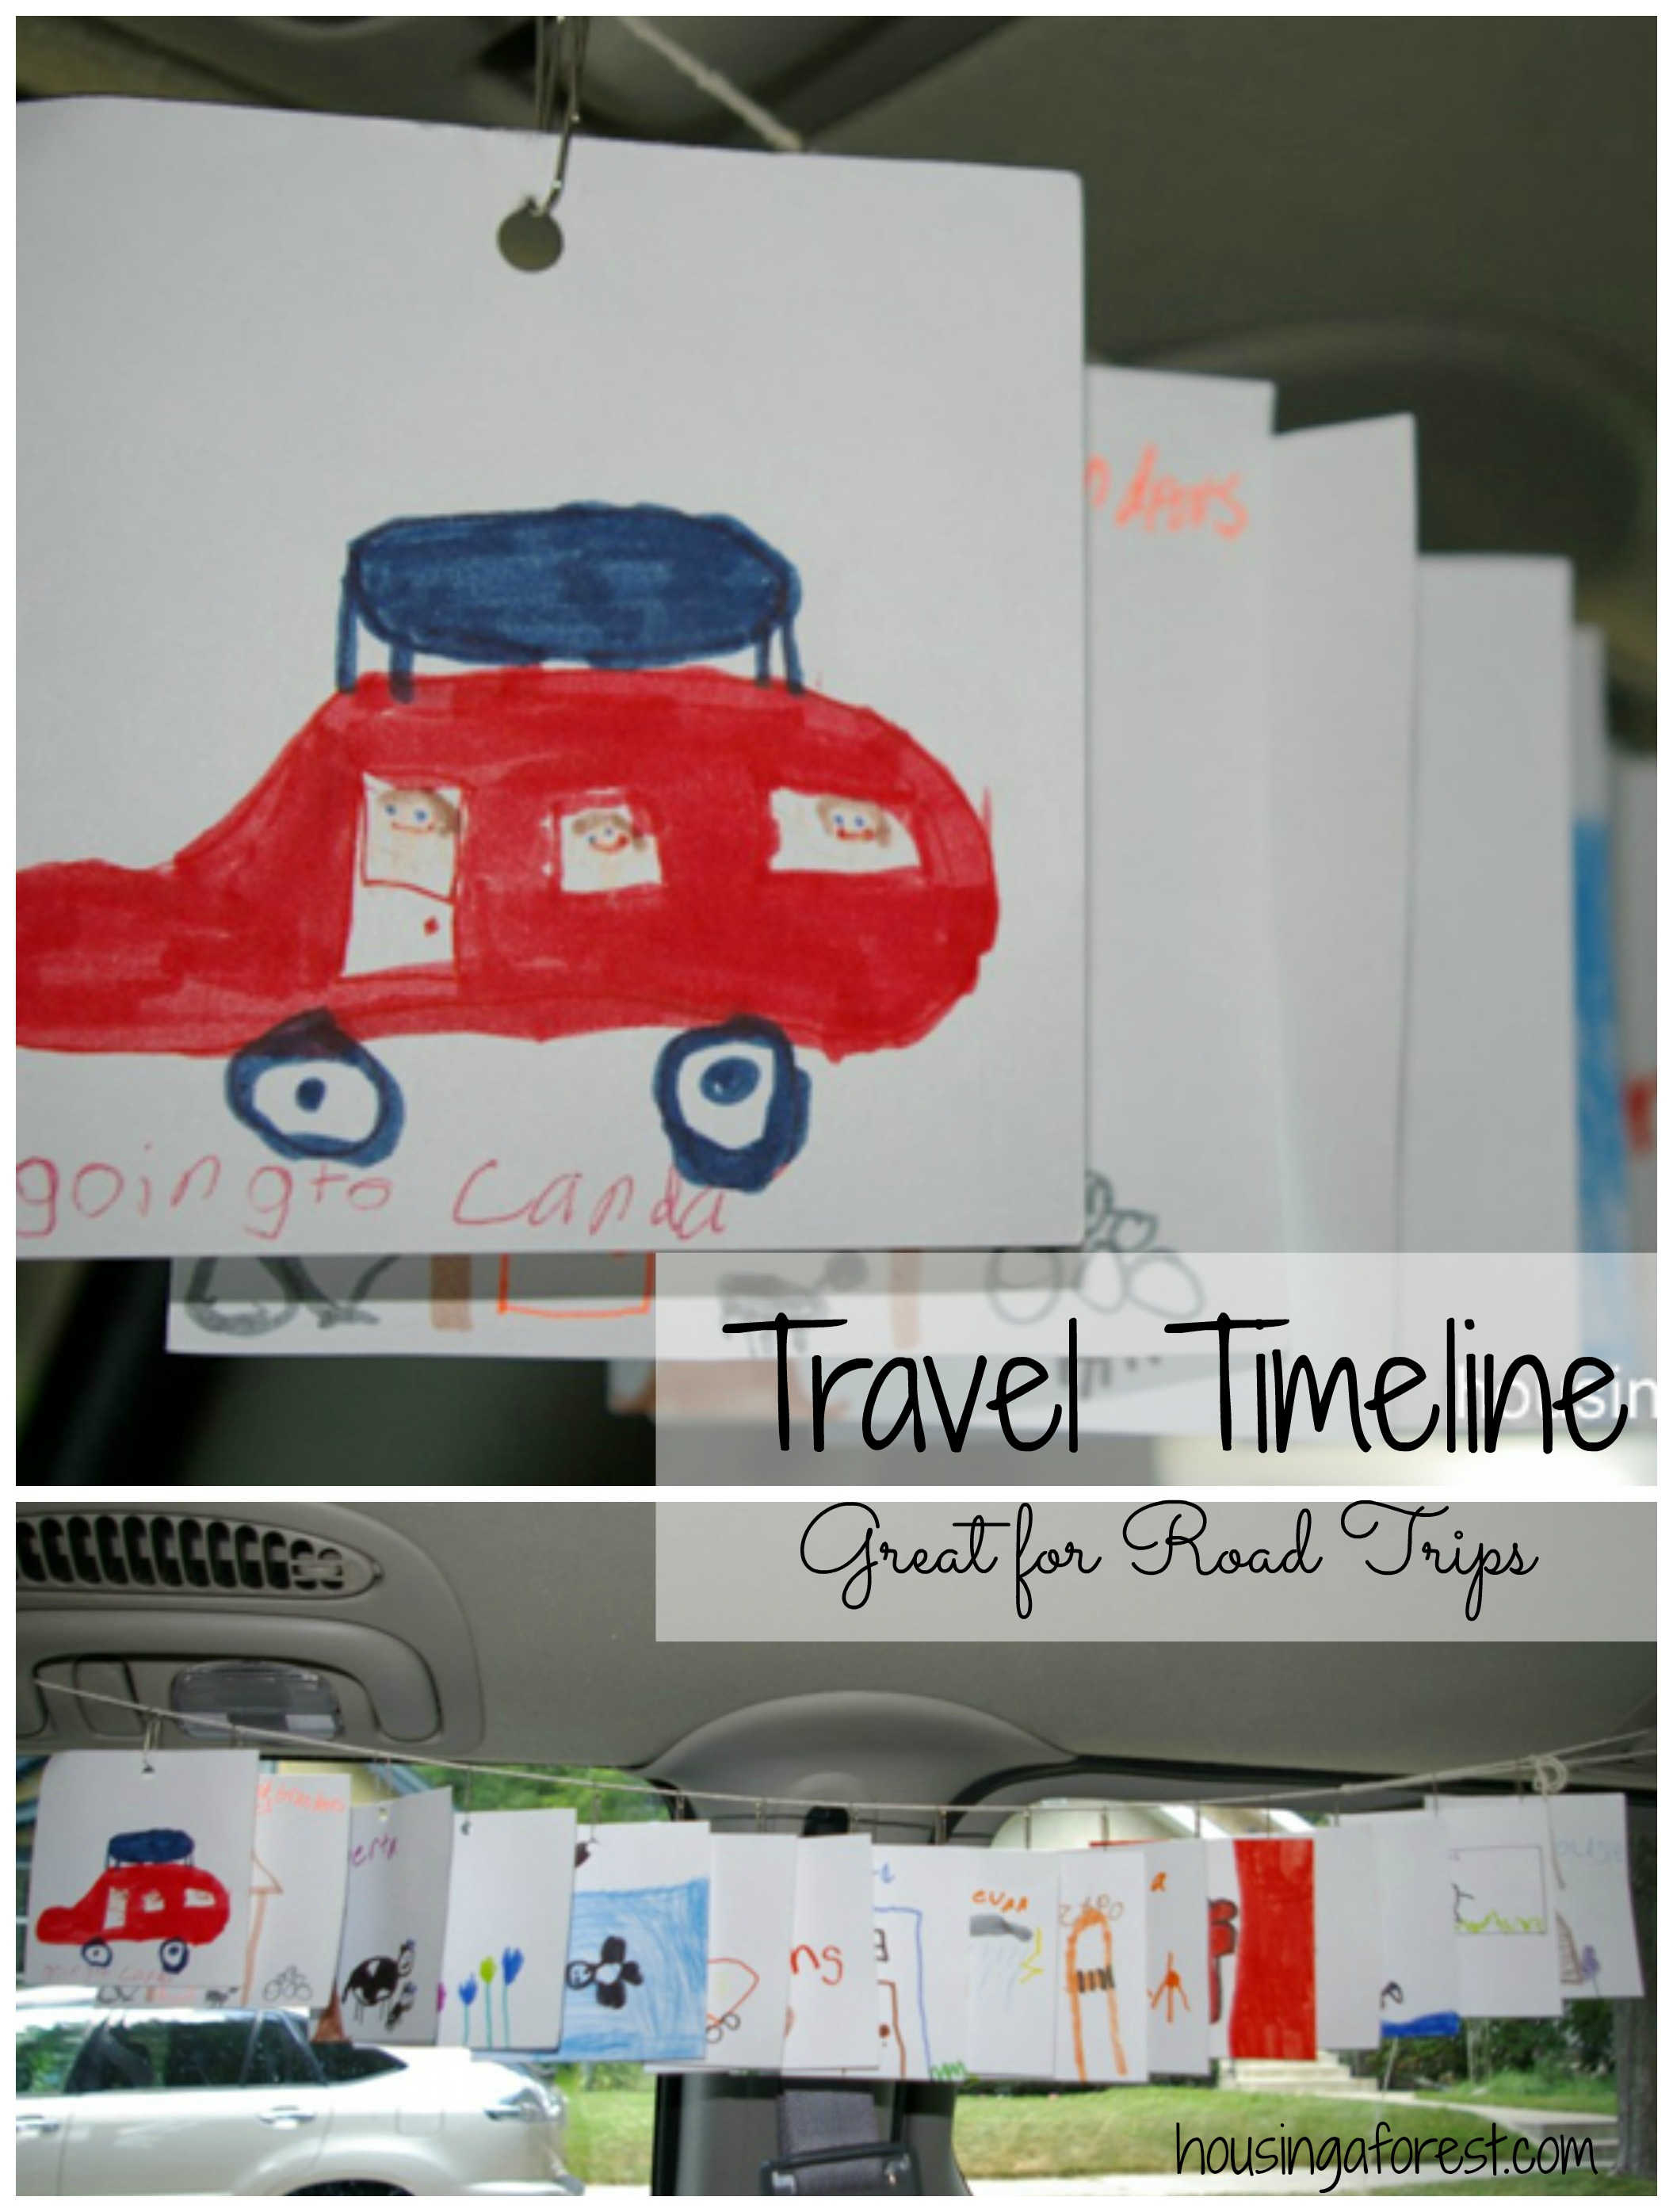
The kiddos drew pictures of things that we would be driving past on our trip.  Since this is a route we take often, the kids were able to remember some of the things from past trips.  We also added all the states and provinces that we would be driving through.

The kids drew our car, and yes we were all smiling the whole trip;)  Ha!  As we passed one of the markers, the kids would move our van along the time line.

I love how it turned out.  They looked so cute swaying in the window and the kiddos loved seeing the car move along the time line as we got closer to our destination.  So fun!

If you are looking for more road trip ideas, follow the link to a fun list of things we like to do.

Flower Suncatchers

Sticky wall flower suncatcher

Suncatchers are always a hit and they are so easy to make.  The kids made nature sun catchers in the minivan on our road trip to Canada.  They turned out super cute, and brightened our windows for a short period.  Love it!

This craft did not take much organization before hand.  All you will need to pack in the car is contact paper, tape and a pair of scissors.  We were able to pick the flowers out of a friends garden where we spent the night.  Thanks Vince and Erin!  I placed them in a bag until we were ready to use them.

The girls were really excited about making their windows pretty.  I cut a sheet of contact paper and peeled the backing off and used masking tape to stick it to the window.  The kids arranged the flowers on the sticky paper pressing gently.  Once they made their design I gave them another sheet of contact paper slightly larger then the first one.  Sandwich the flowers between the two layers of contact paper and press firmly.  Since the last piece of contact paper was slightly larger, the kids were able to stick them right onto their window (we removed the masking tape since it was no longer needed).

The kids loved this project.  Normally you would press and dry the flowers before you begin, but we were on the road and no time for that.  So we used fresh picked flowers.  They were beautiful for a few days, but as they sat in the sun the kids started noticing moisture inside the contact paper layers.  This brought about a quick lesson in how nature decomposes.  This was a great project for the car.  Totally mess free (well minus a few stray flower petals) and so easy for the kids to do.

If you are looking for more road trip ideas, follow the link to a fun list of things we like to do.

Road Trip BINGO

I love summer road trips.  We just returned from visiting my family, which is about 20 hours by car one way.  We drive up a few times a year, and we are continually tweaking our system to make the trip as easy as possible.  We don’t watch many movies, even though we have a built in movie player.  Our trip is viewed as “captive family time.”  I plan lots of fun activities, we play games, do crafts and hopefully enjoy spending time together:)  We have been blessed with 3 wonderful travelers.  Over the next few days I will be sharing what our car looks like and what types of things we do together to make the time go quickly.

One of the things that the kids love to do is play travel bingo.  Although, most free printable travel bingo games are usually designed with only 4 boards.  Boo!  We like options, so I got out my sharpie and set to work.  This is my first printable pdf so hopefully this works.

I created 8 different Bingo boards.  Each board has the same objects just in different spots.  I like to laminated our Bingo boards which makes them reusable.  When you find an object on your Bingo board, simply cross off with a dry erase marker.  Once someone has won, wipe all the boards clean with a cloth.  Like with regular Bingo, before you start determine what type of Bingo you will be playing.

I would love to hear where you played my Bingo game.  It would be interesting to know how far it has traveled and where it has been played.

Bingo Board 1

Bingo Board 2

Bingo Board 3

Bingo Board 4

Bingo Board 5

Bingo Board 6

Bingo Board 7

Bingo Board 8

Disclaimer:  I am super excited to have the road trip bingo printable available for your use.  If you would like to share, please share a link to my blog.  Please do not link directly to just the PDF files.  Please feel free to print the PDF file for your own personal use, but do not sell or host these files anywhere else.  Thanks and have fun playing road trip bingo!

If you are looking for more road trip ideas, follow the link to a fun list of things we like to do.

I will be linking to these parties

Healthy Dehydrated Fruit

My kids love Healthy Dehydrated Fruit Snacks.  They are easy to make and the perfect quick healthy snack for kids.  You can buy dried fruit in the store, but my kids prefer our dehydrator snacks.  My favorite part it that I know exactly what the kids are eating, I don’t have to read any labels.  They also love taking healthy homemade Fruit Roll-ups in their school lunches.

Healthy Dehydrated Fruit

This post contains affiliate links for your convenience.

We have experimented with dehydrating lots of different fruits.  However the kids favorites include kiwis, apples, strawberries, bananas and peaches. We have a 10 Tray Food Dehydratorand absolutely love it!  I have tried a few different dehydrators  but so far this is our favorite.

Healthy Dehydrated Fruit

Dehydrated Strawberries:

Wash the fruit and remove the steams.  Use an egg slicer to make thin slices and simply lay them on the dehydrator trays.  No lemon juice or sugar needed. Dehydrated strawberries are great by themselves or they make a perfect topper for granola.

Healthy Dehydrated Fruit

Dehydrated Kiwi:

Wash the kiwi and peel off the skin. Using a mandolin or knife, make thin even slices.  Arrange slices on dehydrator trays.  Again no special treatment, just ripe tasty fruit!  My kids think that they taste just like sour patch kids!  Love it!

Healthy Dehydrated Fruit

Dehydrated Apples:

Wash your apples and run them through an apple-corer-peeler-slicer (if you don’t have one, then simple peel by hand, core and slice by hand).  Our family loves the tartness of granny smith apples.  Soak the apples in lemon juice to prevent them from browning.

We also enjoy…

  • Sweet Cinnamon Apple Slices ~  Place apple slices in 1/2 cup lemon juice and 1 tablespoon of agave nectar or honey.  Arrange the slices on the dehydrator trays and sprinkle with a dash of cinnamon.
  • Cinnamon Sugar Apple Slices ~  Place apple slices in lemon juice and arrange on dehydrator trays.  Sprinkle with cinnamon sugar.

Healthy Dehydrated Fruit

Dehydrated Bananas: 

Peel the banana and cut into thick slices.  I usually get about 18-20 slices out of each banana.  Soak bananas in 1/2 cup lemon juice and 1 Tablespoon of agave nectar or honey.  Arrange slices on the dehydrator trays.  These will not be crisp like the ones in the store, but they taste SO much better.

Healthy Dehydrated Fruit

Dehydrated Oranges: 

Peel oranges and thinly slice with a Mandoline or knife.  Arrange slices on dehydrator trays.  You may be surprised by how delightful dehydrated oranges taste.  They also make great Christmas decorations.

Drying time will depend on how thick you slice your fruit and if you have added agave nectar or honey.  Generally most fruit will take up to 8 hours.  I often start my dehydrator in the evening and let it run all night.  The fruit is dry when you cut it open and there is no moisture inside.  Remove the fruit from the tray and let cool before storing.  I store my dried fruit in glass mason jars.  It is best to buy fruit at its peak season and make sure to only use ripe fruit.

Healthy Dehydrated Fruit

These healthy dehydrated snacks are perfect for camping, going to the beach, long car rides, throwing in your purse, on top of granola and just about anywhere else.  I love that there are no messy, drippy, sticky fingers or faces to wash and that my kids are snacking on healthy treats with no preservatives.

Healthy dehydrated Fruit Leather

Here is another great dehydrator recipe.  My kids also LOVE this healthy fruit leather in their lunches.  It is 100% fruit, nothing extra added which I’m all for and the kids love that  it tastes great!

Build Your Own Sprinkler

Our summer has not been super warm yet, but the kiddos don’t seem to mind.  They have been splashing in the pool and loving being at the lake.  Today they really wanted to run through the sprinkler, but when we pulled it out it was broken.  Boo!  I have seen some wonderful sprinklers made out of PVC pipe on Pinterest that I would love to make with the kids.  However, we needed a quick simple option for today.  With a few simple steps, you can Build Your Own Sprinkler too.

Homemade Sprinkler ~ Recycled Materials

Materials:

  • Sturdy Plastic Bottle ~ from our recycling bin
  • Tyvek Tape
  • Drill
  • Garden Hose that you can tape to.

Homemade Sprinkler ~ Recycled Materials We attached the garden hose to the bottle with Tyvek tape.  I’m sure most any waterproof tape would work.  Then the kids drilled a number of holes in the top and sides of the bottle.  Depending on how you want your sprinkler to shoot, will depend on where you place the holes.  The kids wanted water spurting everywhere so choose to drill holes in all directions.

Homemade Sprinkler ~ Recycled Materials

It was so simple to make.  I love that Kaleb is so great with power tools.  He spends a lot of time helping his Dad build and was super excited to show Chuck what he created.  So cute!

Homemade Sprinkler ~ Made with Recycled Materials

The kids sprinkler worked great! My favorite part is that we didn’t need to spend money on a new one and the kids had the fun of creating their own.  I was surprised at how easy it was and that it only took the kids a few minutes to build.

Homemade Sprinkler ~ made with recycled materials

The kids loved running and playing in it.