Wet and Wild Days

This is one of my kids favorite City activities.  They set up 3 giant slip n slides made out of sheets of strong plastic.  The slides alone sound fun, but when you add firefighters standing at the top shooting water down the slide it’s perfect (according to my kids!).  Need I say more.  It is a great time and the kids love it!

Wet and Wild Days


Wet and Wild Days


Wet and Wild Days

Kaleb loved seeing how far he could go off the plastic at the end.  He would take a running start to make sure he maximized his speed down the giant slip n slide.  I love it!

Wet and Wild Days

Annika had a blast!  She may not of had the speed of Kaleb, but what she lacked in speed she made up for it with great facial expressions!  Love it!

Wet and Wild Days

They also loved the Fire Truck sprinkler.  It created a great muddy/grassy area for the kiddos to run and slide in.

Wet and Wild Days

Nothing like ending a fun day with a nice jump in a mud puddle.  So fun, the kids can’t wait until next year!

Our House Guests

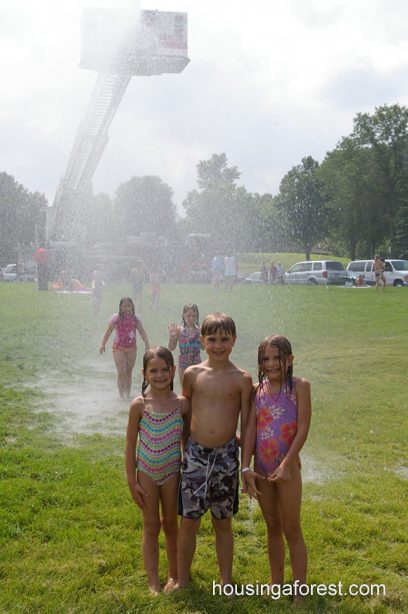
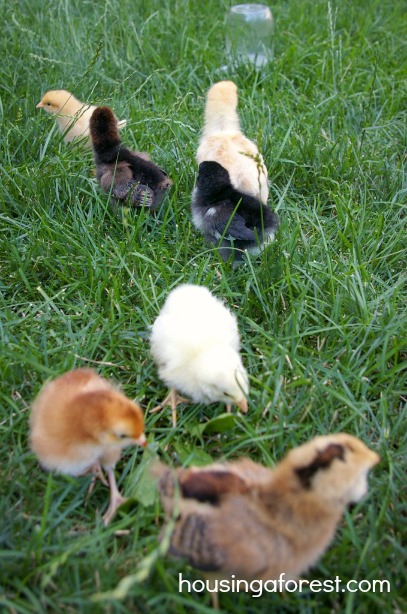
Where is summer going?  It is so hard to believe that we are into August already!  You may have noticed that I have been absent the last little while.  We have been getting acquainted with our new friends and house guests…7 cute fluffy chickens!

Urban Chickens

 The kids have been waiting for this moment for almost a full year.  We have been reading lots of blogs about raising urban chickens.  I raised chickens growing up, but that was on a farm where we had lots of space and room for them.  Raising chickens in a small urban backyard is a different story.  Thank-goodness for all the blogs, they have been a wonderful resource.

Urban Chickens

Every city has their own laws regarding chickens, make sure you check what the laws are in your area.  I am thankful that city is very chicken friendly.  We had to ask all the neighbors within a 100 feet of our property line.  That ended up being 16 houses.  After getting all the signatures that we needed, we then moved on to planning our coop.  The city zoning needed to approve the placement of our coop, and we applied for a permit.  Once our plans were approved we started building the coop and preparing for chickens.

Urban Chickens

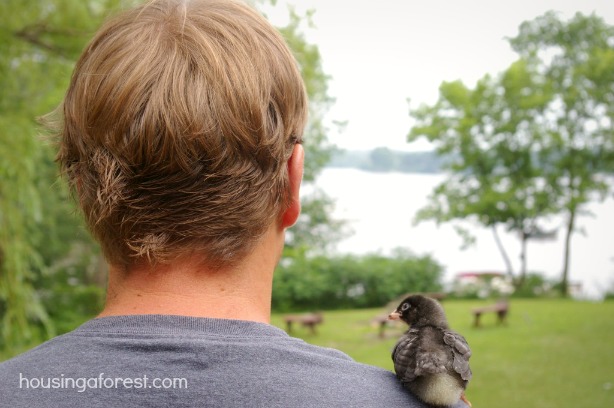
Our chicks went on a vacation to the cabin with us!  I know, I know, but what is a girl to do when we have 7 babies to look after.  They were so little and I could not imagine asking someone to look in on them, so off to the lake they went.  The chicks loved to trip, and were wonderful travel companions.  We set up a little box in the car with a heat lamp so they would not be too cold.  I really wish I would have taken a picture of how cozy they looked.  Once at the cabin, the chicks enjoyed sitting on someones shoulder, being snuggled and played with.  So cute!

Urban Chickens

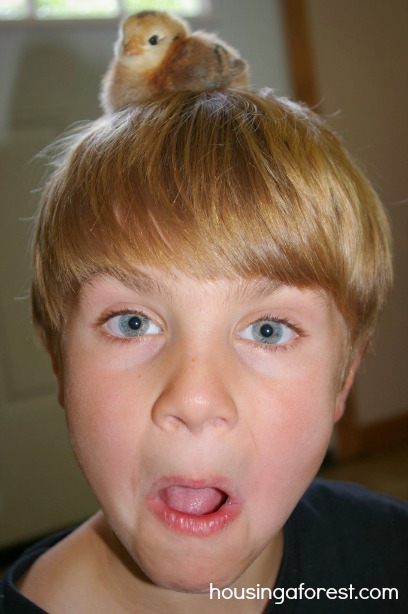
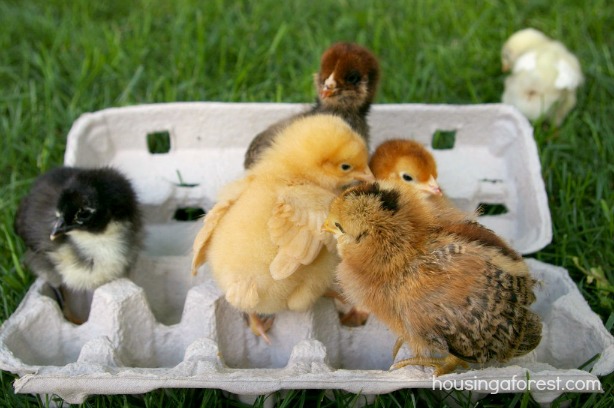
Kaleb loves hanging out with the chicks.  I caught him more than once with a chick on his head.  Ha!  This little cutie named Chip since she looks like a chipmunk.

Urban Chickens

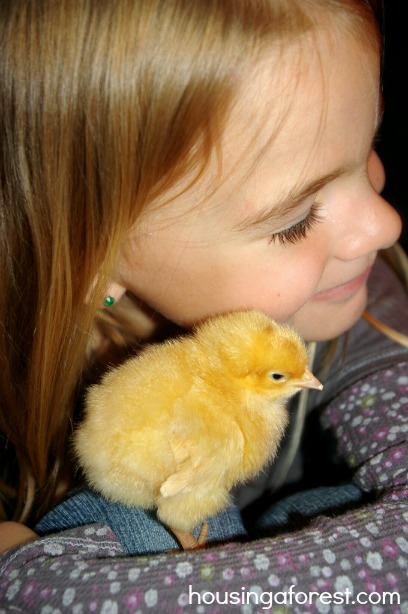
Annika loves snuggling Marshmallow, Marsha for short.  I love the names the kids came up with.

Urban Chickens

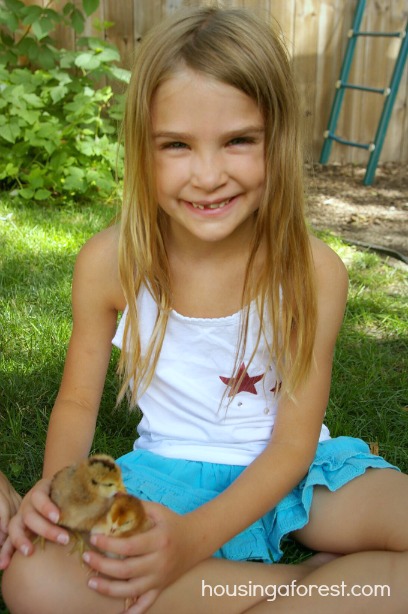
Bree has a soft spot for the 2 smallest chicks Ruby and Chip.

Urban Chickens

Chip has become part of the family.  She even received a spot at the girls outdoor tea party.  Too funny.

Urban Chickens

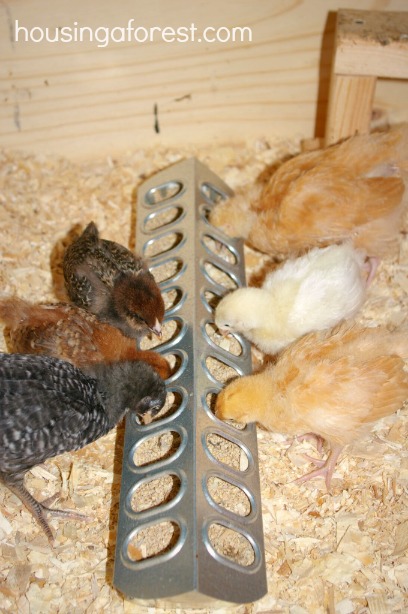
At the moment the chicks are still living in a brooder box in our dinning room.  They spend lots of time outside, but until their coop is finished they are sharing a corner of our home.  I love how these little cuties have become a part of our family.

Urban Chickens

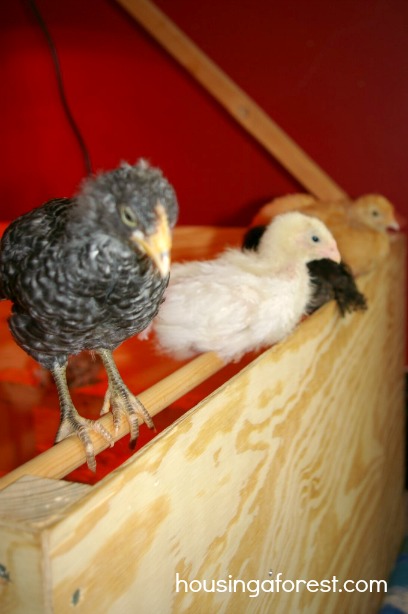
This is what welcomes us at every meal.  They line up on the edge of the brooder box watching us eat.  They love watermelon, spinach, cucumbers, grapes and many other fresh treats.  I’m convinced if a chicken could beg, these little cuties have it down.

I promise this is not going to turn into a chicken blog, but I thought I would share our newest family members.  If you have urban chickens we would love to hear any tips or advice you have.  We are excited about our new adventure and I can’t wait for our first egg!

Mirror Symmetry Drawing

My kiddos love finding new ways to draw, especially when it involves a “trick.”  While we were in the car on our road trip, I remembered playing with mirrors in elementary math class.  It is a simple trick, but it is a great way to teach your kiddos about symmetry.  All you need is a small mirror, paper and a marker.  Perfect for playing in the tight quarters of your car.

Draw a line down the center of the paper, this will become your line of symmetry.  Draw a simple image on one half of the paper.  If your kiddo is right handed draw the image on the left hand side of the line.  If they are left handed, draw on the right hand side of the line.

Have your kiddo complete the symmetrical drawing.  Place the mirror on the line with the mirror side facing the image.  This is where the “trick” happens.  Look down the mirror and the image will magically appear on the clean side of the paper.  Simply trace the reflection onto the paper.  The kiddos LOVED this trick.

I love the results, so simple and fun.  We had a pile of these fun pictures before the kiddos tired and moved onto something new.

There are also a number of websites that offer free worksheets to teach symmetry.  These are ready made and all set for your kiddo to draw the mirror image.

If you are looking for more road trip ideas, follow the link to a fun list of things we like to do.

I will be linking to these parties.

Slinky Eyes

I’m not sure what your car looks like on a road trip, but I’m sure that you are beginning to guess that we do a lot of creating while we are traveling.  20 hours in the car provides lots of opportunity to unleash your creative side.  This is what can be done with a couple of slinkies, paper and lots of tape.  I love it!

If you are looking for more road trip ideas, follow the link to a fun list of things we like to do.

Recycled Animal Houses

When packing for a long trip, the kiddos always bring at least one special stuffed animal with them.  As you know, the kiddos love projects.  So why not make a recycled animal house for their stuffed animals to sleep in while in the car.

To make your own recycled animal house, you will need:

  • A clean yogurt container with a lid
  • String – any kind should work
  • Lots of colorful tape – we used colorful electrical tape from the dollar store.

The kiddos used colorful tape to decorate the outside of the yogurt container.  Tape is a great option for decorating in the car since it is mess free plus kids love it.

I used an exacto knife to cut a window into the lid of the container.  Then I punched a few holes in the container to tie the string to hang the house from.

These little cuties swung from the hooks, above each kid.  The kiddos loved that their special recycled animal houses.  Each of the stuffed animals had a colorful home to sleep in, which made the kids happy.  I loved that the kiddos always knew where their stuffed animals were.  No more searching for lost animals while we were driving!

They also made little blankets, pillows and clothing for their animals from felt.  Felt is a great material for kids to work with.  It is easy to cut, it does not fray and it comes in a variety of wonderful colors.  So fun!

If you are looking for more road trip ideas, follow the link to a fun list of things we like to do.