Double Brush Painting

It is time for another Paint and Play weekly challenge.  If this is your first time joining us,  the focus for our weekly series is all about the process, having fun and getting kids excited to create art with fun and unique mediums!  Our challenge this week was to create art with Kitchen Gadgets.  Growing A Jeweled Rose got creative making Electric Art, and we pulled out our Kiddie Chopstick Helpers to create a fun Double Brush Painting technique.

Double Brush Painting ~ fun process art technique that your kids will love.  Its a great way to combine art AND fine motor skills

…………………………………………………………………………………………

We don’t eat out very often, but my kids love being treated Chinese take-out.  One of our favorite local Chinese restaurants often gives our kids Chopstick Helpers.  The goal with this simple kitchen gadget is designed to help kids get comfortable eating with chopsticks.  My kids and I recently discovered that paintbrushes fit into our Chopstick Helpers perfectly, creating a fun Double Paintbrush.    

Double Brush Painting ~ fun process art technique that your kids will love.  Its a great way to combine art AND fine motor skills

To create your own Double Paintbrush all you need is:

Double Brush Painting ~ fun process art technique that your kids will love.  Its a great way to combine art AND fine motor skills

Since our challenge was to create with Kitchen Gadgets, we chose to make our watercolors with food coloring.  Just a few drop of food coloring in some water creates frugal and beautiful watercolors.   Double Brush Painting ~ fun process art technique that your kids will love.  Its a great way to combine art AND fine motor skills

We tried a few different paintbrushes before we found a pair that fit snugly into the Chopstick Helpers.

Double Brush Painting ~ fun process art technique that your kids will love.  Its a great way to combine art AND fine motor skills

This is a great exercise for kids to work on their fine motor skills.  One paint brush is fun, but two is a blast!

Double Brush Painting ~ fun process art technique that your kids will love.  Its a great way to combine art AND fine motor skills

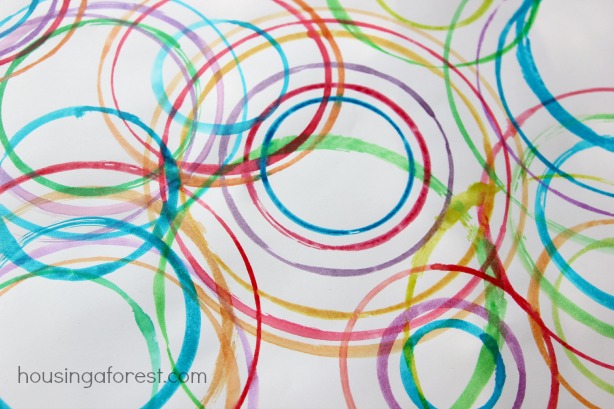
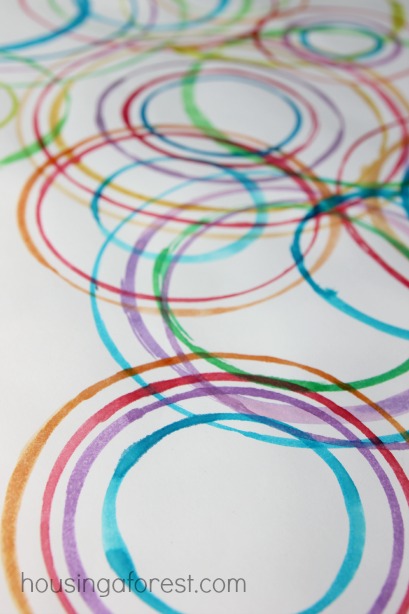
The kids quickly discovered that with a little pressure, you can squeeze the paintbrushes together and release.  This will create a fun and squiggly wavy pattern.

Double Brush Painting ~ fun process art technique that your kids will love.  Its a great way to combine art AND fine motor skills

We had so much fun creating with our simple double paintbrushes.  The patterns that the kids created were beautiful and the process is something that we will play with again.

…………………………………………………………………………………………

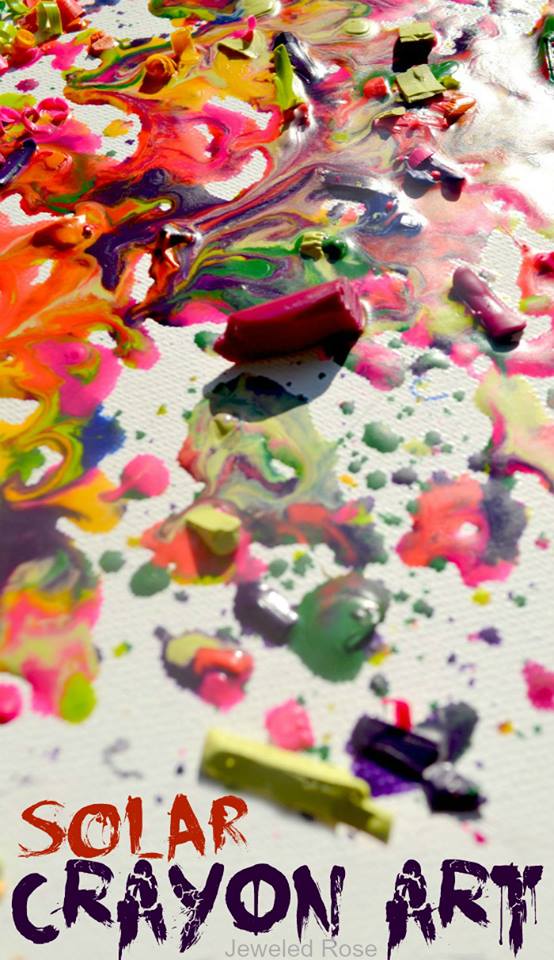
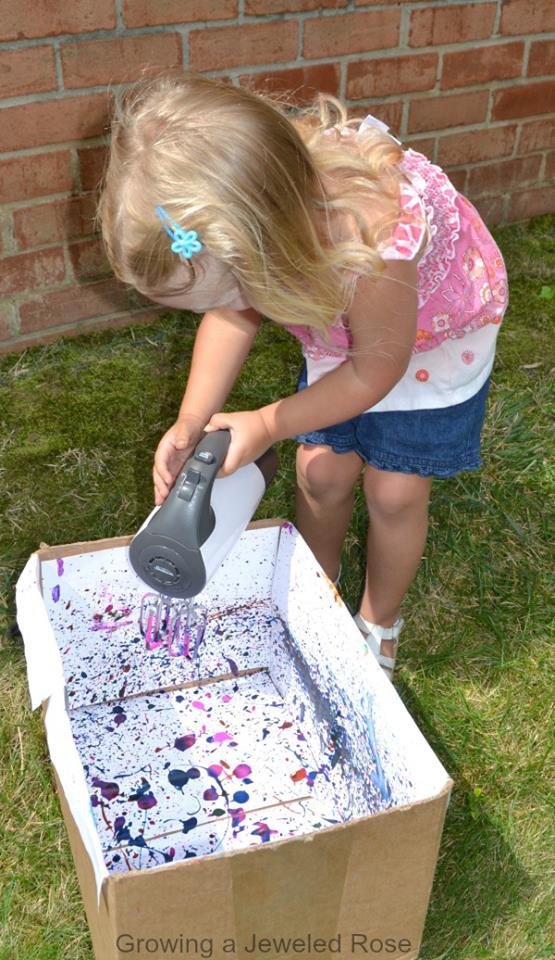
I love this fun Electric Art from Growing A Jeweled Rose.  My kids enjoy using an electric drill, so I know that they would love creating art with a hand mixer!

Electric Art

…………………………………………………………………………………………

Don’t miss out on any of our Paint and Play series.

Our kids have had so much fun creating process art.  If you are looking for some fun inspiration, check out what we have created with balloons, spin art, pendulums, candy, ice, marbles, touch painting, bubbles and school supplies.

 Make sure you stop back in next week for more Paint and Play!

…………………………………………………………………………………………

Compass Painting ~ Fun back to school art!

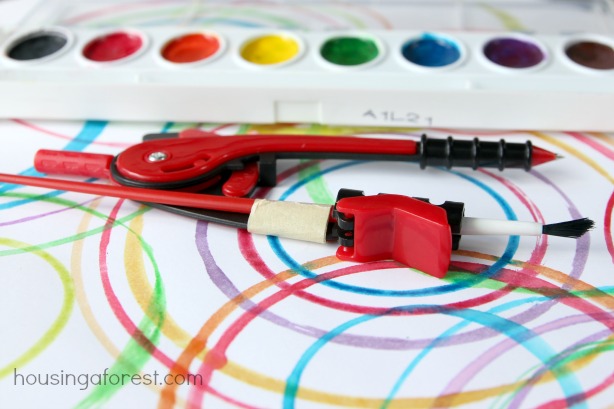
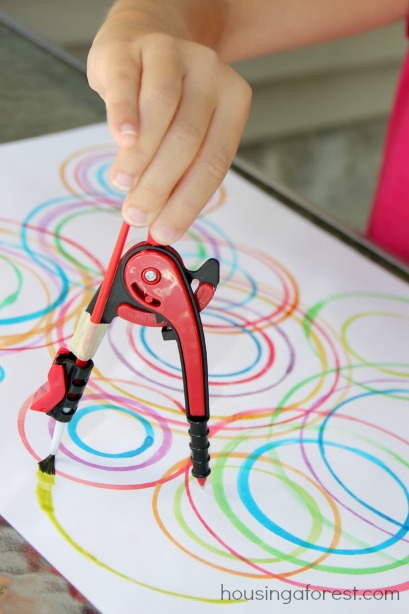
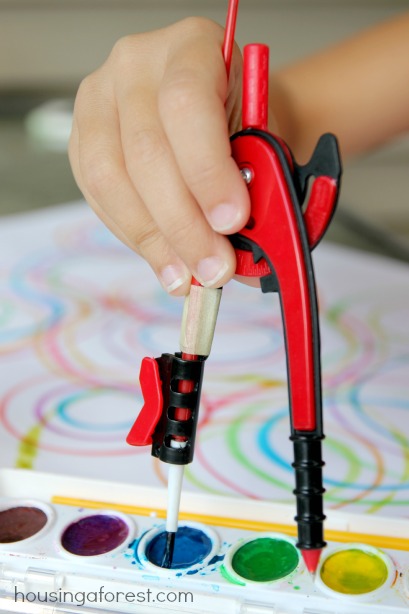
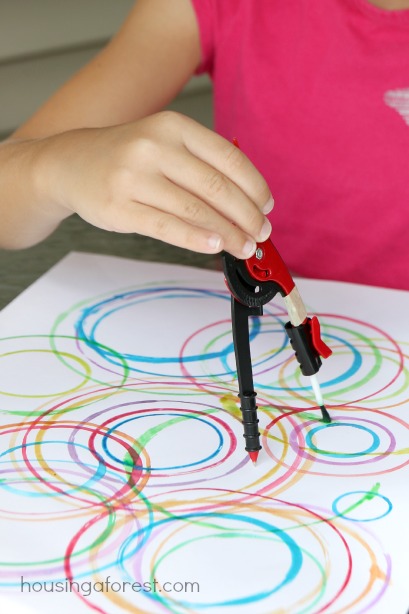
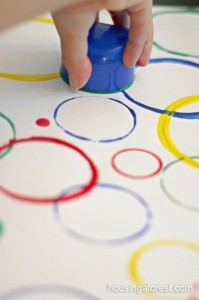
Last week we created this simple Compass Painting which inspired out post today.

If you love process art like us, then check out my Painting Without Brushes Pinterest board.  It is packed full of fun ideas.


DIY Duct Tape Hobby Horse

Today, I am super excited to have Meri from Meri Cherry guest posting on Housing A Forest.  I recently stumbled on Meri’s blog and I am so glad that I did.  She is one creative lady and I have spent quite some time scrolling through her blog!  As you know I am all about creating from our recycle bin, so I immediately fell in love with this creative DIY Duct Tape Hobby Horse that Meri is sharing with us today! Read on for her full tutorial.

…………………………………………………………………………………………….

diy duct tape hobby horse

We’ve had a lot of fun with spaghetti this summer, which has lead to an unusual amount of spaghetti boxes laying around the house. It seemed a shame to throw them all out, so we got creative. Meet Henry. I always loved hobby horses as a kid and to make one for my daughter, Gigi, was a special treat. She has ridden Henry all over town and it cracks me up every time. The materials are simple. You’ll need three spaghetti boxes, duct tape, which we use for all kinds of things, a dowel (found at most craft stores) and an exacto knife. This is the first one we’ve made. I’m excited to make more for gifts and play dates. I can see a whole colorful gang of these guys hanging in our backyard.

diy duct tape hobby horseHere’s how to do it.

Step 1 ~ Duct tape two boxes together for the head and one separate for the neck. Cover each section completely with tape.

Step 2 ~ Add the nostrils to the two boxes taped together on either side. I cut a piece of duct tape, placed it on the box and then with an exacto knife I cut out the nostril shape and peeled the tape off, like a stencil.

Step 3 ~ Tape both boxes together in the shape of a horse, leaving about an inch or so at the top for the ears.

Step 4 ~ Cut two pieces of duct tape the length of one box and tape together tape side to tape side. Cut fringe along the tape and tape it on the length of the single box for the mane.

Step 5 ~ Tape two pieces together tape side to tape side and cut out ears. Tape the ears onto the horse.

Step 6 ~ Cut out a mouth from tape or something else. I used sticker paper for my mouth and drew a mouth on it with sharpie. The mouth could be done in many different ways.

Step 7 ~ Add eyes. I used cupcake holders and large googly eyes. You can do it any way you choose. Get creative!

Step 8 ~ With an exacto knife, cut an x at the bottom of the single box for the dowel. Stick in the dowel until it doesn’t go in any further. Tape the bottom of the box to the dowel and add a few pieces of tape around the dowel where it meets the box to finish it off.

Step 9 ~ Ride.

diy duct tape hobby horsediy duct tape hobby horse

Watching Gigi ride Henry was pretty hilarious. She galloped around and around our backyard making horsey noises for twenty minutes. It’s been so beautiful outside lately. Our backyard has become a haven for all kinds of art play and creativity. With summer coming to an end, I am treasuring every moment.

diy duct tape hobby horsediy duct tape hobby horse

So many times I have had ideas that just sit in my mind or on a list and never make it to fruition. I guess that’s life. Other times, ideas snowball and become this great big thing that I never expected. I am so glad Henry made it to life. He’s the perfect addition to the family and worth every ounce of rainbow spaghetti.

diy duct tape hobby horse

Meri Cherry

Follow along and join in the fun at:

…………………………………………………………………………………………….

Thanks so much for sharing Meri, I can’t tell you enough how much I love this simple DIY Hobby Horse! You combined 2 of my favorite things; recycling and Duct Tape!  What a wonderful recycled toy.  We all love comments, so why not pop over and visit Meri Cherry and tell her how much you enjoyed her post on Housing A Forest.

Here are a few of my favorite posts from Meri Cherry to get you started:

The Invention Box

I love watching kids invent and create. The other day, I heard LOTS of silly giggles coming from downstairs and I just had to share with you what the kids had created.  Let me start by saying, we have a box full of odds and ends that are all fair game for kids to create with.  If the kids are looking to build something, The Invention Box is their first stop.  It is packed full of all those loose parts and interesting items that no longer have a home.  Check out the kids latest invention…an indoor sled.

Encourage your kids creativity with a simple Inventions Box ~ perfect place for kids to let their imaginations run wild

If you are wondering what this wonderful sled like contraption is built from, well so am I;) From what I can tell, they used some large cardboard tubes, plastic coated wire, slats from a old window blind and LOTS of Vikings Duct tape.

The kids wanted to create something that would roll/slide down our indoor wrestling mat that they had stacked on top of the dresser.  I did not investigate how the slide was set up too closely, but I think that they had a rubber tub on top of the dresser as well, just to get a little more height.  According to them, they created the ultimate slide! It is times like these that remind me how much fun it is just being a kid!  They don’t need expensive toys, just a little imagination!

Encourage your kids creativity with a simple Inventions Box ~ perfect place for kids to let their imaginations run wild

If you don’t already, I would totally encourage you to start a simple Inventions Box. It does not have to be anything fancy, a simple cardboard or plastic bin works perfect.  Let the kids know that anything in the box is fair game for them to create with.  Stand back and watch the magic happen.

Items that are perfect for an Inventions Box:

  • Paper cups and plates
  • Pie tins
  • Cupcake liners
  • Straws
  • Foil
  • Cotton balls
  • Balloons
  • Old CD’s
  • Cereal boxes
  • Plastic containers
  • Tin cans
  • Bottle tops
  • Toilet and paper towel tubes
  • Milk cartons
  • Bubble wrap
  • Egg cartons
  • Yarn
  • Gems and sparkly items
  • Pom poms
  • Clothespins
  • Pumps from shampoo bottles
  • Missing parts from games
  • Wire and pipe cleaners

If you find something interesting laying around the house that does not serve a purpose anymore; throw it in the box!  You might be surprised at how the kids re-purpose it.

My kids also have full access to tape, glue, staples, string etc.  You never know what adhesive will be best for the current project, so having lots on hand is a good idea.  The dollar store is a great place to stock up on these items.

Encourage your kids creativity with a simple Inventions Box ~ perfect place for kids to let their imaginations run wild

I absolutely love this simple creation.  It may not have worked out exactly how they intended it to, but boy did they have fun!  It was so sweet watching the kids play for hours with something they made.  The best part is that the whole creation (minus the tape) would have been thrown into garbage or recycling if we did not have an inventions box.  Free creations are totally the best!

Encourage your kids creativity with a simple Inventions Box ~ perfect place for kids to let their imaginations run wildDo you have and Inventions Box in your house?  I would love to add some new items to our Invention Box, what are some of your kids favorite things to create with?

If you are looking for more Inventions Box ideas or Junk Drawer Creations check out my ABC’s of crafting on a budget.  Lots of simple ideas that your kids will love!

Compass Painting

It is time for another Paint and Play challenge.  If this is your first time joining us,  the focus for our weekly series is all about the process, having fun and getting kids excited to create art with fun and unique mediums!  Our challenge this week was to get creative with School Supplies.  While Growing A Jeweled Rose is outside to creating Solar Crayon Art, we dusted up on our math skills by creating a Concentric Compass Painting. 

Compass Painting ~ Fun back to school art!

……………………………………………………………………………

Its almost time for my kids to go back to school and our summer break is coming to a close.  I will miss having a crazy busy house, but the kids can’t wait to see all their friends.  I am thankful that they still love school, it makes this process so much easier.

In order to get everyone back in the school groove, we are attempting to organize our school supplies.  As we were sorting all the pencils, rulers and notebooks, we came across a compass and a paint set.  After a little fiddling, we came up with a fun solution that allowed us to paint with our compass.  Look out beautiful circles, here we come!

Compass Painting ~ Fun back to school art!

 Compass Painting: 

  • Compass
  • Paint brush ~ with a skinny handle
  • Masking Tape
  • Watercolor Paint
  • White Paper

Compass Painting ~ Fun back to school art!

Our paintbrush was a little skinny to fit exactly into our compass.  To keep it from sliding around, we taped it with a little masking tape.

Compass Painting ~ Fun back to school art!

To begin creating, simply load your paint brush as you would normally, leaving it attached to the compass.  The kids found this a bit awkward at first, but the quickly got the hang of it.  We also found that a wet paint-filled brush worked better that a slightly dry brush.

Compass Painting ~ Fun back to school art!

I love all the beautiful overlapping circles.

Compass Painting ~ Fun back to school art!

We had so much fun covering the paper in as many circles as we could manage.

Compass Painting ~ Fun back to school art!

The kids soon discovered if they placed the point of the compass in the same spot and widened or narrowed the hinge of the compass, they were able to create a beautiful concentric circle pattern.  They were so excited by this simple discovery!

Compass Painting ~ Fun back to school art!

I have to admit, I brain starts to hurt when I hear mathematical words, and the thought of using a compass to create something playful and fun sounds like a total contradiction to me.  However, this simple project was so delightful and it a great introduction for kids to learn how a compass works.  We will be trying this again soon.  Compass Painting is such a fun and playful way to combine math and art!

……………………………………………………………………………

Make sure to stop by Growing A Jeweled Rose and see how they created Solar Crayon Art!

Solar Crayon Art

……………………………………………………………………………

Don’t miss out on any of our Paint and Play series:

Balloon Painting 5 Ways and Super Creative Balloon Painting

Homemade Spin Art Machine and A Spin on Spin Art

Tire Swing Pendulum Painting and Glowing Pendulum Painting 

Painting with Candy and Painting with Candy

Glowing Ice Painting and Summer SCENTsory Ice Paints

Marble Maze Painting and  Ice Marble Painting Activity

Touch Painting and Touch Painting

Soap Free Bubble Prints and  Glowing Bubbles

Make sure you stop back in next week for more Paint and Play!

……………………………………………………………………………

Circle Painting made easy ~ simple preschool art

These simple Circle Prints are perfect for creating with your toddler.

If you love process art like us, then check out my Painting Without Brushes Pinterest board.  It is packed full of fun ideas.

Walking on Raw Eggs

Easy Science Experiments for Kids

We are always looking for new science experiments for kids to try.  I have seen this one done a few times and every time I am amazed!  Who knew that that the simple egg was so strong.  I took these pictures while helping out with a kids program where this simple yet amazing experiment was demonstrated.  Let me tell you, the looks on the kids faces were simply hilarious!

Have you tried Walking on Raw Eggs before?

Easy Science Experiments for Kids ~ Walking on Raw Eggs Science...will they crack?

Walking on Raw Eggs:

  • A Dozen Raw Eggs in their carton ~ We used 5 dozen.
  • Plastic to cover the floor ~ just in case:)
  • A few volunteers to join in on this fun learning experiment.

Start by having the kids make a few predictions as to what will happen when they walk across the raw eggs.  Some of my favorite, and very scientific predictions included…

“The eggs will crack and break!”

“Your feet will be covered in scrambled eggs!”

“You will have egg guts all over your feet!”

Easy Science Experiments for Kids ~ Walking on Raw Eggs Science...will they crack?

Make sure to remove your socks and shoes.  This is one experiment that will only work if you are barefoot.

Lay out the plastic to protect the floor.  Have the kids help arrange the egg cartons in a staggered pattern just like stepping stones.  It will make it easier to step from one carton to the next.

Easy Science Experiments for Kids ~ Walking on Raw Eggs Science...will they crack?

The first carton of eggs is the hardest to step onto, you may want a friend to assist you.  Try to disperse your weight onto as many eggs as possible and move slowly from carton to carton.

I loved listening to all the amazed oooo’s, ahhhhh’s, giggles and cheers.  There is nothing like kids encouragement and amazement!

Easy Science Experiments for Kids ~ Walking on Raw Eggs Science...will they crack?

After the cheers settled, the kids wanted to see what would happen when you stood on only one egg.  Splat!  It just goes to prove that the little mighty egg is way stronger when in a group of its friends.  This was the only egg that cracked during the experiment, the rest were still good to use as you would regularly.  

If you are looking for the science explanation behind this fun experiment, make sure to check out Steve Spangler Science.  It is my go to site for all things science.

Looking for more simple science experiments for kids? Check out our:

Exploding soap experiment

Packing Peanut Experiments

Exploding Peep Geysers

Shooting Water Experiment