


Halloween Craft for Kids
Monster marker prints are sure to be a hit with your kids. Your kids will create adorable monsters, and learn to use markers in a new way.

Coffee Filter Monsters:
- Coffee filters (I ironed ours just to get them to lay flat. Ironing them makes it easier for little ones to color on them)
- White Paper
- Washable Markers (only water soluable makers will work)
- Spray bottle
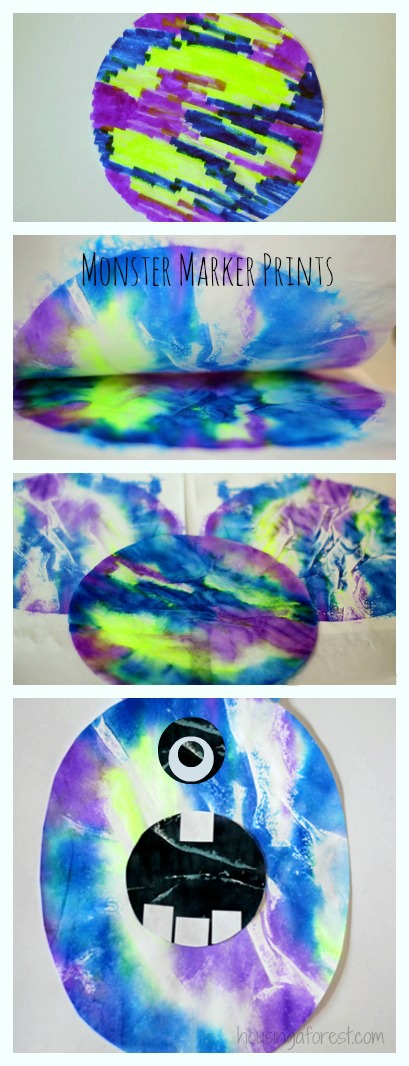
Color with washable markers all over the coffee filter. Don’t be too worried about complete coverage. Center the coffee filter on white paper and spray with water. Make sure the coffee filter is wet, but not dripping. You will start to see the colors blend together right on the coffee filter.
Place another sheet of white paper over the top of the coffee filter and press firmly to help transfer the color. Leave your prints sandwiched until they have dried slightly, or get out your craft iron to help speed up the drying process. If you don’t wait until they are dry, you will have drips of color running down your paper.
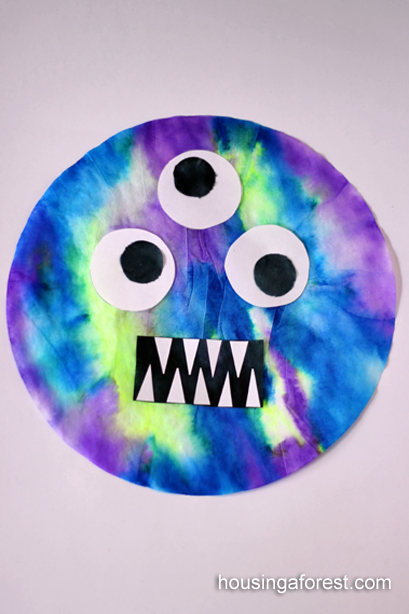
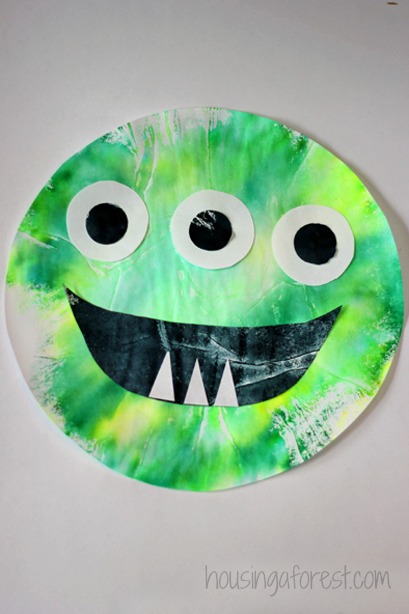
Once everything is dry, peel the paper off the coffee filter. You will be left with your original coffee filter, and 2 printed papers. The coffee filter has lost the marker lines, and is blended beautifully. However, I love how wonderful prints turned out, they have a depth that the coffee filter lacks! These prints are the prefect base for creating adorable monsters. Although you could use this technique to make beautiful fall leaves, pumpkins…the possibilities are endless.
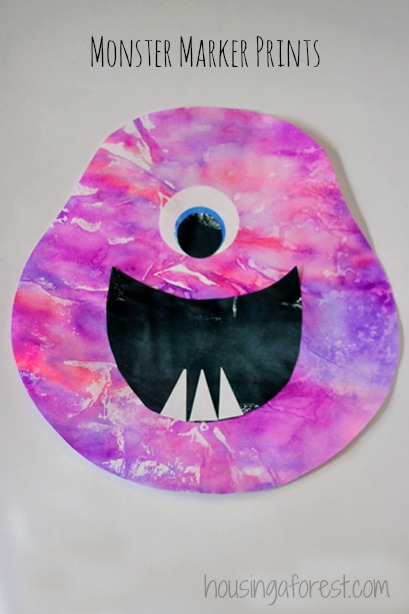
We also created one coffee filter that was just black so that we could use it for the mouth and eyes. Use all the scraps of paper to create interesting shaped mouths, teeth, eyes etc.
Check out this fun list of fall ideas!


Pingback: 100+ Spooktacular Halloween Ideas for Kids…A Halloween Round-up from Bloggers Around the World! | Small Potatoes
This is great and really easy to do with kiddies! I’ll do it in my ‘english craft workshop’ class 🙂 Thankyou.
I have a couple of questions though – they look shiny! Is that just the paint or did you cover them? And what sort of coffe filters are they? Ours are not that shape! 😀 haha…
To create your marker print, you will first color on the coffee filter with washable markers. Then spray the colored filter with water and sandwich it between 2 pieces of paper. This will leave you with the colored coffee filter and 2 printed papers. You can use either the paper or coffee filter to create your monsters. They are not covered with anything, must be the lighting. We used regular coffee filters and just cut them into fun monster shapes.
Hope this helps!
This is a fantastic little place I can not believe I didn’t stumble upon it sooner!
Pingback: Stained Glass Shamrock Craft ~ Housing A ForestHousing a Forest
Pingback: Tie Dye Butterfly on a Stick - Housing a ForestHousing a Forest
I have to babysit 2 young boys. There are ecstatic about the Monsters University. This was/is going to be the perfect craft for them o do.. So easy
Love these! We are going to try making them at my Halloween carnival tomorrow!
I ADORE these monsters! I’ve already got them in my preschool lesson plans, and I know my son will love making them to decorate for Halloween. Thanks for sharing such awesome ideas (as usual)!
I was looking for some inspiration to make coffee filter snowflakes, and this looks like it will work! Thanks so much for the detailed info and photos!
I love this! I think I’m going to use it to make leaves, then monsters! Thank you!
I tried crayola pipsqueaks and it didn’t work as well. What markers did you use? Thanks for the idea, it’s great.